User Tools
Sidebar
Creating an Oracle Database Backup Set
1. Click the Backup Sets icon on the CloudBacko Pro main interface.
2. Create a new backup set by clicking the Add button.
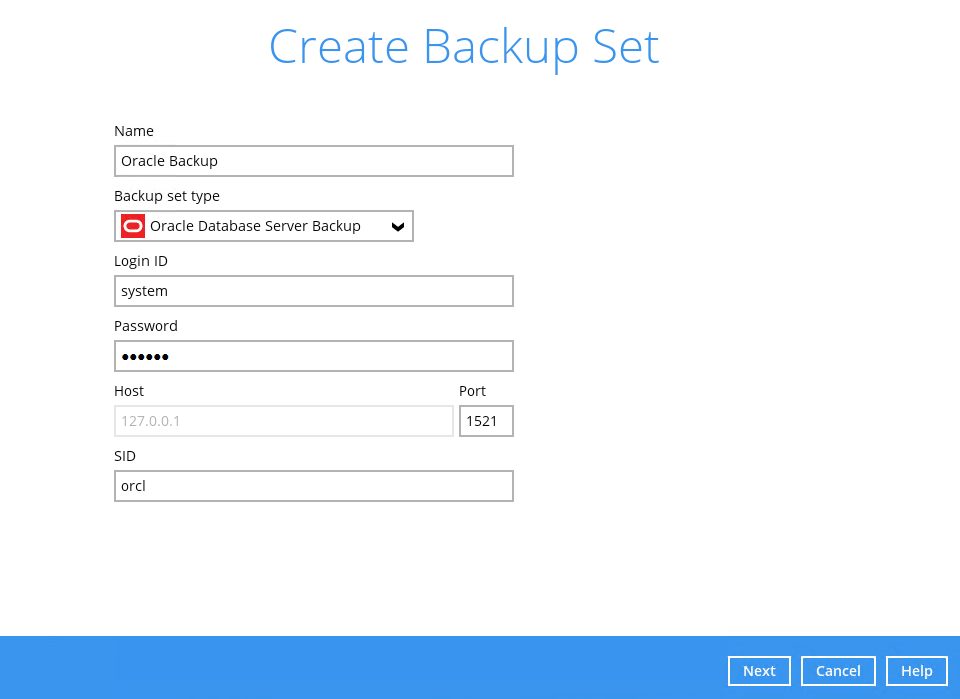
3. In the Create Backup Set window, select Oracle Database Server Backup as the Backup set type. Configure the following settings:
- Name - the name of the backup set.
- Backup set type – the type of the backup set (i.e. Oracle Database Server Backup).
- Login ID – the login ID of the Oracle server. The default login ID is “system”.
- Password – the password of the login account.
- Host – this value is not user configurable.
- Port – the port where the connections to the Oracle server is made. The default port is “1521”.
- SID – the Oracle System Identifier. For more details, please refer to Ch. 2.9.4.
Once all the fields are configured, click Next to proceed.
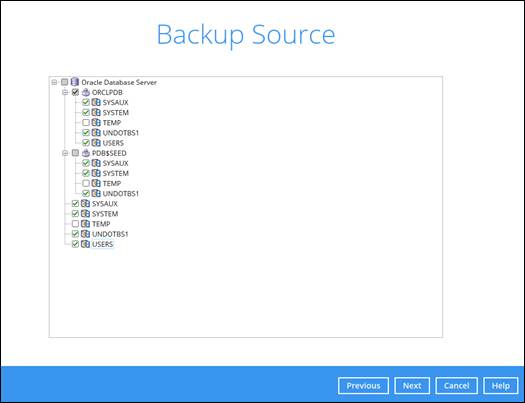
4. In the Backup Source menu, select the Oracle database(s) you would like to back up. Click Next to proceed.
- All databases including SYSAUX, SYSTEM, UNDOTBS1, USERS and related application databases except for “TEMP” must be selected in the backup source when creating the backup set. Otherwise, without a backup of these databases, a full Oracle database instance recovery will NOT be possible.
- Even if the “TEMP” is selected in the backup source, this database will be skipped during a backup job.
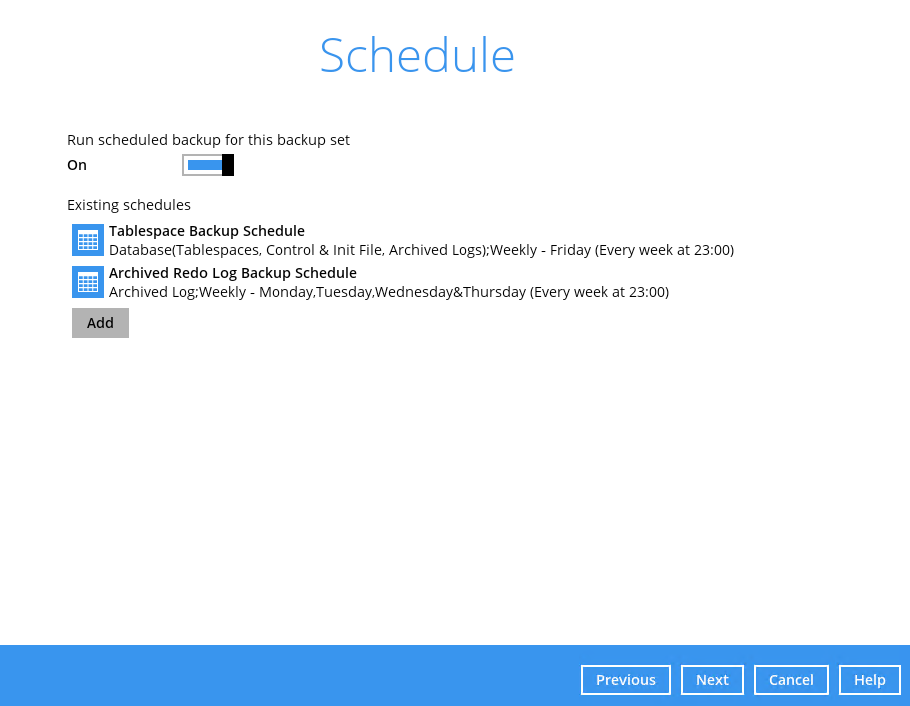
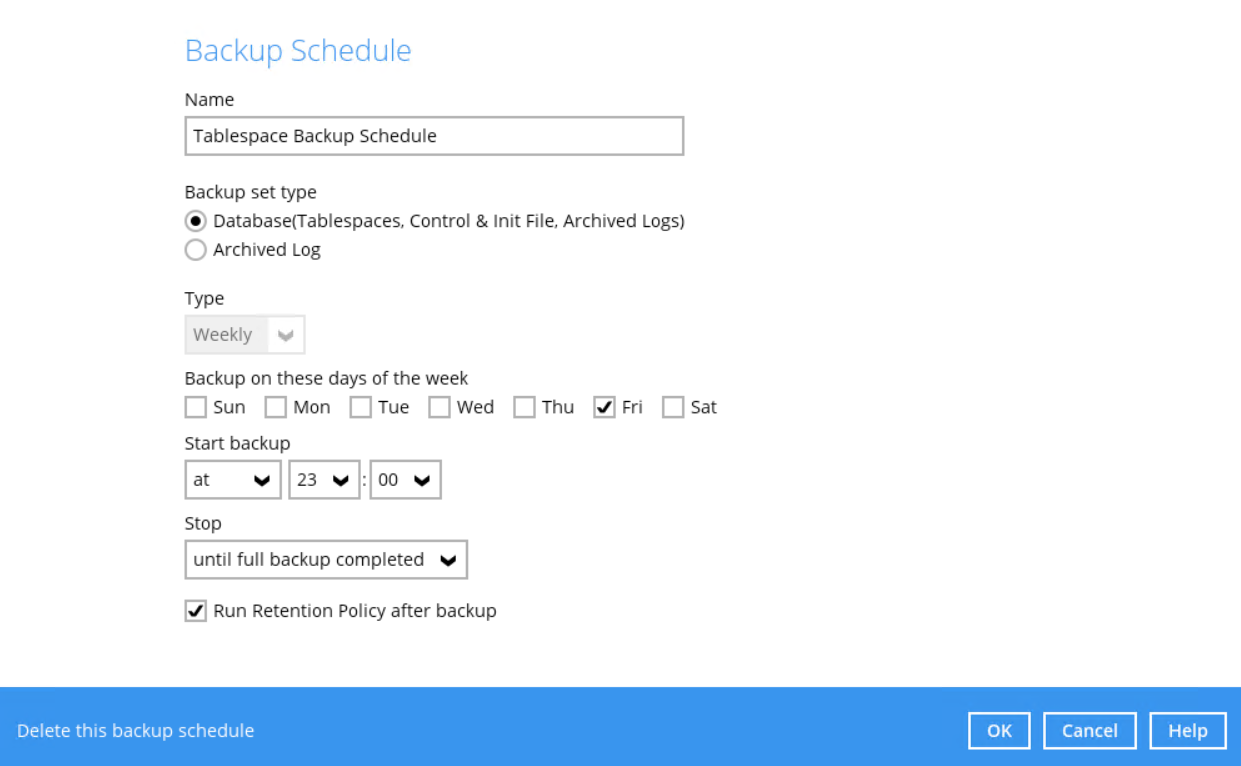
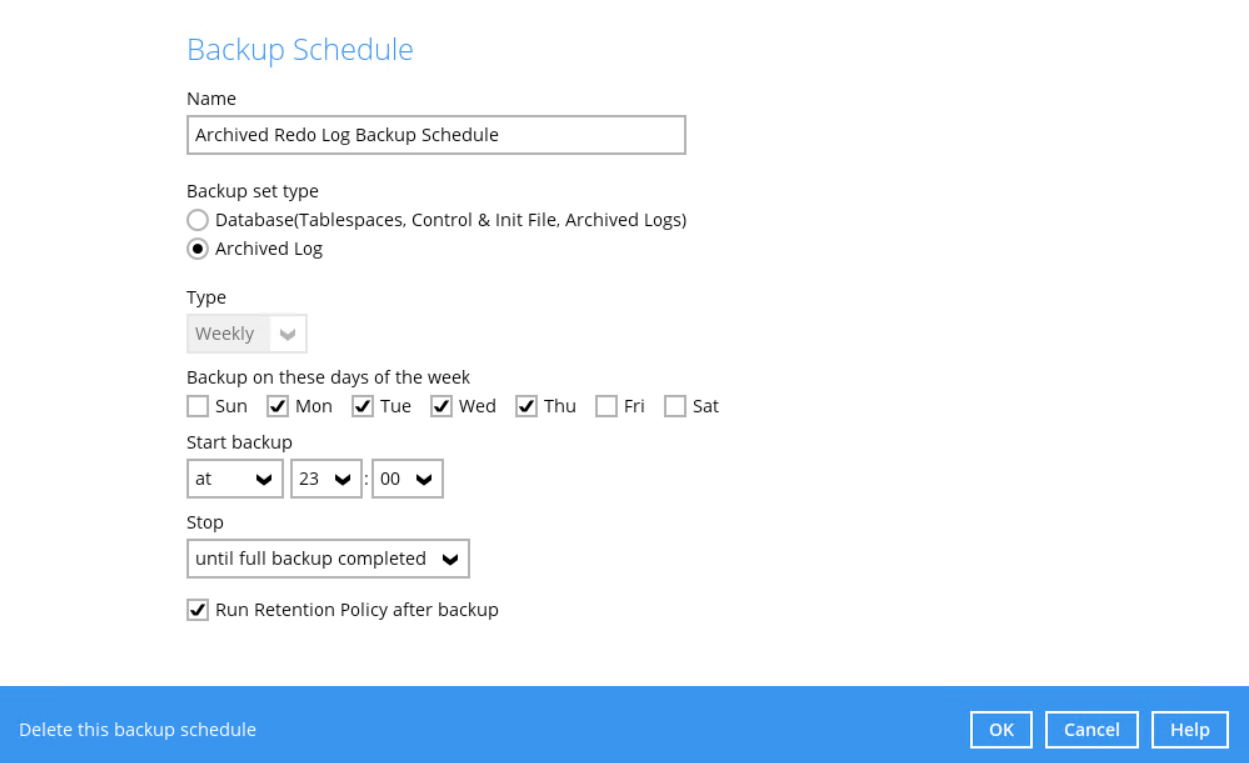
5. A backup schedule for a backup job to run automatically at your specified time interval can be configured. The backup schedule is enabled by default.
There are two types of backup schedule:
- Tablespace Backup Schedule – This type of backup scheduler will automatically run weekly every Friday at 23:00.
- Archived Redo Log Backup Schedule – This type of backup scheduler will automatically run weekly every Monday, Tuesday, Wednesday and Thursday at 23:00.
To change the backup schedule settings of an existing schedule, double-click the schedule to be modified. Otherwise, click Next to proceed.
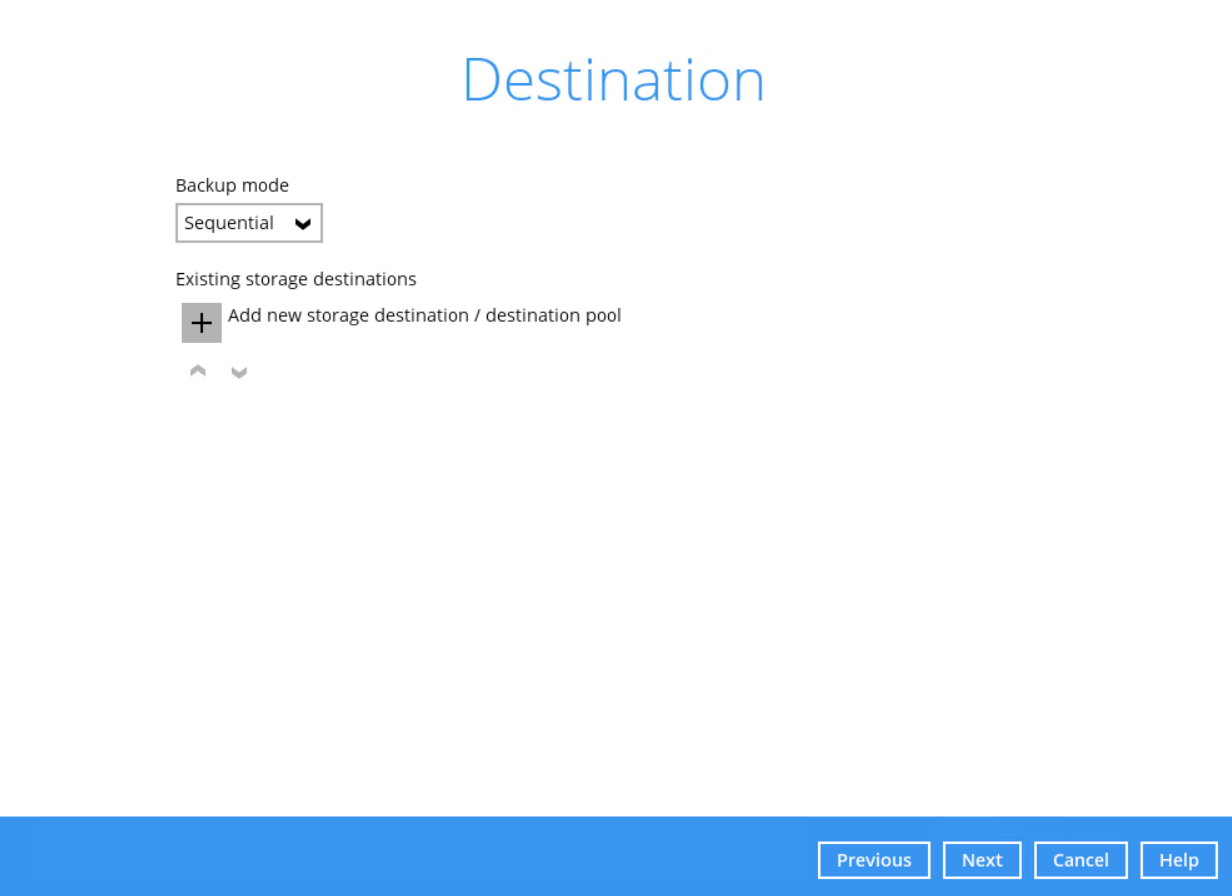
6. In the Destination window, select a backup mode then click the “+” button to add a backup storage destination.
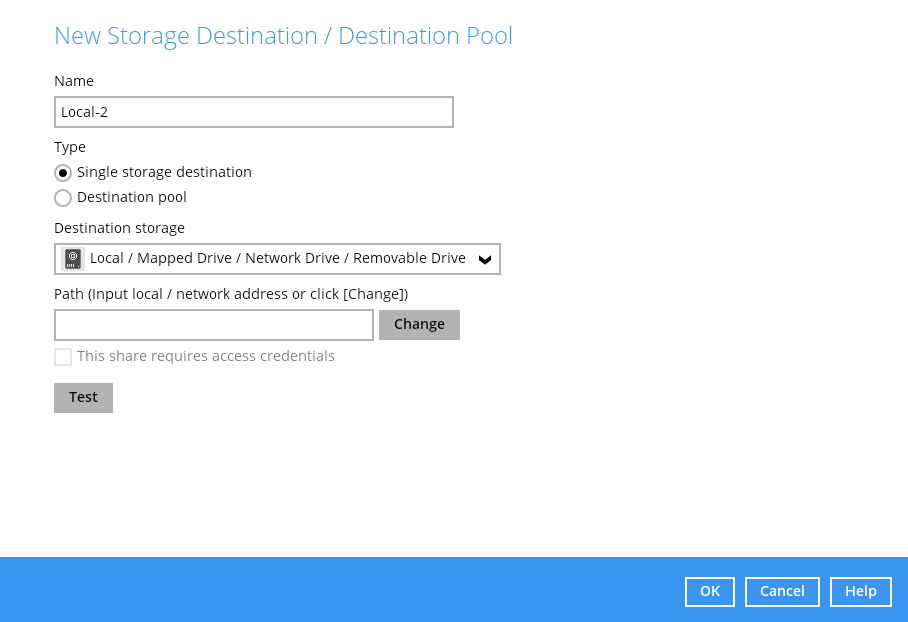
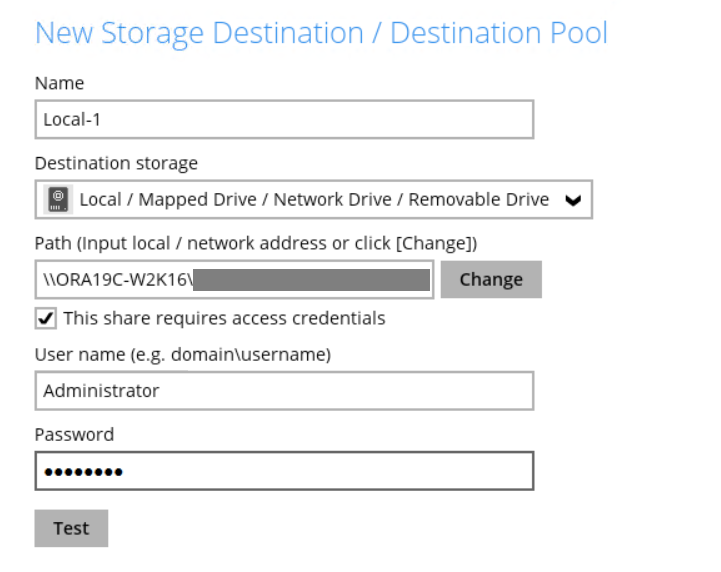
In the New Storage Destination / Destination Pool window, select the destination storage. Then, click OK to confirm your selection.
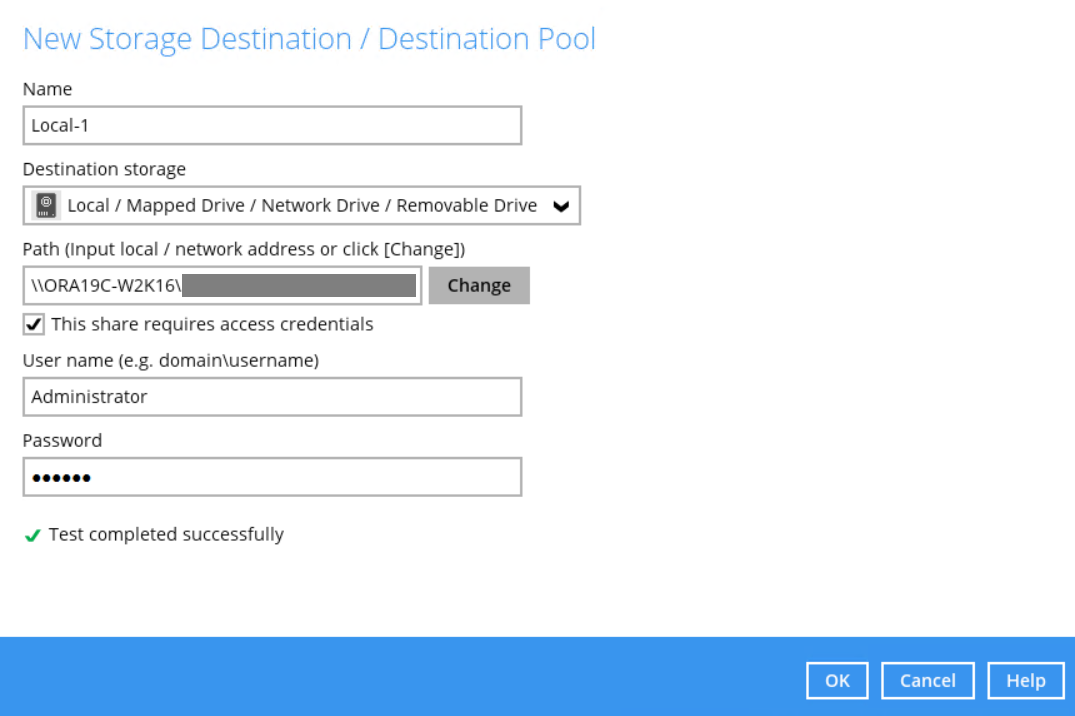
If Local / Mapped Drive / Network Drive / Removable Drive is selected, you need to specify the path by clicking Change to select the path or you can manually enter it. Once a network address is entered, This share requires access credentials check box will be enabled. Check the box beside it if access credentials are required to connect to the destination storage then enter the User name and Password. Otherwise, leave it unchecked. Click Test to check the connection.
When the Test completed successfully message is shown, click OK to proceed.
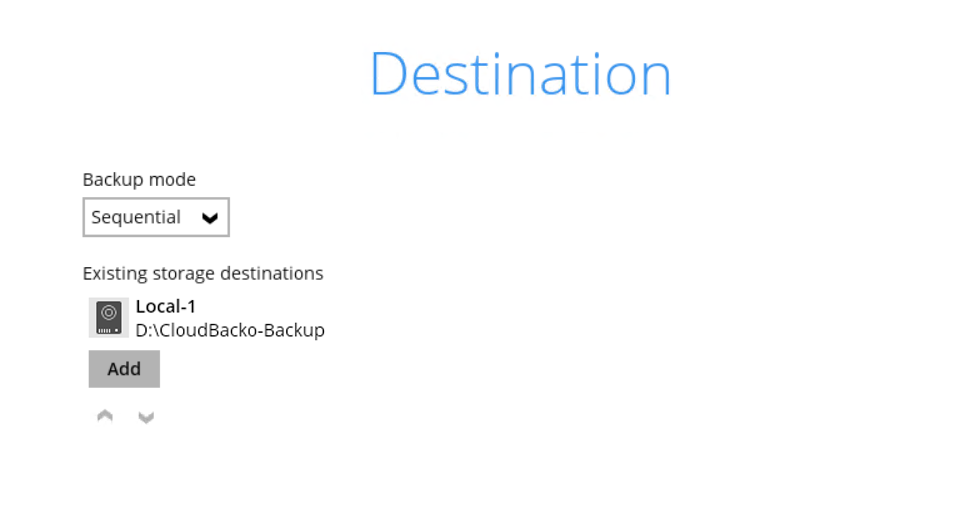
7. In the Destination window, your selected storage destination will be shown. Click Next to proceed.
8. In the Encryption window, the Encrypt Backup Data option is enabled by default with an encryption key preset by the system.
There are 2 types of Encryption to choose from:
- Default – an encryption key with forty-four (44) alpha numeric characters will be randomly generated by the system.
- Custom – the encryption key can be customized where the user can select the Algorithm, Method and Key length, and then input an Encryption key.
Click Next once done with the Encryption settings.
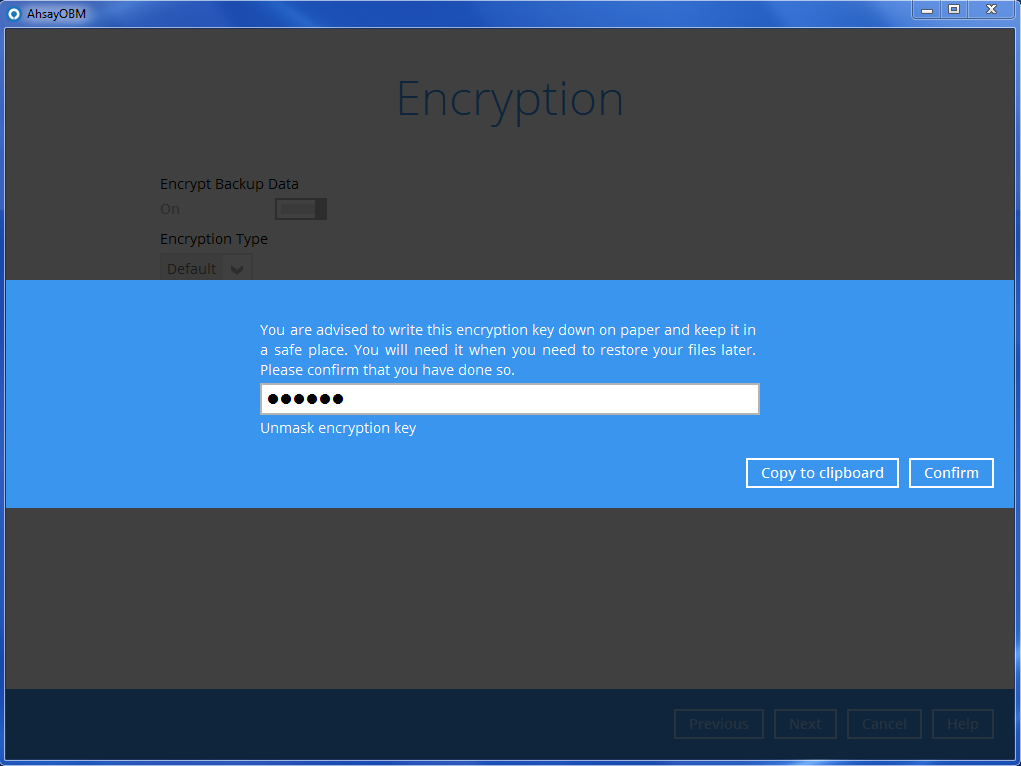
9. If the Encryption feature is enabled in the previous step, the following window will pop-up whichever encryption type is selected.
This pop-up window has three (3) options to choose from:
- Copy to clipboard – Select this option to copy the encryption key. Once copied, you can paste it to a text editor (e.g., Notepad) and save to a location.
- Confirm – Select this option to exit the pop-up window and proceed to the next step.
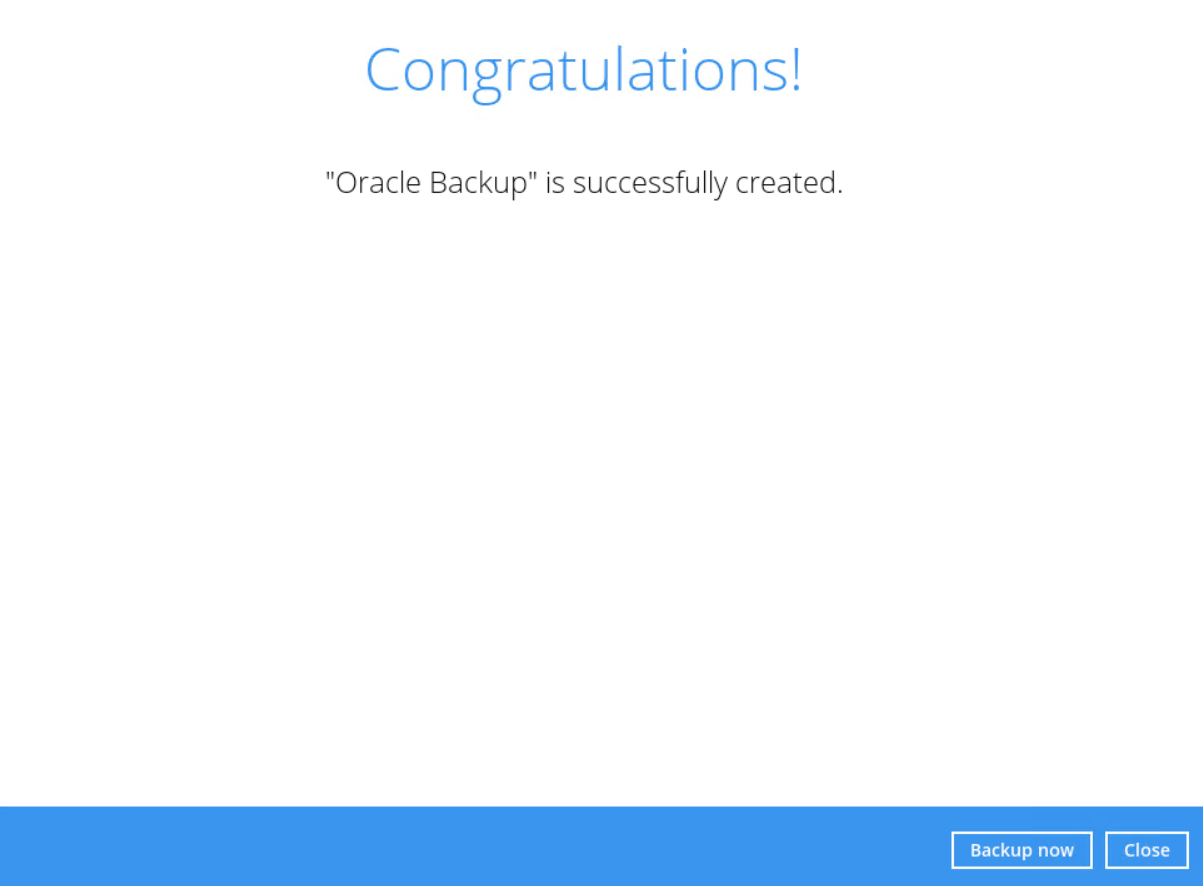
10. After completing all the configuration settings, the Oracle database server backup set will be created.
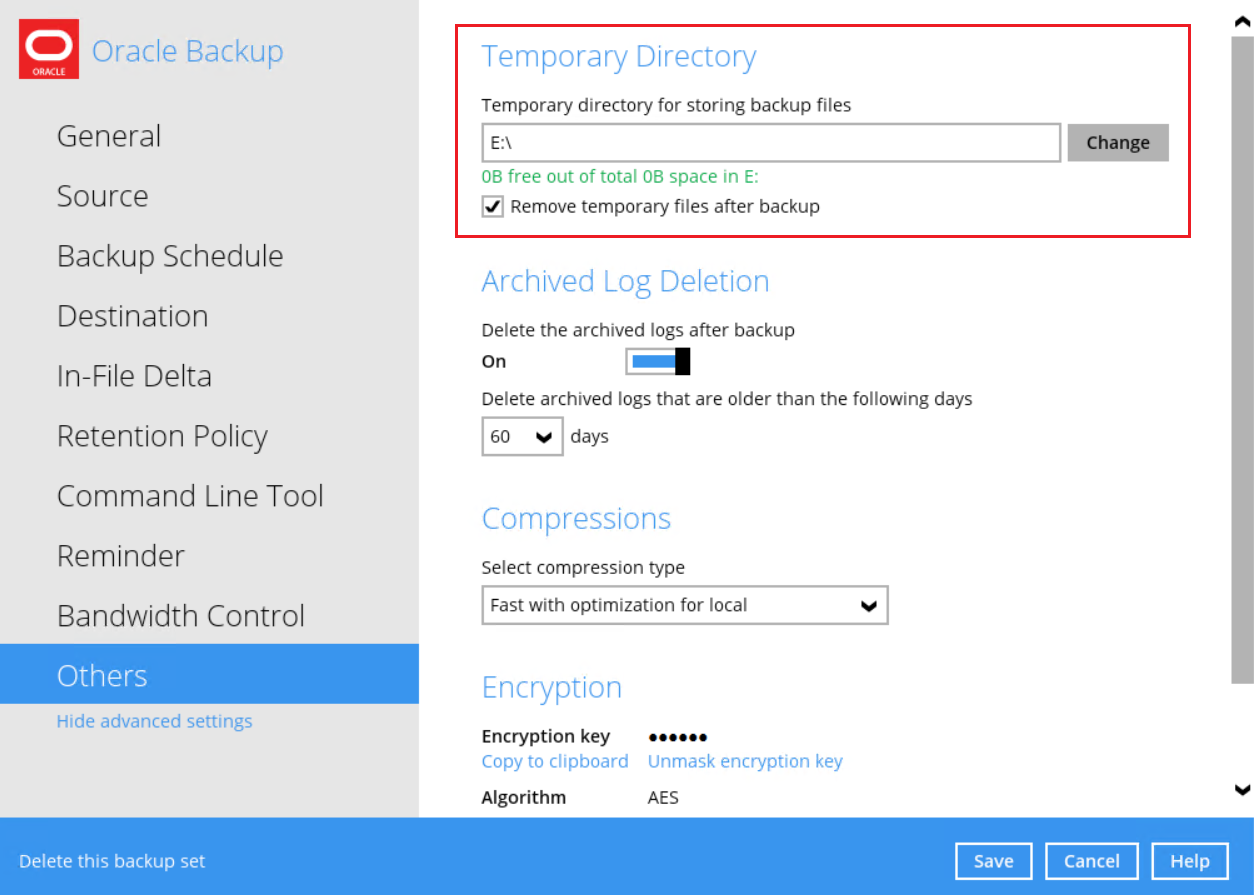
11. According to Best Practices and Recommendations, it is highly recommended to set the temporary directory to another location other than Drive C: (e.g., Drive E:). To do this, click the Backup Sets icon on the CloudBacko Pro main interface, then select a backup set. Click Show advanced settings link. Go to Others > Temporary Directory and click the Change button to browse for another location.
Tick the “Remove temporary files after backup” option.
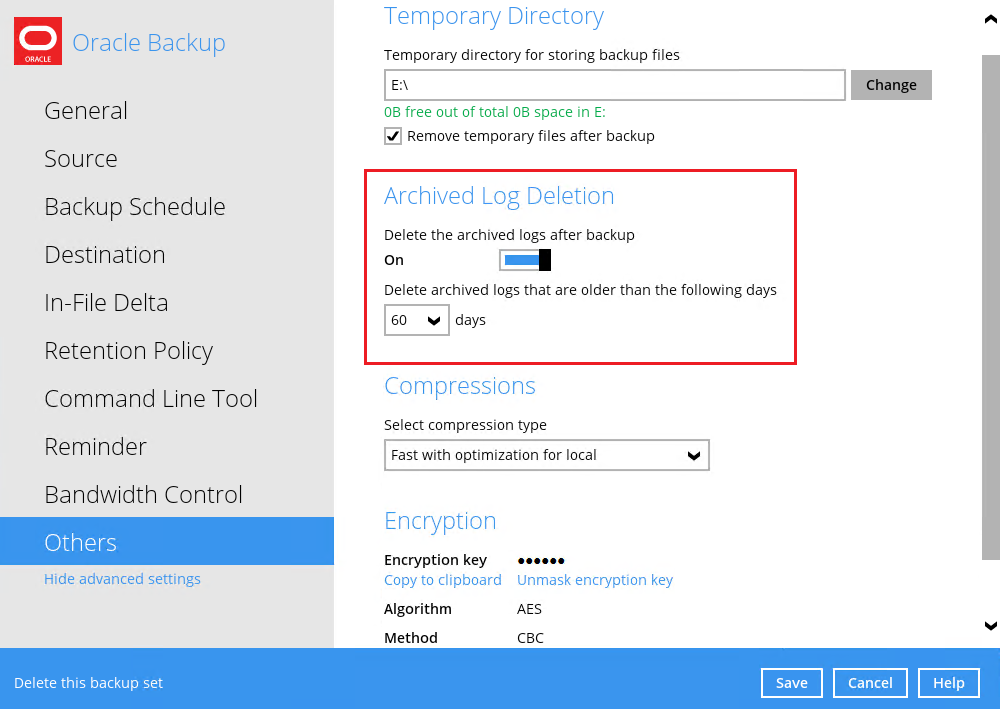
12. Optional: Archived Log Deletion
The deletion of the archived logs is enabled by default and archived logs more than 60 days are deleted from the Oracle database instance. This process is done after every databases and archived log backup job.
For example, if the Oracle database instance generates a lot of archived log files, you may want to reduce the number of days before they are deleted.
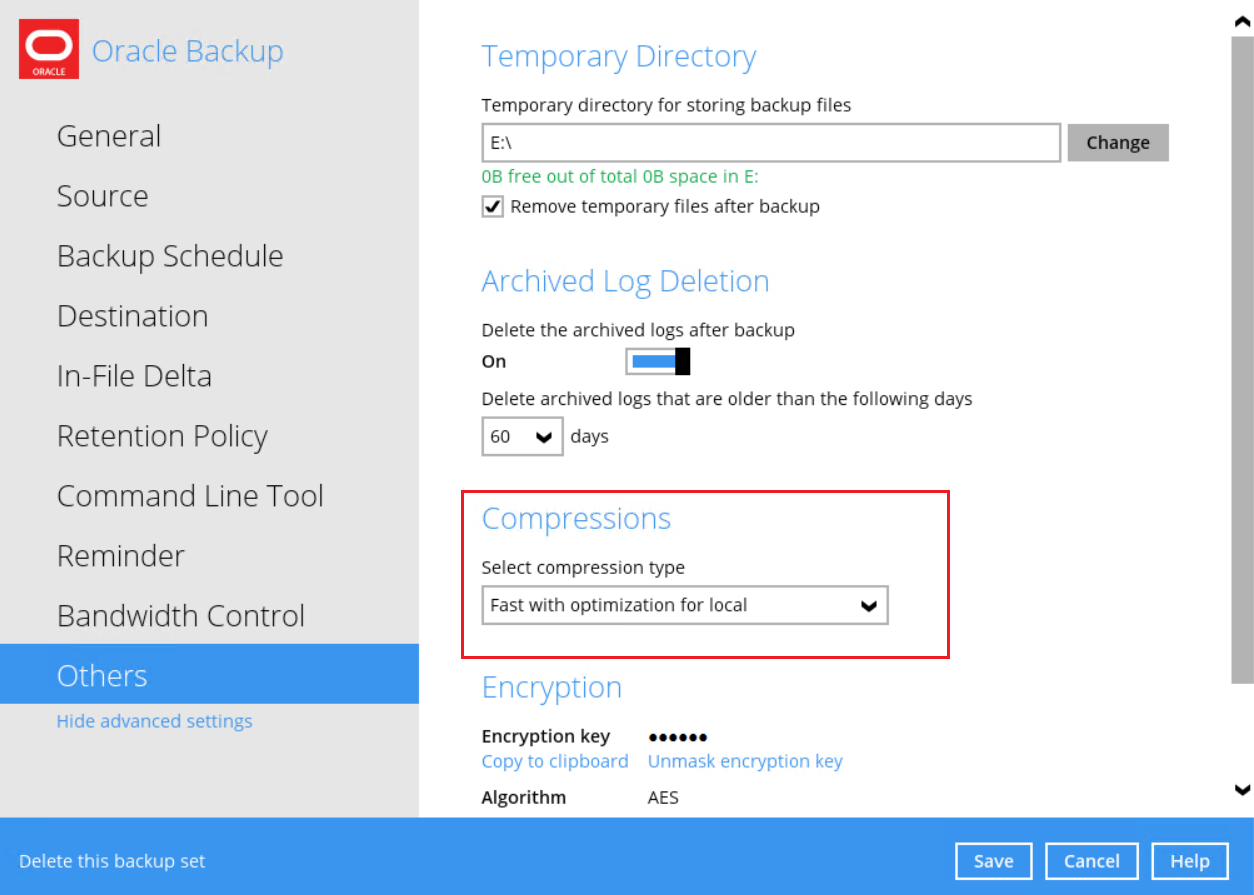
13. Optional: Select your preferred Compression type. The compression type is set to Fast with optimization for local by default. To change the compression type, go to Others > Compressions.
Select from the following:
- No Compression
- Normal
- Fast (Compressed size larger than normal)
- Fast with optimization for local
14. Click Save to apply the changes.

