
Sidebar
public:faq:restore_windows_system_image_backup_to_another_computer
Table of Contents
How to restore a Windows System Image to another computer
If you have backed up your Windows System with CloudBacko's Windows System backup set, performing a Windows System or bare metal restore on a new computer using CloudBacko is done in two stages.
2 Stages
- Restoring the Windows System image from cloud storage using CloudBacko.
- Recovering the Windows System image to the new machine using Windows recovery disk.
Assumptions
- The original Windows machine has crashed or suffered critical hardware failure.
- Although both CloudBacko Pro and CloudBacko Lite support Windows System Backup, the example will use CloudBacko Pro.
Stage 1
- Install CloudBacko Pro on another working Windows machine (in order to restore the backed up Windows System image from the Cloud).
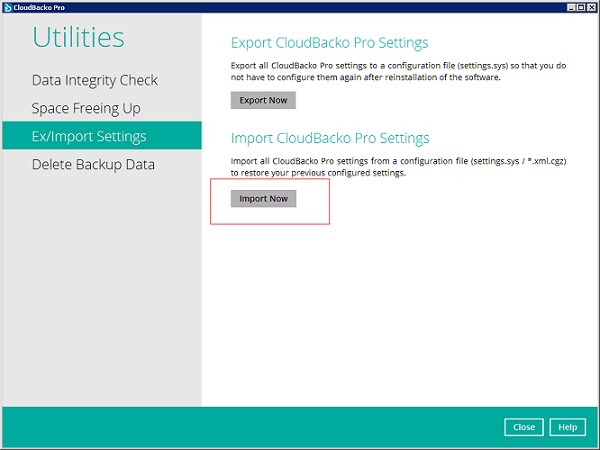
- Import your original CloudBacko settings using [Utilities] > [Ex/Import Settings] > [Import CloudBacko Pro Settings].
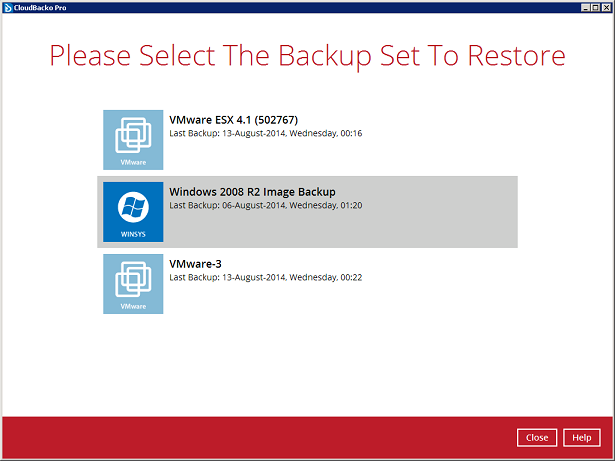
- Use [Restore] to restore the backed up Windows System Image from your Cloud storage to a USB drive.
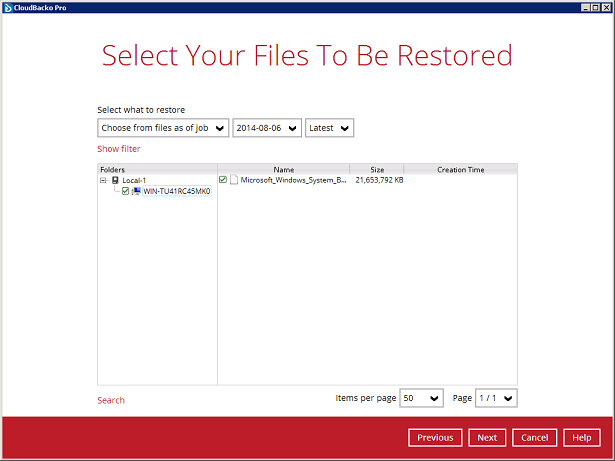
- Select the Window Image files to restore.
- Select to destination disk where CloudBacko restores the Windows Image files to (D: is a USB drive).
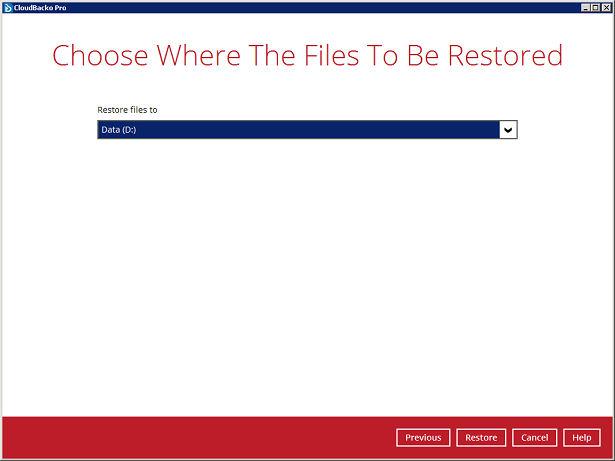
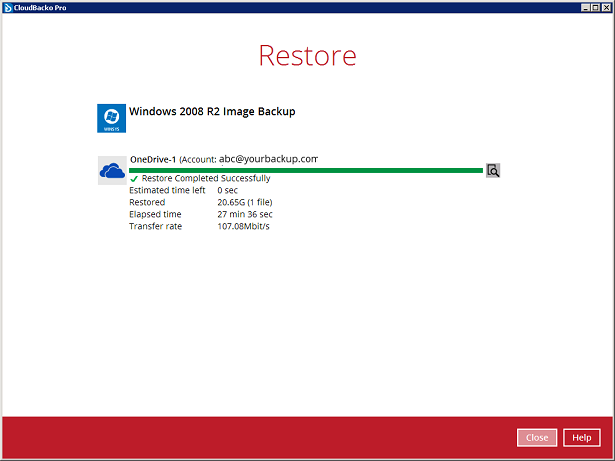
- The Windows System Image has now been restored from Cloud storage to USB drive.


Stage 2
Although the following example is for a Windows System Image restore of Windows 2008 R2 is used, the same instructions can also used for Windows System Image of Windows Vista 7, 8, 8.1, 2008, 2012, and 2012 R2.
- Connect the USB drive with the restored Windows Image file to the new computer.
- Insert your Windows bootable DVD into the new computer.
- Reboot the machine.
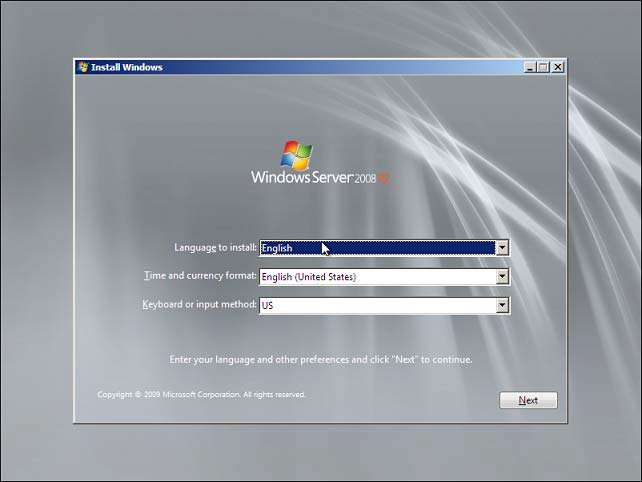
- After booting up specify the language settings, and then click [Next].
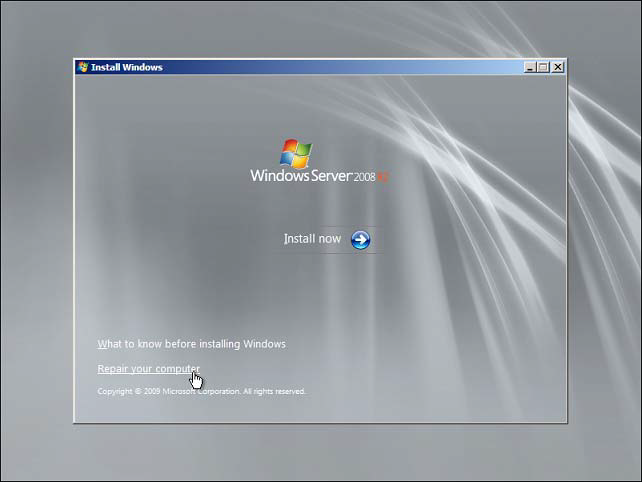
- Click [Repair your computer].
- From the System Recovery Options page, choose to load any drivers required by your hard disk at this stage. After loading the driver(s) if necessary, such as RAID drivers, click [Next].
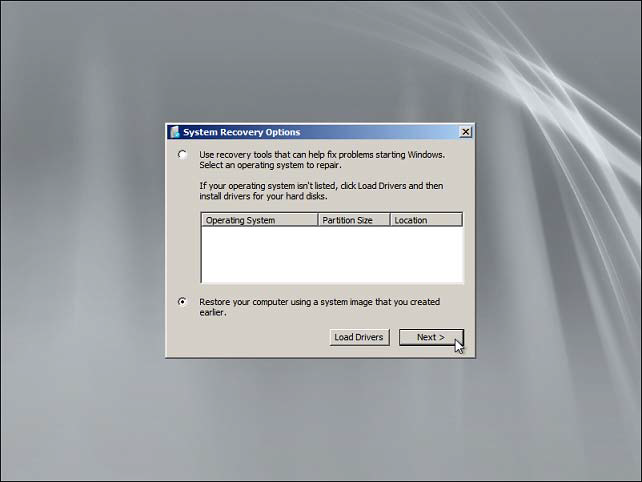
If you are performing a system restore to a brand new hard disk, you will not see any Operating Systems listed as shown on the right. Whereas if you are restoring a backup to a machine that already has Windows installed, then it will be listed under Operating Systems.
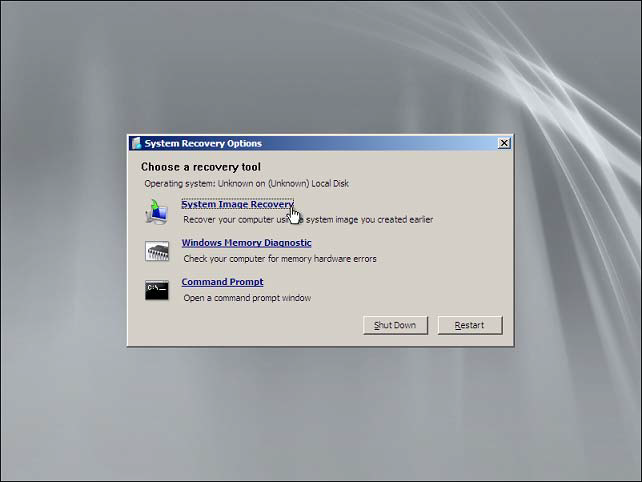
- Under the System Recovery Options page, select the System Image Recovery option.
- Windows will then scan the system for available image backups. Select the backup image to restore and click [Next].
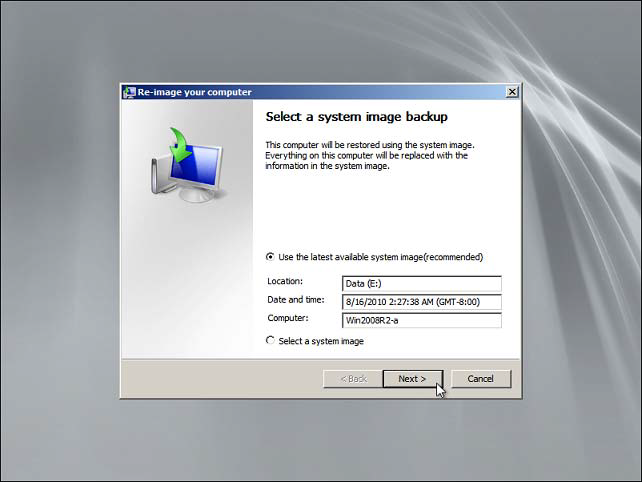
Please ensure that the media with the image file(s) is connected to the machine. If Windows is unable to find the backup, please try un-connecting and re-connecting the storage device.
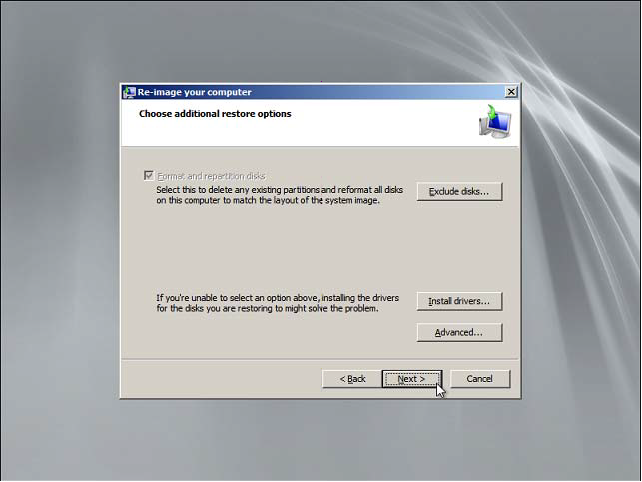
- In the Choose how to restore your backup page, the following options are available. After you have select you options press [Next]
* Install Drivers, to install any drivers for the hardware you are restoring to.
* Exclude disks, to exclude disks that you don't want formatted.
* Advanced, to restart the computer after the restore process and to automatically check and update.
- You will be prompted to confirm if you want to format the disks and restore the backups you have chosen, click [Yes].
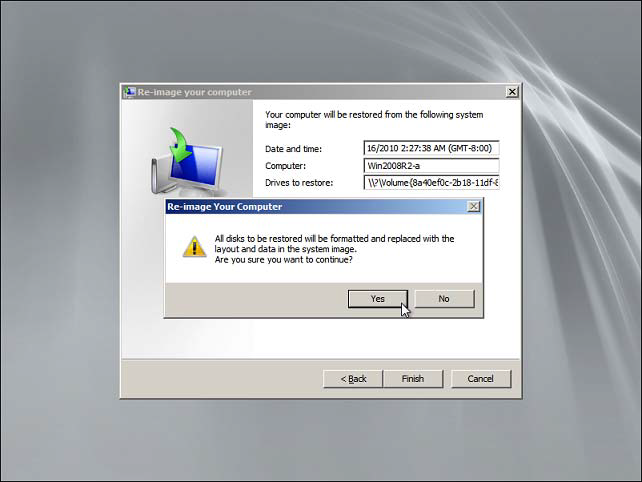
- The Windows Image will now be recovered to the machine.


public/faq/restore_windows_system_image_backup_to_another_computer.txt · Last modified: 2019/12/05 14:09 by ronnie.chan