
Sidebar
public:module:windows_system_state:2008_configure_backup_set
Configure Windows System State Backup Set for Windows Server 2008 and Newer Releases
Create the MS Windows System State backup set in CloudBacko Pro running on Windows Server 2008 and new releases with following steps.
1. In the Cloudbacko Pro main interface, click Backup Sets.

2. Create a MS Windows System State backup set by clicking “+” next to Add new backup set.
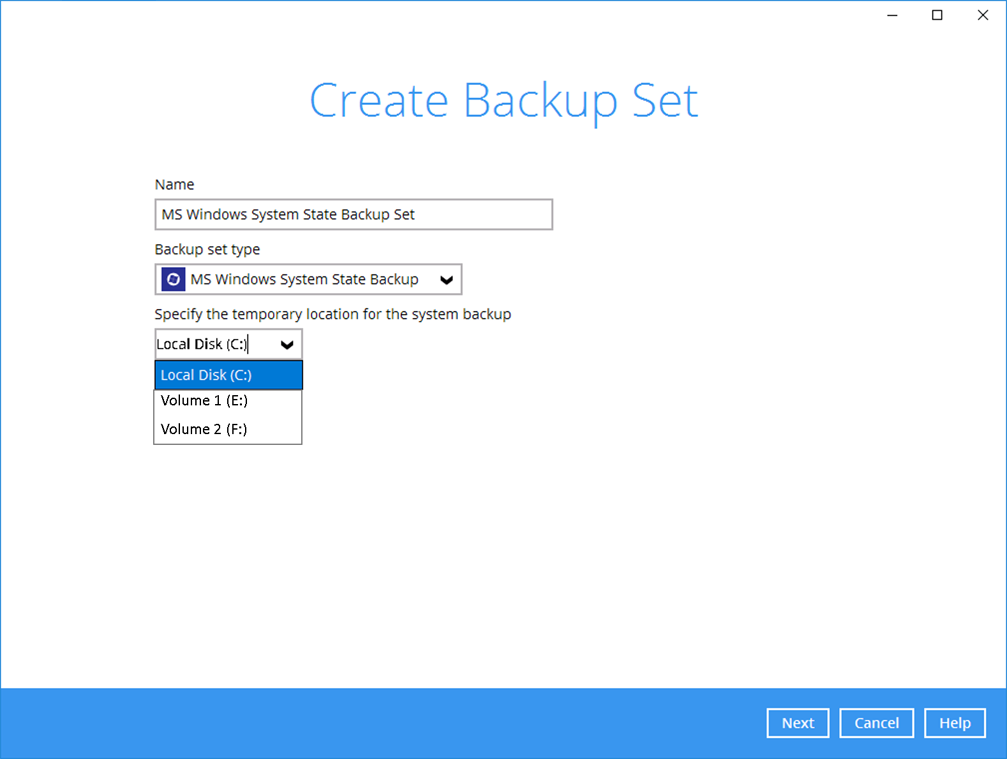
3. Select MS Windows System State Backup as the Backup set type, and enter a Name for your backup set.

4. Select the location where you would like to store the system state image before generating the backup data.
- Select a local volume from the dropdown menu.

- OR enter the UNC path to a network volume that is accessible to the client computer.
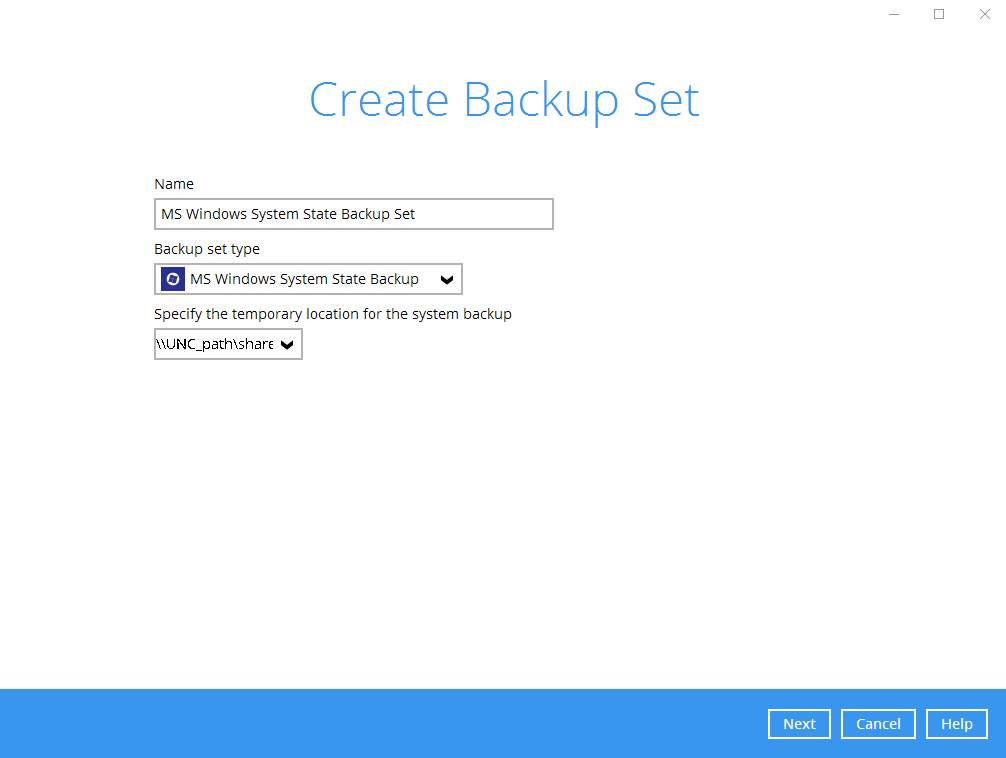

For Windows 2008 Server, the temporary storage location cannot be set to a network path.
If the storage location is set to a critical volume (e.g. system volume), the following message will be displayed:

Click Yes for Cloudbacko Pro to enable the registry entry. Or, click No, then change the storage location setting to another location.
5. In the Schedule menu, configure a backup schedule for backup job to run automatically at your specified time interval.

Click Add to add a new schedule.

Click OK to continue, and then click Next to proceed.
6. In the Destination menu, select a backup destination where the backup data will be stored. Click “+” next to Add new storage destination / destination pool.

For more details on configuration of cloud storage as backup destination, refer to the Appendix section in this guide.
7. Select the Type and Destination storage.

Continue by adding another destination for the backup set, or click Next to proceed.

Multiple backup destinations can be configured for a single backup set.
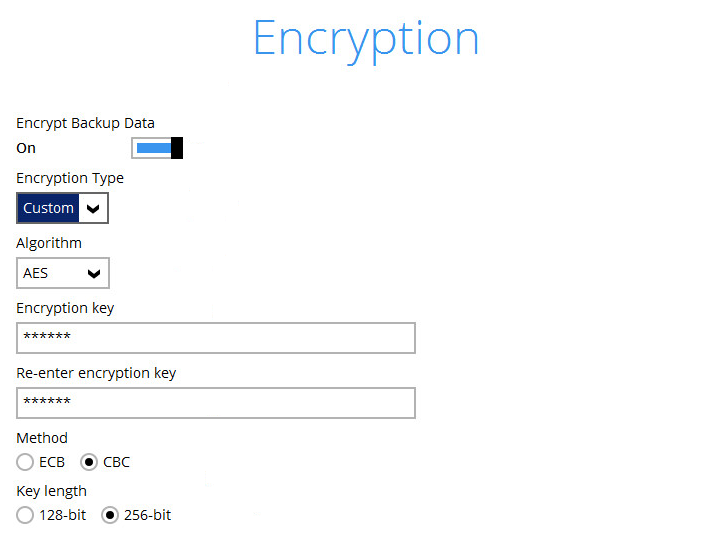
8. In the Encryption window, the default Encrypt Backup Data option is enabled with an encryption key preset by the system which provides the most secure protection.

You can choose from one of the following 2 Encryption Type options:
- Default – an encryption key with 44 alpha numeric characters will be randomly generated by the system
- Custom – you can customize your encryption key, where you can set your own algorithm, encryption key, method and key length.

9. If you have enabled the Encryption feature in the previous step, the following pop-up window will be shown, no matter which encryption type you have selected.

The pop-up window has the following three options to choose from:
- Unmask encryption key – The encryption key is masked by default. Click this option to show the encryption key.
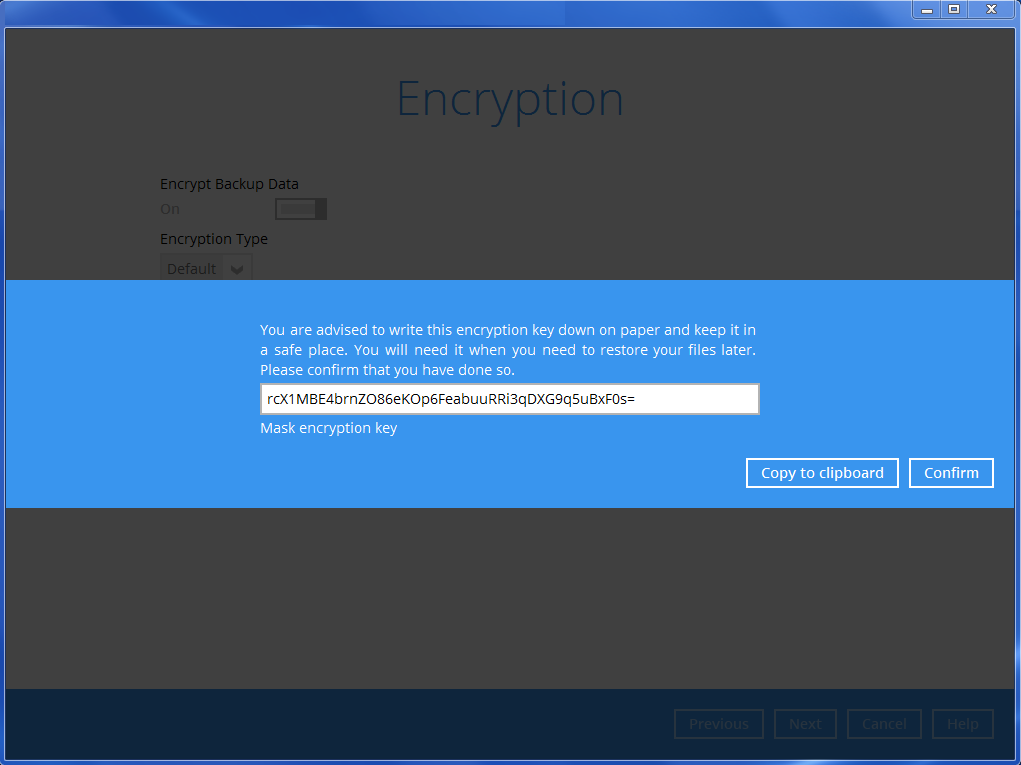
- Copy to clipboard – Click to copy the encryption key, then you can paste it in another location of your choice.
- Confirm – Click to exit this pop-up window and proceed to the next step.

10. If you have enabled the Schedule feature in the previous step, the following window will be shown. Enter the Domain Name / Host Name of the computer, User Name and Password of the Windows account that will be running the backup. Click Next to create the backup set.

11. The following screen is displayed when the new MS Windows System State backup set is created successfully.

public/module/windows_system_state/2008_configure_backup_set.txt · Last modified: 2019/09/20 11:58 by ronnie.chan