
Sidebar
public:module:microsoft_sql_database:backup
Performing Backup for Microsoft SQL Server
Creating Backup Set for Microsoft SQL Server
1. Click the Backup Sets icon on the main interface of CloudBacko Pro.

2. Create a new backup set by clicking the + icon next to Add new backup set.
3. Select the Backup set type as MS SQL Server Backup.

- Name – enter a meaningful backup set name
- Backup mode – choose between VSS mode and ODBC mode. Refer to the Backup Mode section for details on the differences between the two modes.
- Server - CloudBacko Pro supports backup of multiple SQL instance in one backup set. In this Server drop-down menu, you can choose to back up multiple SQL instances or a specific instance of your choice.
- Login - Enter the login ID for the chosen instance.
- Password – Enter the password for the chosen instance.
Click Next to proceed when you are done with the settings.
4. In the Backup Source menu, select the database you would like to back up, then click Next to proceed.
If you have chosen to back up multiple SQL instances in the previous step, databases in all the chosen instances will be shown here.

5. In the Schedule menu, you can configure a backup schedule for backup job to run automatically at your specified time interval. Click Add to add a new schedule, then click Next to proceed when you are done with the settings.
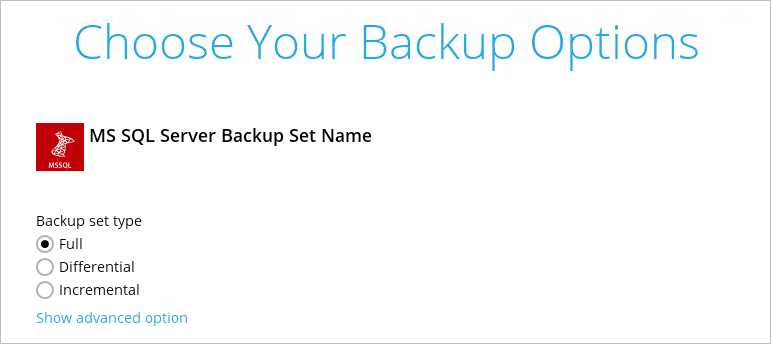
For each of the 2 different backup modes, you can create the following backup set types:
| VSS Mode | ODBC Mode | |
|---|---|---|
| Backup Set Types | 1. Full 2. Differential 3. Incremental | 1. Full 2. Differential 3. Transaction Log |

Differnent backup set types are explain in Appendix A.
6. In the Destination menu, select a backup destination where the backup database will be stored. Click the “+” icon next to Add new storage destination / destination pool.

7. Select the destination storage, then click OK to proceed.

For more information regarding backing up to cloud storage destination, refer to Appendix C Cloud Storage as Backup Destination.
8. Click Next on the Destination menu page to proceed.

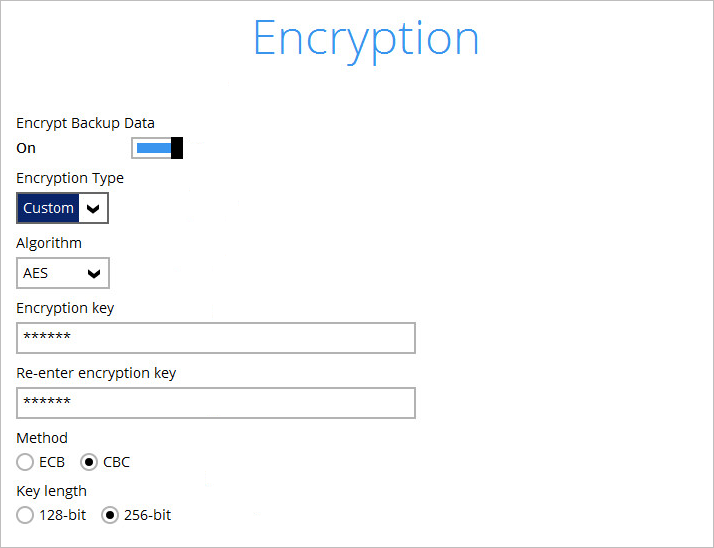
9. In the Encryption window, the default Encrypt Backup Data option is enabled with an encryption key preset by the system which provides the most secure protection.

You can choose from one of the following 2 Encryption Type options:
- Default – an encryption key with 44 alpha numeric characters will be randomly generated by the system
- Custom – you can customize your encryption key, where you can set your own algorithm, encryption key, method and key length.

10. If you have enabled the Encryption Key feature in the previous step, the following pop-up window shows, no matter which encryption key you have selected.

The pop-up window has the following three options to choose from:
- Unmask encryption key – The encryption key is masked by default. Click this option to show the encryption key.
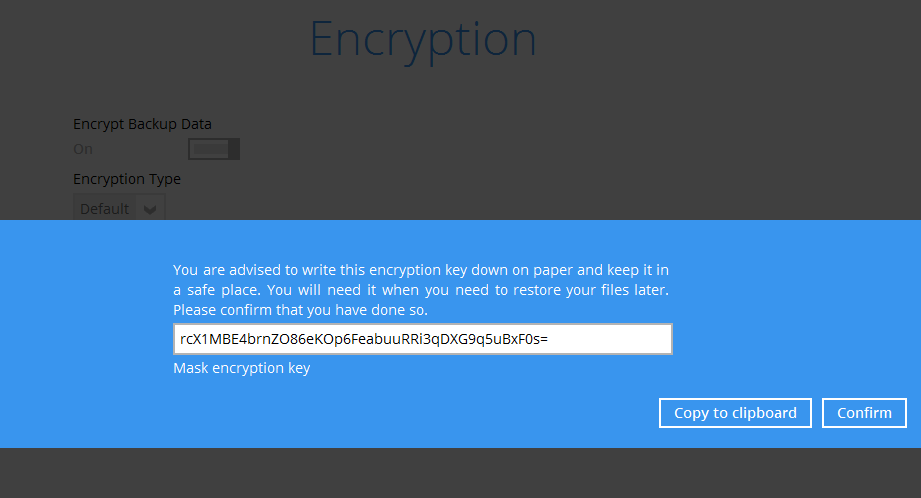

- Copy to clipboard – Click to copy the encryption key, then you can paste it in another location of your choice.
- Confirm – Click to exit this pop-up window and proceed to the next step.
11. Enter the Windows login credentials for user authentication. Click Next to proceed.

This screen shows only if you have configured scheduled backup.
12. The following screen shows when the new backup set is created successfully.

13. Click Backup now to start a backup immediately, or you can run a backup job later by following the instructions in Running Backup Job for Microsoft SQL Server.
Running Backup Job for Microsoft SQL Server
1. Click the Backup icon on the main interface of CloudBacko Pro.

2. Select the backup set which you would like to start a backup for.

3. Select the Backup set type. For more details regarding the Backup set type & In-file delta type, refer to Appendix A Backup Set Type.
- For VSS Backup Mode

- For ODBC Backup Mode
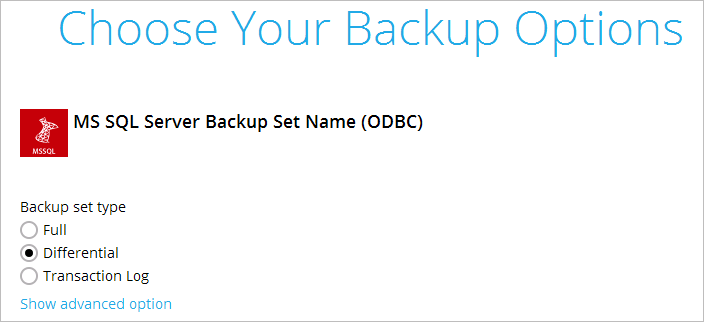

If you would like to modify the In-File Delta type (for Full backup set type only), Destinations and Retention Policy settings, click Show advanced option.

5. Click Backup to start the backup.
Configuring Backup Schedule for Automated Backup
1. Click the Backup Sets icon on the CloudBacko Pro main interface.

2. Select the backup set that you want to create a backup schedule for.
3. Click Backup Schedule, then create a new backup schedule by clicking Add.
4. Configure the backup schedule settings, then click OK to proceed.
5. Click Save to confirm your settings.
public/module/microsoft_sql_database/backup.txt · Last modified: 2019/09/19 18:00 by ronnie.chan