
Sidebar
public:module:hyper-v:run_direct_restore
Run Direct Restore
This type of restore will start up the guest VM directly from the backup file without restoring the guest virtual machine to the Hyper-V server.
Restore to Original Hyper-V Host
Start up a guest VM from Backup Destination without Auto Migration Enabled – The guest VM data will not migrate to the destination until you manually trigger this action. If manual migration is not performed, any changes made during the Run Direct instance will NOT be committed to backup files.
Start up a guest VM from Backup Destination with Auto Migration Enabled – To start up the guest VM directly from the backup file and then start restoring the guest VM files to the Hyper-V server. VM guest will start migrating without the need trigger a manual migration. Any changes made during the Run Direct instance will also be committed to the Hyper-V server as well.
Requirements and Limitations
1. Run Direct restore can only be performed on one guest virtual machine at a time.
2. Restored guest virtual machines using Run Direct containing a saved state will not automatically power on. The saved state must be manually deleted in Hyper-V Manager and the guest must be powered on manually.
3. When a guest virtual machine is started in a Run Direct instance is stopped any changes made within the guest environment will be lost, if the guest virtual is not migrated to the Hyper-V Server using the “Auto migrate after Run Direct is running” option.
4. When a guest virtual machine is started using Run Direct Restore all backup jobs (manual, scheduled, and continuous) for the related backup set will be skipped.
5. When a guest virtual machine is started using Run Direct Restore the following features are not available for the backup set; Data Integrity Check, Space Freeing Up, and Delete Backup Data.
Procedures
a). Start up a guest VM from Backup Destination without Auto Migration Enabled
Follow the steps below to start up the guest VM directly from the backup files.
1. In the CloudBacko Pro main interface, click the Restore icon.

2. Select the backup set that you would like to restore the guest VM from.

3. Select the local, mapped drive, or removable drive storage destination that contains Hyper-V guest VM that you would like to restore.

4. Select Restore virtual machines as the restore mode.

5. Select to restore the Hyper-V guest VM from a specific backup job then select the files or folders that you would like to restore. Click Next to proceed.

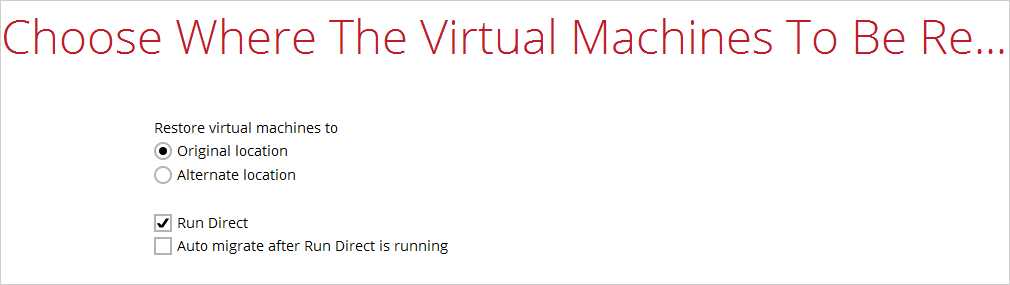
6. Select to restore the Hyper-V guest VM to the Original location, or to an Alternate location. Then select Run Direct and click Next to proceed.
- Original location – The Hyper-V guest VM will be restored to the same directory path which stores the backup source on the original Hyper-V host.
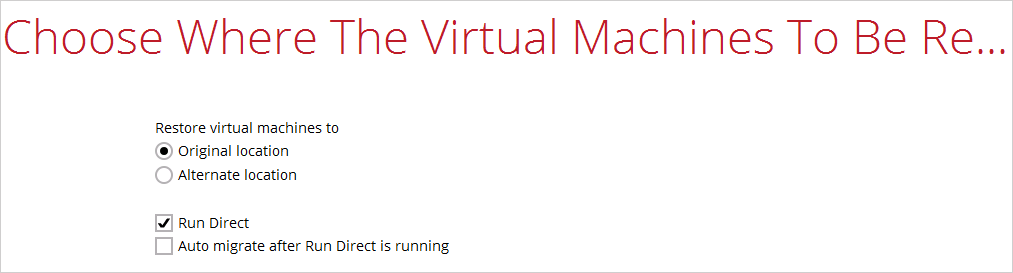

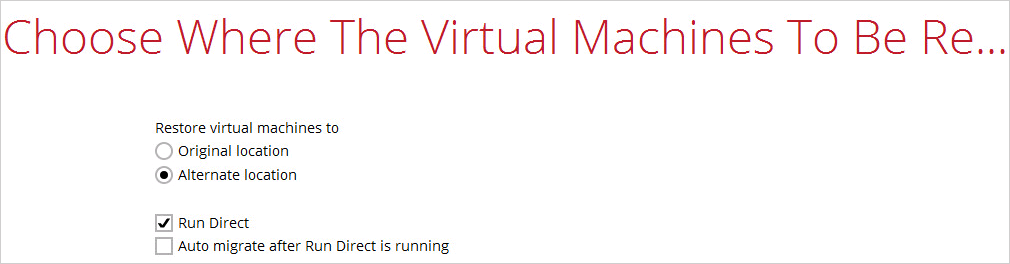
- Alternate location – The Hyper-V guest VM will be restored to the different directory path on the original Hyper-V host.


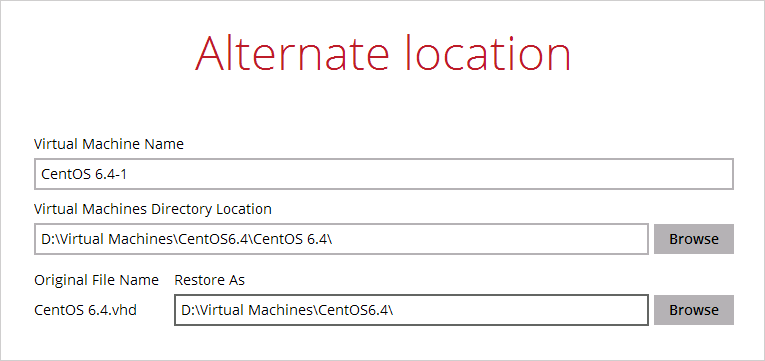
Click Next to proceed and the following values are needed to update:
- Virtual Machine Name
- Virtual Machines Directory Location (guest configuration files)
- Restore As (new location for the guest VHD files)
Example:
- Rename the restored guest VM to CentOS 6.4-1
- Store the configuration files in the new location D:\Virtual Machines\CentOS6.4\CentOS 6.4\
- Store the VHD files in the new location D:\Virtual Machines\CentOS6.4\

When the values have been updated click on Next to proceed.
7. Confirm the temporary directory path is correct and then click Restore to proceed.

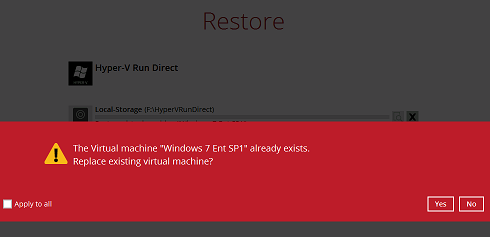
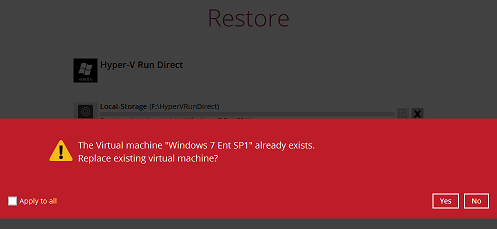
8. If the guest virtual machine selected to be restored already exists on the Hyper-V server, CloudBacko Pro will prompt to confirm overwriting of the existing guest.
- Yes - the exiting guest virtual machine will be deleted from the Hyper-V server before the restore process starts.
- No – the restore of the current guest virtual machine will be skipped.


9. After the Hyper-V guest virtual machine has been restored, you will see the following screen.

10. Go to the Hyper-V server and open the Hyper-V Manager to verify the guest VM has been restored and is powered on.

11. Connect to the guest virtual machine to verify if is running correctly.
Example: Linux guest

b). Migrate Virtual Machine (Permanently Restore)
To permanently restore the guest virtual machine after starting up using the Run Direct option, you will still need to migrate it from the backup destination to the designated permanent location on the Hyper-V server using the Migrate Virtual Machine option. This process can be performed even when the guest machine is already running.
1. After starting up the guest machine from the backup destination. Click on Close.

2. Click on Manage Run Direct virtual machines.

3. Click on the guest virtual machine.

4. To permanently restore the guest virtual machine, click on Migrate Virtual Machine.

1. CloudBacko Pro will begin migration of the guest VM from the backup destination to the Hyper-V Server.
2. The guest virtual machine can be used during the migration process. Any changes made in the guest virtual machine environment is saved in transaction logs and will be applied when the migration process is completed.
3. When finalizing the restore, during the application of changes in transaction logs with the restored guest VM, the guest VM will be put into saved state temporarily. Once the changes have been applied the guest virtual machine resume.
c). Stop Run Direct Virtual Machines
To stop running guest virtual machines started up using Run Direct can be done by either:
1. Quitting CloudBacko Pro

- OR-
2. Click on the Stop Run Direct button at the left bottom corner.

Click on Stop all Run Direct virtual machines.

When a guest virtual machine started in a Run Direct instance is stopped, any changes made within the guest environment will be lost, if the guest virtual is not migrated to the Hyper-V Server using the “Auto migrate after Run Direct is running” option.
d). Start up a guest VM from Backup Destination with Auto Migration Enabled
Follow the steps below to start up the guest VM directly from the backup files.
1. In the CloudBacko Pro main interface, click the Restore icon.

2. Select the backup set that you would like to restore the guest virtual machine from.

3.Select the local, mapped drive, or removable drive storage destination that contains Hyper-V guest virtual machine that you would like to restore.

4. Select Restore virtual machines as the restore mode.

5. Select to restore the Hyper-V guest from a specific backup job then select the files or folders that you would like to restore. Click Next to proceed.

6. Select to restore the Hyper-V guest VM to the Original location, or to an Alternate location. Then select Run Direct and Auto migrate after Run Direct is running and click Next to proceed.
- Original location – The Hyper-V guest VM will be restored to the same directory path which stores the backup source on the original Hyper-V host.
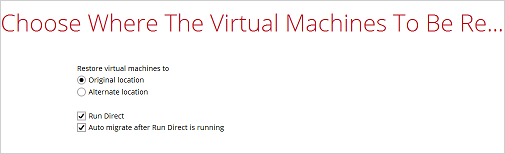

- Alternate location – The Hyper-V guest VM will be restored to the different directory path on the original Hyper-V host.

Click Next to proceed and the following values are needed to be update:
- Virtual Machine Name
- Virtual Machines Directory Location (guest configuration files)
- Restore As (new location for the guest VHD files)
Example:
- Rename the restored guest VM to CentOS 6.4-1
- Store the configuration files in the new location D:\Virtual Machines\CentOS6.4\CentOS 6.4\
- Store the VHD files in the new location D:\Virtual Machines\CentOS6.4\


When the values have been updated click on Next to proceed.

7. Confirm the temporary directory path is correct and then click Restore to proceed.
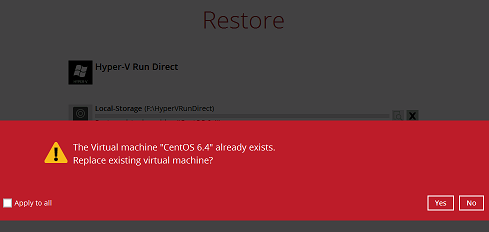
8. If the guest virtual machine selected to be restore already exists on the Hyper-V server CloudBacko Pro will prompt to confirm overwriting of the existing guest.
- Yes - the exiting guest virtual machine will be deleted from the Hyper-V server before the restore process starts.
- No – the restore of the current guest virtual machine will be skipped.

9. After the Hyper-V guest virtual machine has been restored, you will see the following screen.

10. Go to the Hyper-V server and open the Hyper-V Manager to verify the guest has been restored and is powered on.

11. Connect to the guest virtual machine to verify if is running correctly.
Example: Linux guest

Restore to Different (Standby) Hyper-V Host
Run Direct restore guest VM to a standby Hyper-V host is supported by the latest CloudBacko Pro. This restore option allows you to restore your backed up guest VM to another Hyper-V host, for example: if your original Hyper-V host is down and you need to restore your production guest VM’s to a standby Hyper-V host.
Start up a guest VM from Backup Destination without Auto Migration Enabled – The guest VM data will not migrate to the destination until you manually trigger this action. If manual migration is not performed, any changes made during the Run Direct instance will NOT be committed to backup files.
Start up a guest VM from Backup Destination with Auto Migration Enabled – To start up the guest VM directly from the backup file and then start restoring the guest VM files to the Hyper-V server. VM data will start migrating without the need trigger a manual migration. Any changes made during the Run Direct instance will also be committed to the Hyper-V server as well.
Requirements and Limitations
1. CloudBacko Pro must be installed on the Hyper-V Host where you wish to restore the guest Virtual Machine.
2. The correct encryption key is required if the backup set was created with the encryption key feature enabled.
3. A guest virtual machine can only be restored to another Hyper-V server with the same version, i.e. backup of a guest on Hyper-V 2012 R2 server cannot be restored to Hyper-V 2008 R2 host or vice versa.
4. A guest virtual machine backed up from a standalone Hyper-V host can only be restored to another standalone Hyper-V host. A guest virtual machine backed up from a Hyper-V Cluster can only be restored to another Hyper-V Cluster.
5. Guest Virtual Machine backed up to local drive / mapped drive / removable drive on the original Hyper-V host, can be restored to another Hyper-V host only if the new machine has access to the original drive(s).
6. The network configuration and structure of the standby Hyper-V host must be same with the original Hyper-V host.
7. The default Java heap size setting on CloudBacko Pro is 1024MB for 32-bit machine, 2048MB for 64-bit machine. For Hyper-V restore it is highly recommended to increase the Java heap size setting to improve performance. Especially guest VM’s with many incremental delta files. (The actual heap size is dependent on amount of free memory available on your Hyper-V host).
8. The temporary directory should be set to a local drive for best restore performance. Also, the temporary directory must have sufficient free disk space for the guest VM restore, for example, the restore of a 500GB guest VM with 30 incremental files of around 5GB each (500GB + 150GB (30 x 5GB)), the temporary directory will require at least 650GB of free space.
9. Restore guest Virtual Machine to “Original Location” is possible only if the disk setup on the new Hyper-V host is the same as the original Hyper-V host, for example if the original guest VM was backed up on G: drive. Then restore to “Original location” can be selected if G: drive is setup on the new Hyper-V host. Otherwise, select “Alternate location”.

10. The Hyper-V management tools must be installed on the new Hyper-V host. For Hyper-V Cluster environments Hyper-V management tools must be installed on all Cluster nodes.
11. The Hyper-V services must be started on the host. For Hyper-V Cluster environment, the Hyper-V services must be started on all Cluster nodes.
12. The Microsoft Hyper-V VSS Writer must be installed and running on the new Hyper-V host and the writer state must be Stable. This can be verified by running the vssadmin list writers command.
Example:
C:\Users\Administrator>vssadmin list writers
vssadmin 1.1 - Volume Shadow Copy Service administrative command-line tool
(C) Copyright 2001-2005 Microsoft Corp.
Writer name: 'Task Scheduler Writer'
        Writer Id: {d61d61c8-d73a-4eee-8cdd-f6f9786b7124}
        Writer Instance Id: {1bddd48e-5052-49db-9b07-b96f96727e6b}
        State: [1] Stable
        Last error: No error

Writer name: 'VSS Metadata Store Writer'
        Writer Id: {75dfb225-e2e4-4d39-9ac9-ffaff65ddf06}
        Writer Instance Id: {088e7a7d-09a8-4cc6-a609-ad90e75ddc93}
        State: [1] Stable
        Last error: No error

Writer name: 'Performance Counters Writer'
        Writer Id: {0bada1de-01a9-4625-8278-69e735f39dd2}
        Writer Instance Id: {f0086dda-9efc-47c5-8eb6-a944c3d09381}
        State: [1] Stable
        Last error: No error

Writer name: 'System Writer'
        Writer Id: {e8132975-6f93-4464-a53e-1050253ae220}
        Writer Instance Id: {8de7ed2b-8d69-43dd-beec-5bfb79b9691c}
        State: [1] Stable
        Last error: No error

Writer name: 'SqlServerWriter'
        Writer Id: {a65faa63-5ea8-4ebc-9dbd-a0c4db26912a}
        Writer Instance Id: {1f668bf9-38d6-48e8-81c4-2df60a3fab57}
        State: [1] Stable
        Last error: No error

Writer name: 'ASR Writer'
        Writer Id: {be000cbe-11fe-4426-9c58-531aa6355fc4}
        Writer Instance Id: {01499d55-61da-45bc-9a1e-76161065630f}
        State: [1] Stable
        Last error: No error

Writer name: 'Microsoft Hyper-V VSS Writer'
        Writer Id: {66841cd4-6ded-4f4b-8f17-fd23f8ddc3de}
        Writer Instance Id: {a51919e3-0256-4ecf-8530-2f600de6ea68}
        State: [1] Stable
        Last error: No error

Writer name: 'COM+ REGDB Writer'
        Writer Id: {542da469-d3e1-473c-9f4f-7847f01fc64f}
        Writer Instance Id: {7303813b-b22e-4967-87a3-4c6a42f861c4}
        State: [1] Stable
        Last error: No error

Writer name: 'Shadow Copy Optimization Writer'
        Writer Id: {4dc3bdd4-ab48-4d07-adb0-3bee2926fd7f}
        Writer Instance Id: {d3199397-ec58-4e57-ad04-e0df345b5e68}
        State: [1] Stable
        Last error: No error

Writer name: 'Registry Writer'
        Writer Id: {afbab4a2-367d-4d15-a586-71dbb18f8485}
        Writer Instance Id: {25428453-2ded-4204-800f-e87204f2508a}
        State: [1] Stable
        Last error: No error

Writer name: 'BITS Writer'
        Writer Id: {4969d978-be47-48b0-b100-f328f07ac1e0}
        Writer Instance Id: {78fa3f1e-d706-4982-a826-32523ec9a305}
        State: [1] Stable
        Last error: No error

Writer name: 'WMI Writer'
        Writer Id: {a6ad56c2-b509-4e6c-bb19-49d8f43532f0}
        Writer Instance Id: {3efcf721-d590-4e50-9a37-845939ca51e0}
        State: [1] Stable
        Last error: No error
Procedures
a). Start up a guest VM from Backup Destination without Auto Migration Enabled
This restore option allows you to restore your backed up guest VM to another Hyper-V host, for example if your original Hyper-V host is down and you need to restore your production guest VM’s to a standby Hyper-V host. Please refer to the Requirements and Limitations for the details about requirements and limitations for restoring Hyper-V guest VM to another Hyper-V host.
1. On the machine you wish to restore Hyper-V guest VM, launch CloudBacko Pro and click the Restore icon in the main interface.

2. Select the backup set that you would like to restore the guest virtual machine from.

3. Select the local, mapped drive, or removable drive storage destination that contains Hyper-V guest VM that you would like to restore.

4. Select Restore virtual machines as the restore mode.

5. Select to restore the Hyper-V guest VM from a specific backup job then select the files or folders that you would like to restore. Click Next to proceed.

6. Select to restore the Hyper-V guest VM to the Original location, or to an Alternate location. Then select Run Direct and click Next to proceed.
- Original location – The Hyper-V guest VM will be restored to the same directory path which stores the backup source on the original Hyper-V host.

- Alternate location – The Hyper-V guest VM will be restored to the different directory path on the original Hyper-V host.

Click Next to proceed and the following values are needed to update:
- Virtual Machine Name
- Virtual Machines Directory Location (guest configuration files)
- Restore As (new location for the guest VHD files)
Example:
- Rename the restored guest VM to CentOS 6.4-1
- Store the configuration files in the new location D:\Virtual Machines\CentOS6.4\CentOS 6.4\
- Store the VHD files in the new location D:\Virtual Machines\CentOS6.4\


When the values have been updated click on Next to proceed.
7. Confirm the temporary directory path is correct and then click Restore to proceed.

8. If the guest virtual machine selected to be restored already exists on the Hyper-V server, CloudBacko Pro will prompt to confirm overwriting of the existing guest.
- Yes - the exiting guest virtual machine will be deleted from the Hyper-V server before the restore process starts.
- No – the restore of the current guest virtual machine will be skipped.

9. After the Hyper-V guest virtual machine has been restored, you will see the following screen.

10. Go to the Hyper-V server and open the Hyper-V Manager to verify the guest VM has been restored and is powered on.

11. Connect to the guest virtual machine to verify if is running correctly.
Example: Linux guest

b). Migrate Virtual Machine (Permanently Restore)
To permanently restore the guest virtual machine after starting up using the Run Direct option, you will still need to migrate it to from the backup destination to the designated permanent location on the Hyper-V server using the Migrate Virtual Machine option. This process can be performed even when the guest machine is already running.
1. After starting up the guest machine from the backup destination. Click on Close.

2. Click on Manage Run Direct virtual machines.

3. Click on the guest virtual machine.

4. To permanently restore the guest virtual machine, click on Migrate Virtual Machine.

1. CloudBacko Pro will begin migration of the guest virtual machine from the backup destination to the Hyper-V Server.
2. The guest VM can be used during the migration process. Any changes made in the guest VM environment is saved in transaction logs and will be applied when the migration process is completed.
3. When finalizing the restore, during the application of changes in transaction logs with the restored guest VM, the guest VM will be put into saved state temporarily. Once the changes have been applied the guest virtual machine resume.
c). Stop Run Direct Virtual Machines
To stop running guest virtual machines started up using Run Direct can be done by either:
1. Quitting CloudBacko Pro

- OR-
2. Click on the Stop Run Direct button at the left bottom corner.

Click on Stop all Run Direct virtual machines.

When a guest virtual machine started in a Run Direct instance is stopped, any changes made within the guest environment will be lost, if the guest virtual is not migrated to the Hyper-V Server using the “Auto migrate after Run Direct is running” option.
d). Start up a guest VM from Backup Destination with Auto Migration Enabled
Follow the steps below to start up the guest VM directly from the backup files.
1. On the machine you wish to restore Hyper-V guest VM, launch CloudBacko Pro and click the Restore icon in the main interface.

2. Select the backup set that you would like to restore the guest virtual machine from.

3. Select the local, mapped drive, or removable drive storage destination that contains Hyper-V guest virtual machine that you would like to restore.

4. Select Restore virtual machines as the restore mode.

5. Select to restore the Hyper-V guest from a specific backup job then select the files or folders that you would like to restore. Click Next to proceed.

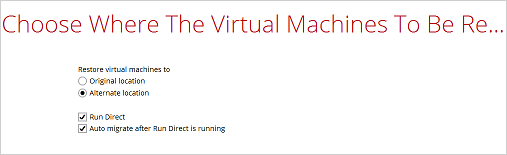
6. Select to restore the Hyper-V guest VM to the Original location, or to an Alternate location. Then select Run Direct and Auto migrate after Run Direct is running and click Next to proceed.
- Original location – The Hyper-V guest VM will be restored to the same directory path which stores the backup source on the original Hyper-V host.
- Alternate location – The Hyper-V guest VM will be restored to the different directory path on the original Hyper-V host.
Click Next to proceed and the following values are needed to be update:
- Virtual Machine Name
- Virtual Machines Directory Location (guest configuration files)
- Restore As (new location for the guest VHD files)
Example:
- Rename the restored guest VM to CentOS 6.4-1
- Store the configuration files in the new location D:\Virtual Machines\CentOS6.4\CentOS 6.4\
- Store the VHD files in the new location D:\Virtual Machines\CentOS6.4\


When the values have been updated click on Next to proceed.
7. Confirm the temporary directory path is correct and then click Restore to proceed.

8. If the guest virtual machine selected to be restore already exists on the Hyper-V server CloudBacko Pro will prompt to confirm overwriting of the existing guest.
- Yes - the exiting guest virtual machine will be deleted from the Hyper-V server before the restore process starts.
- No – the restore of the current guest virtual machine will be skipped.

9. After the Hyper-V guest virtual machine has been restored, you will see the following screen.

10. Go to the Hyper-V server and open the Hyper-V Manager to verify the guest has been restored and is powered on.

11. Connect to the guest virtual machine to verify if is running correctly.
Example: Linux guest

public/module/hyper-v/run_direct_restore.txt · Last modified: 2019/09/20 15:20 by ronnie.chan