
Sidebar
public:module:hyper-v:non_run_direct_restore
This is an old revision of the document!
Non Run Direct Restore
This is the conventional restore method where CloudBacko Pro will restore the guest virtual machine files to the Hyper-V server.
1). Restore to Original Hyper-V Host
Restore of a Guest VM to the Original Hyper-V Host (Original Location) – This option will restore guest VM to original location which contains the backed up guest VM.
Restore of a Guest VM to the Original Hyper-V Host (Alternate Location) – This feature will restore any guest VM to another location (a different disk or folder) on the same Hyper-V host.
<WRAP indent>
a). Restore of Guest VM to the Original Hyper-V Host (Original Location)
1. In the CloudBacko Pro main interface, click the Restore icon.

2. Select the backup set that you would like to restore the guest virtual machine from.

3. Select the CBS, cloud, SFTP/FTP or drive storage destination that contains Hyper-V guest virtual machine that you would like to restore.
Example: Restore from D:\ drive

4. If the backup set is created with Run Direct feature or Granular Restore feature enabled, the following step will show. Select Restore virtual machines as the restore mode.

5. Select to restore the Hyper-V guest from a specific backup job then select the files or folders that you would like to restore. Click Next to proceed.

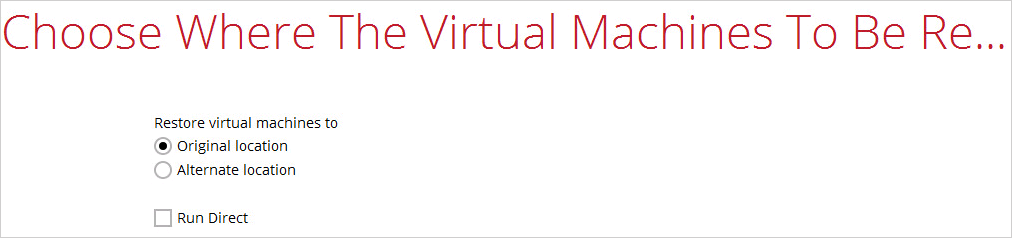
6. Select to restore the Hyper-v guest VM to the Original location.
- For backup set without Run Direct feature enabled:


- For the backup set with Run Direct feature enabled, uncheck the box of Run Direct and then click Next to proceed.

7. Confirm the temporary directory path is correct and then click Restore to proceed.

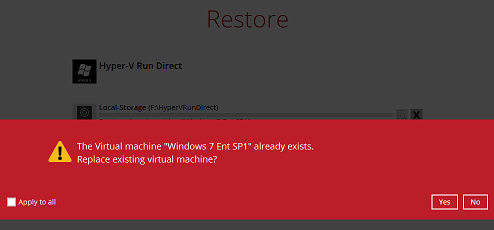
8. If the guest virtual machine selected to be restored already exists on the Hyper-V server CloudBacko Pro will prompt to confirm overwriting of the existing guest.
- Yes - the exiting guest virtual machine will be deleted from the Hyper-V server before the restore process starts.
- No – the restore of the current guest virtual machine will be skipped.

9. After the Hyper-V guest virtual machine has been restored.

10. Go to the Hyper-V server and open the Hyper-V Manager to verify the guest has been restored and power on the guest virtual machine.

11. Connect to the guest virtual machine to verify if is running correctly.
Example: Linux guest

b). Restore of Guest VM to the Original Hyper-V Host (Alternate Location)
This feature will restore any guest VM to another location (a different disk or folder) on the same Hyper-V host. The Restore to Alternate location can be used to restore only one guest virtual machine at any one time.
1. In the CloudBacko Pro main interface, click the Restore icon.

2. Select the backup set that you would like to restore the guest virtual machine from.

3. Select cloud, SFTP/FTP or drive storage destination that contains Hyper-V guest virtual machine that you would like to restore.
Example: Restore from D:\ drive

4. If the backup set is created with Run Direct feature or Granular Restore feature enabled, the following step will show. Select Restore virtual machines as the restore mode.

5. Select to restore the Hyper-V guest from a specific backup job then select the files or folders that you would like to restore.

6. Select to restore the Hyper-v guest VM to the Alternate location.
- For backup set without Run Direct feature enabled:
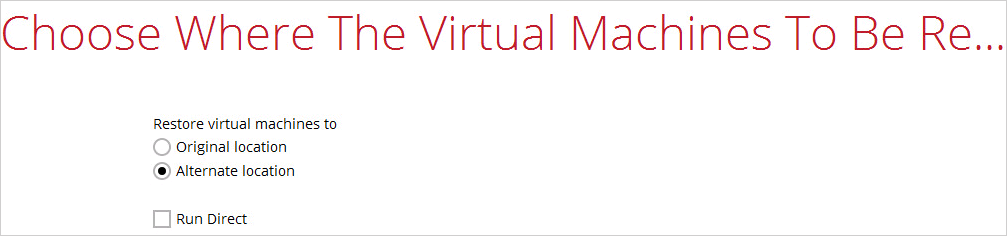

- For the backup set with Run Direct feature enabled, uncheck the box of Run Direct and then click Next to proceed.


Click Next to proceed and the following values are needed to be update:
- Virtual Machine Name
- Virtual Machines Directory Location (guest configuration files)
- Restore As (new location for the guest VHD files)
Example:
- Rename the restored guest VM to CentOS 6.4-1
- Store the configuration files in the new location D:\Virtual Machines\CentOS6.4\CentOS 6.4\
- Store the VHD files in the new location D:\Virtual Machines\CentOS6.4\
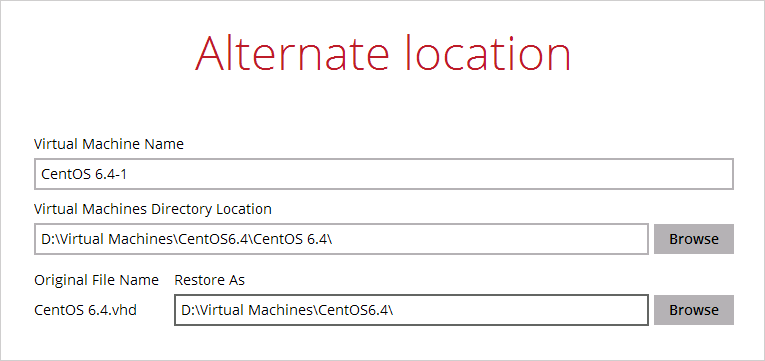

When the values have been updated click on Next to proceed.
7. Confirm the temporary directory path is correct and then click Restore to proceed.

8. After the Hyper-V guest virtual machine has been restored successfully

9. Open Windows File Explorer and verify the guest has been restored to the new location.
public/module/hyper-v/non_run_direct_restore.1568194292.txt.gz · Last modified: 2019/09/11 17:31 by ronnie.chan