
Sidebar
public:module:microsoft_exchange_mail_level_2016:on_exchange_dag
This is an old revision of the document!
Exchange 2016 Mail-Level Backup > Run on Exchange Server > DAG Scenario
This section will cover backup set creation, run mail-level backup, and restore individual mailbox items of Exchange Server 2016 DAG scenario for CloudBacko Pro running on each of the Exchange 2016 Server nodes in the DAG.
Create Mail Level Backup Set for DAG
1. Click the Backup Sets icon on the main interface of CloudBacko Pro.

2. Create a new backup set by clicking the “+” icon next to Add new backup set.
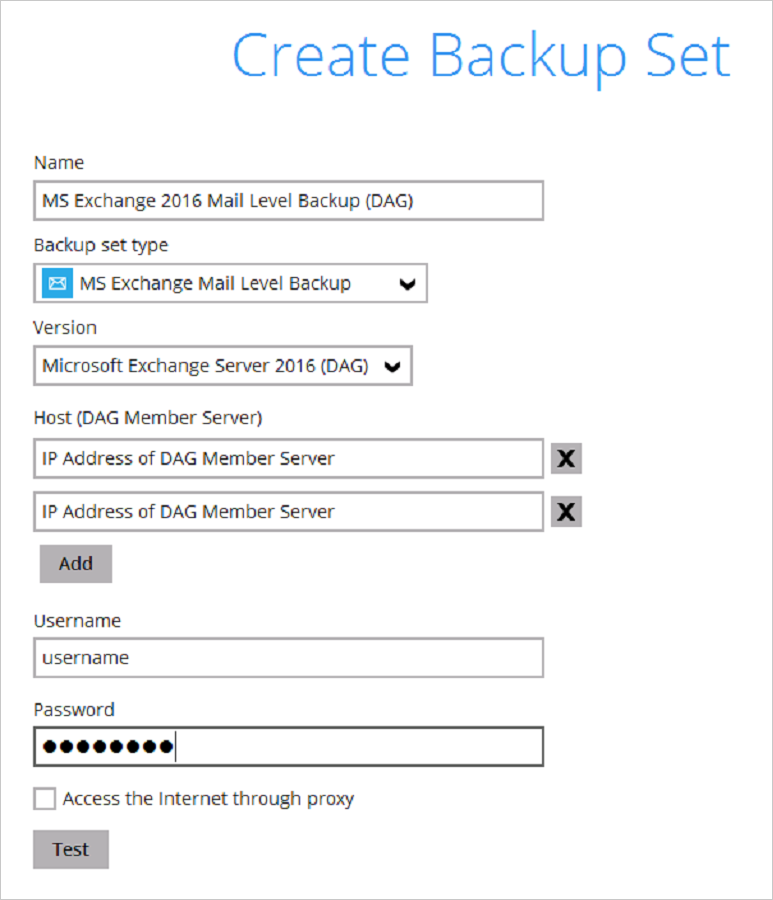
3. Select the Backup set type as MS Exchange Mail Level Backup. The system will automatically detect and select the Exchange Server version, make sure the version selected is correct.
- Name your new backup set.
- Enter the hostname of all the DAG Member Server.
- Enter the username and password of the Windows user account used for backup.
- Check the “Access the Internet through proxy” if required. Then click Next to proceed.

4. In the Backup Source menu, select the mailboxes or public folders for backup. You can click to expand the mailbox or public folder to select which mail folder to back up. You can also click Show mails to select individual mail to back up. Click Next to proceed when you are done.

5. In the Schedule menu, you can configure a backup schedule for backup job to run automatically at your specified time interval. By default the Run scheduled backup for this backup set option is disabled. Enable it then click the “+” icon next to Add new schedule. Click Next to proceed when you are done setting.

6. In the Destination menu, select a backup destination where the backup mail will be stored. Click the “+” icon next to Add new storage destination / destination pool.

7. Select the destination storage, then click OK to proceed.

8. Click Next on the Destination menu page to proceed.
9. In the Encryption window, the default Encrypt Backup Data option is enabled with an encryption key preset by the system which provides the most secure protection.

10. You can choose from one of the following three Encryption Type options:
- Default – an encryption key with 44 alpha numeric characters will be randomly generated by the system
- Custom – you can customize your encryption key, where you can set your own algorithm, encryption key, method and key length.
Click Next when you are done setting.

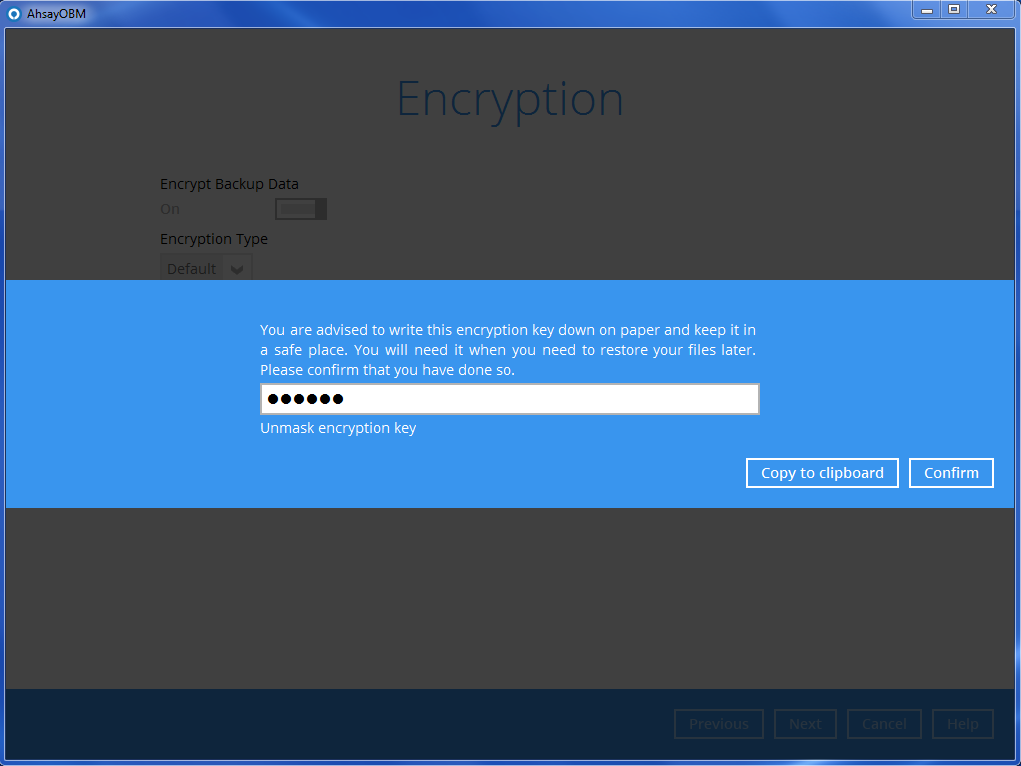
11. If you have enabled the Encryption Key feature in the previous step, the following pop-up window shows, no matter which encryption type you have selected.

The pop-up window has the following three options to choose from:
- Unmask encryption key – The encryption key is masked by default. Click this option to show the encryption key.
- Copy to clipboard – Click to copy the encryption key, then you can paste it in another location of your choice.
- Confirm – Click to exit this pop-up window and proceed to the next step

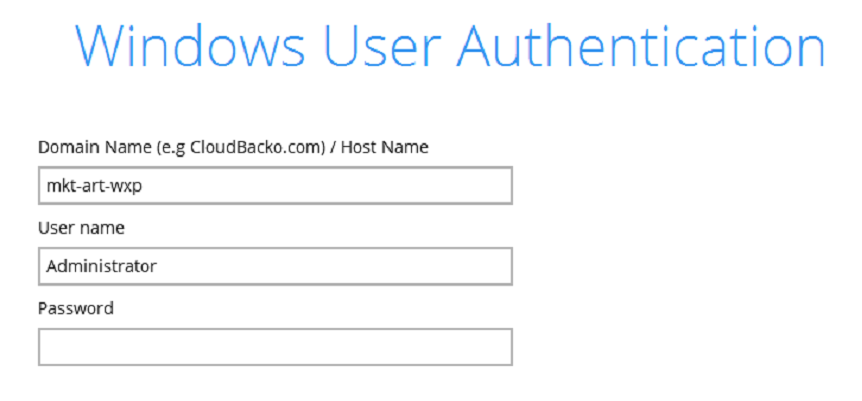
12. Enter the Windows login credentials for user authentication. Click Next to proceed.

public/module/microsoft_exchange_mail_level_2016/on_exchange_dag.1566815992.txt.gz · Last modified: 2019/08/26 18:39 by ronnie.chan