
Sidebar
public:module:cloud_file:lite:create_backup_set
Create Cloud File Backup Set
1. Open CloudBacko Lite backup software.

2. Click Backup Sets.

3. Create a Cloud File backup set by clicking the “+” icon next to Add new backup set.

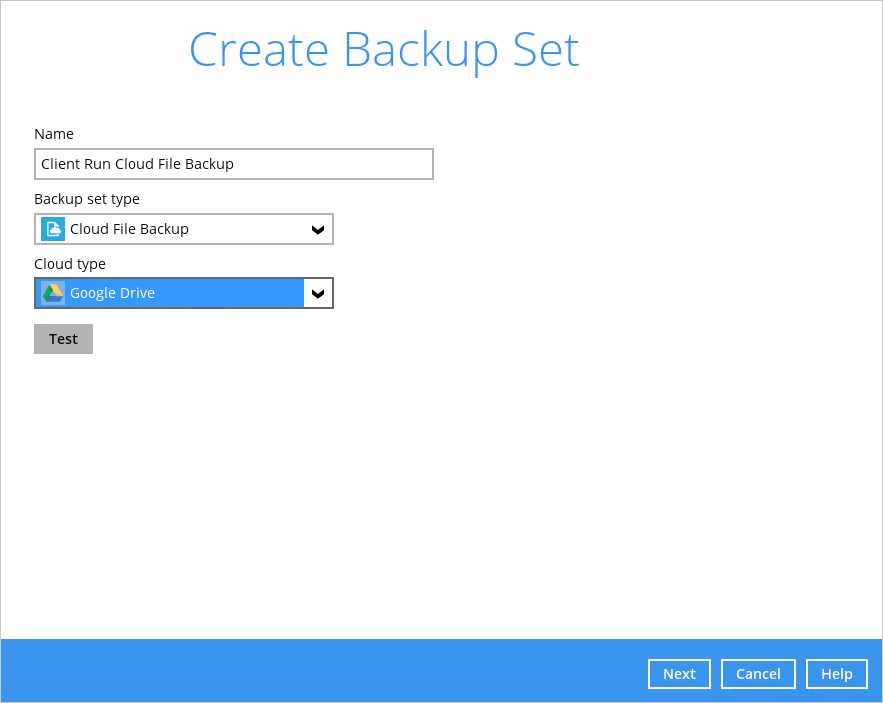
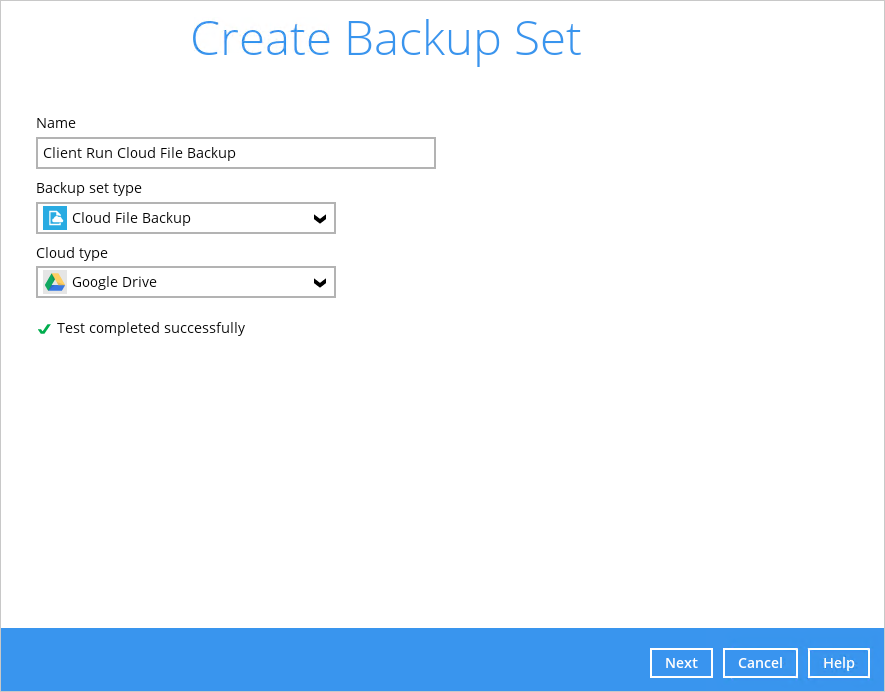
4. Enter a Name for your backup set and select Cloud File Backup as the Backup set type.

5. Select the Cloud type of the cloud storage that contain the data that you want to backup. For example, Google Drive.

6. Depending on the cloud type you have selected, you will be prompted to enter the cloud service login details.
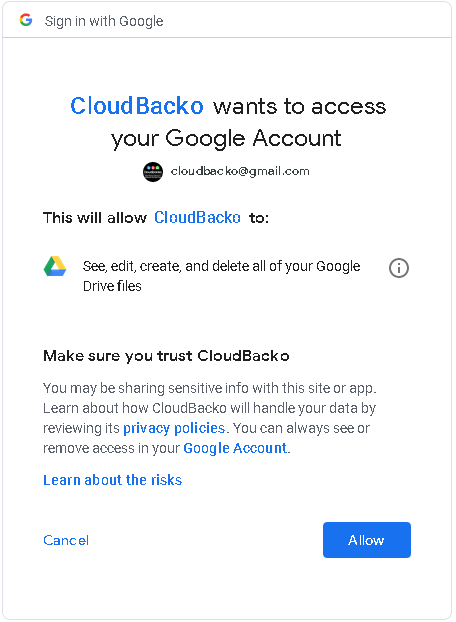
- Click Test to get redirected to the login page of the cloud service provider on your default browser, then enter the login details there.
- Click Allow to permit CloudBacko to access the cloud storage.
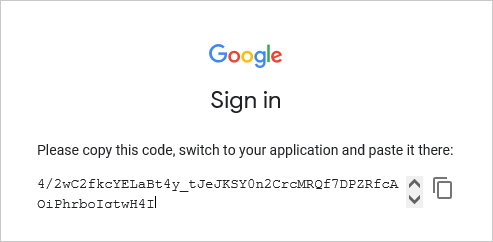
- Copy and paste the code generated by the cloud service provider to CloudBacko Lite where you will be prompted to enter, then click OK to confirm.
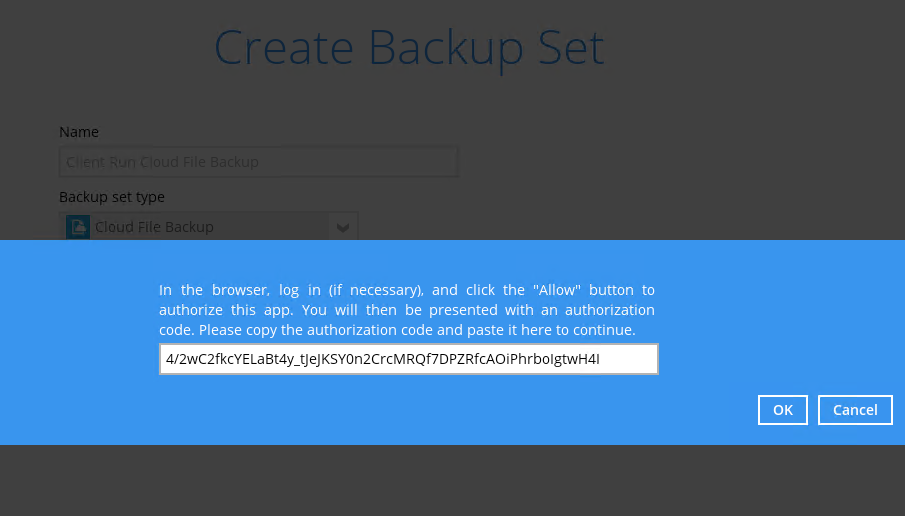


The authentication request will be opened in a new tab / window on the browser, ensure that the pop-up tab / window is not blocked (e.g. pop-up blocker in your browser).
7. In the Backup Source menu, select the folder / files that you would like to backup.

Enable the Show files checkbox at the bottom left corner if you would like to choose individual file for backup. Click Next to proceed when you are done with the selection.

8. In the Schedule menu, configure a backup schedule for backup job to run automatically at your specified time interval. Click Add new schedule to add a new schedule, then click Next to proceed afterward.

Configure the backup schedule settings on this page, then click OK when you are done with the settings, then click Next to proceed.

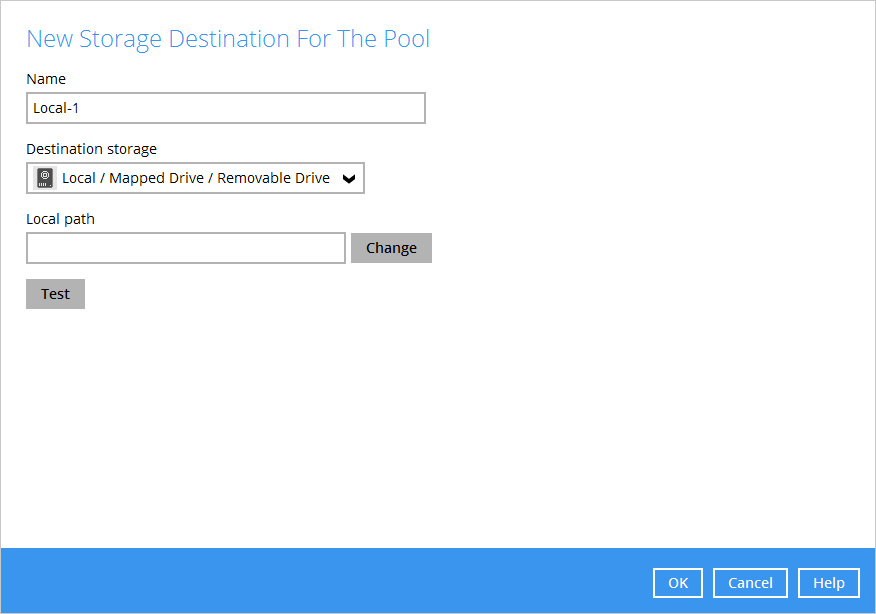
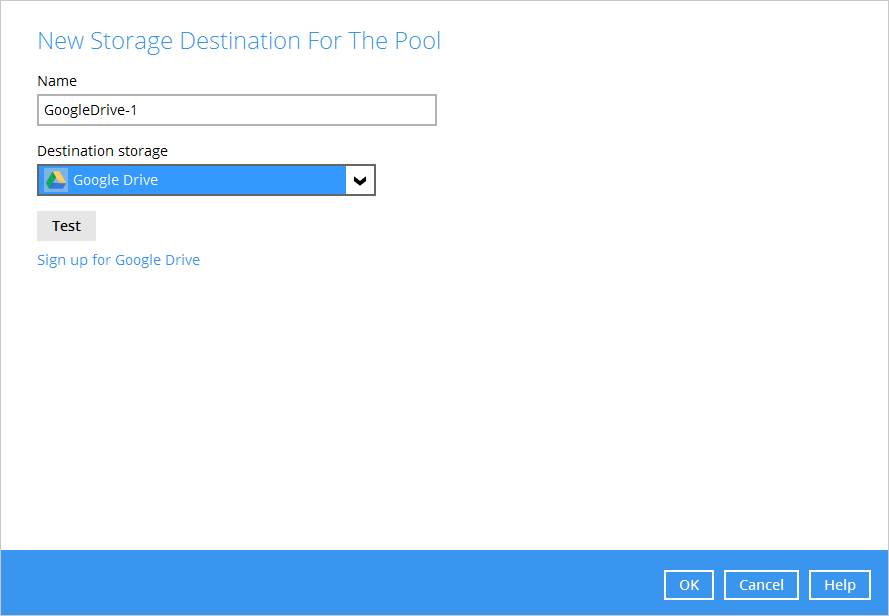
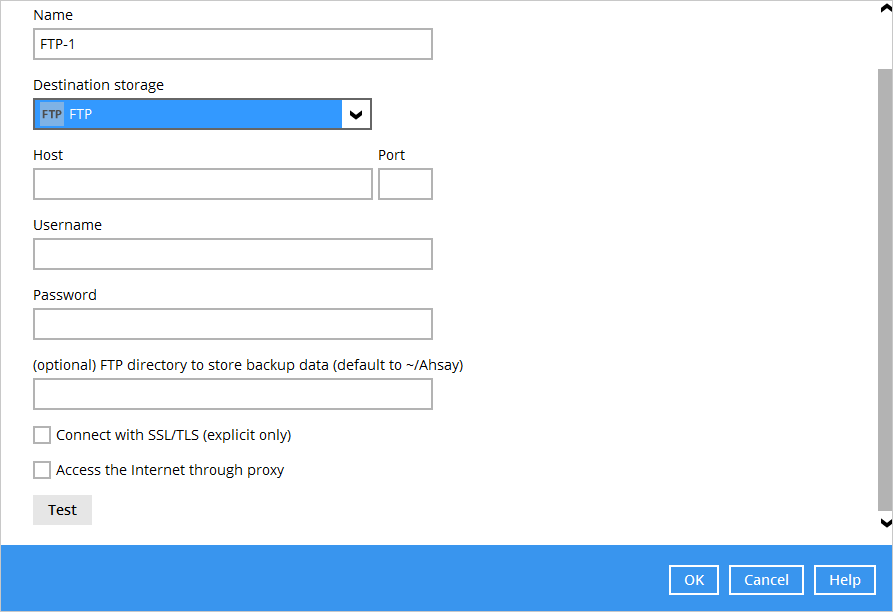
9. In the Destination menu, select a backup destination where the backup data will be stored. Click the “+” icon next to Add new storage destination / destination pool.

10. Select the Destination storage.

You can choose a storage combination of the Local/Mapped drive/Removable Drive, Cloud storage or FTP. Click OK to proceed when you are done with the settings.
- If you have chosen the Local/Mapped Drive/Removable Drive option, click Change to browse to a directory path where backup data will be stored, then click Test to validate the path. Test completed successfully shows when the validation is done.
- If you have chosen to store the backup files in another Cloud Storage, click Test to log in to the corresponding cloud storage service.
- If you have chosen the FTP as the destination, enter the the Host, Username and Password details.


11. You can add multiple storage destinations. The backup data will be uploaded to all the destinations you have selected in the order you added them. Press the  icon to alter the order. Click Next to proceed when you are done with the selection.

12. In the Encryption window, the default Encrypt Backup Data option is enabled with an encryption key preset by the system which provides the most secure protection.

You can choose from one of the following two Encryption Type options:
- Default – an encryption key with 44 alpha numeric characters will be randomly generated by the system
- Custom – you can customize your encryption key, where you can set your own algorithm, encryption key, method and key length.
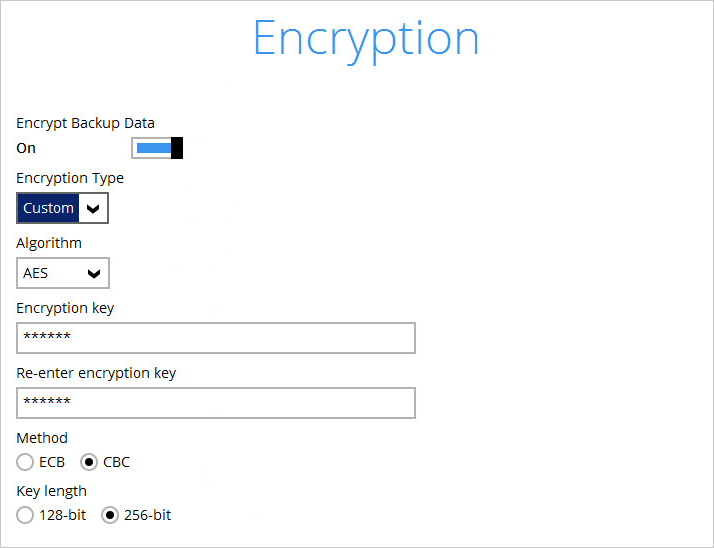
Click Next when you are done setting.

13. If you have enabled the Encryption Key feature in the previous step, the following pop-up window shows, no matter which encryption type you have selected.

The pop-up window has the following three options to choose from:
- Unmask encryption key – The encryption key is masked by default. Click this option to show the encryption key.
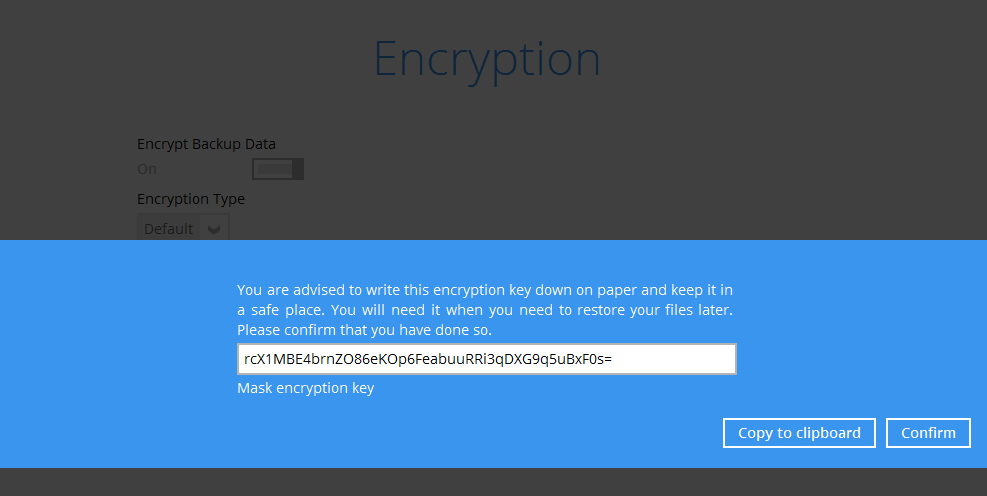
- Copy to clipboard – Click to copy the encryption key, then you can paste it in another location of your choice.
- Confirm – Click to exit this pop-up window and proceed to the next step

14. Enter the Domain Name / Host Name, User Name and Password of the Windows account that will be running the backup.

This menu will only be displayed for backup set with backup schedule configured (for installation on Windows).
15. The backup set has been successfully created.

public/module/cloud_file/lite/create_backup_set.txt · Last modified: 2019/08/23 18:23 by ronnie.chan