User Tools
Sidebar
Restore
There 3 restore options available for MySQL database:
- Original location – CloudBacko Pro will restore the database(s) from the backup destination and apply them to the original production MySQL instance.
- Alternate location – CloudBacko Pro will restore the database(s) from the backup destination and apply them to the either the original MySQL instance or another MySQL instance on the production machine. This option can also be used to clone a database by changing the database name.
- Restore raw file – CloudBacko Pro will restore the database *.sql files to a location on the local machine. Which then can be copied to another MySQL server on another machine for recovery.
To Original Location
Restore files from your backup destination and automatically apply them to the MySQL database server in the original location. These are the steps.
1. Login to MySQL Server using MySQL Command Line Client and verify the database instance is running.
Enter password: ******
Welcome to the MySQL monitor.  Commands end with ; or \g.
Your MySQL connection id is 10
Server version: 5.6.31-log MySQL Community Server (GPL)

Copyright (c) 2000, 2016, Oracle and/or its affiliates. All rights reserved.

Oracle is a registered trademark of Oracle Corporation and/or its
affiliates. Other names may be trademarks of their respective
owners.

Type 'help;' or '\h' for help. Type '\c' to clear the current input statement.

mysql> show databases;
+--------------------+
| Database           |
+--------------------+
| information_schema |
| mysql              |
| performance_schema |
+--------------------+
3 rows in set (0.00 sec)

mysql>
2. In the CloudBacko Pro main interface, click the Restore icon.

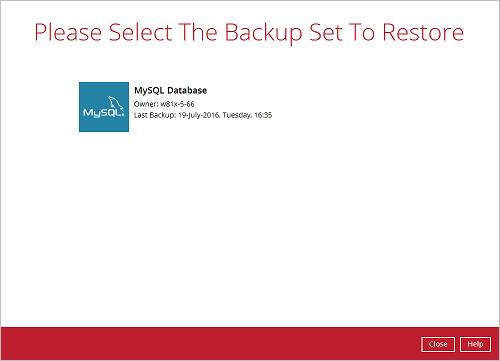
3. Select the backup set that you would like to restore the MySQL Database from.
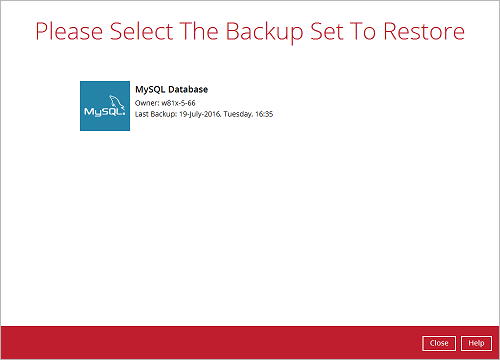
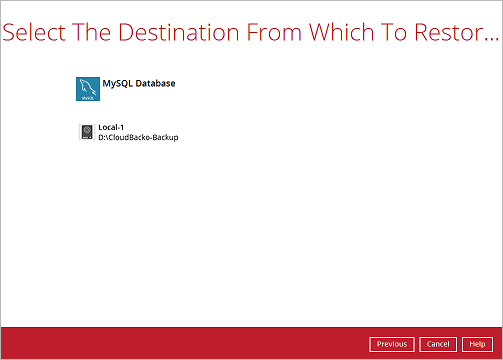
4. Select the storage destination that contains the MySQL databases that you would like to restore from.
5. Select to restore the MySQL node from a specific backup job then select the files or folders that you would like to restore. Click Next to proceed.
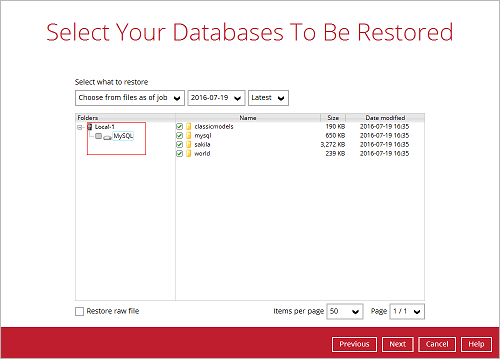
To restore to either original or alternate location please unselect the MySQL data node and only select the databases only.
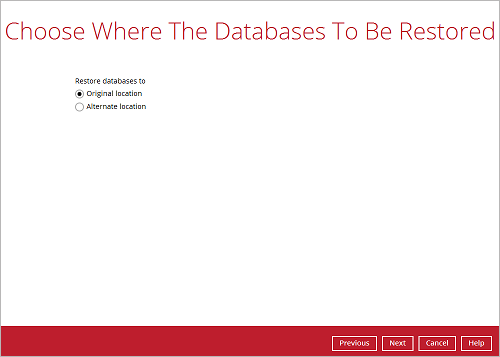
6. Select to restore the MySQL Databases to the Original location and click Next to proceed.
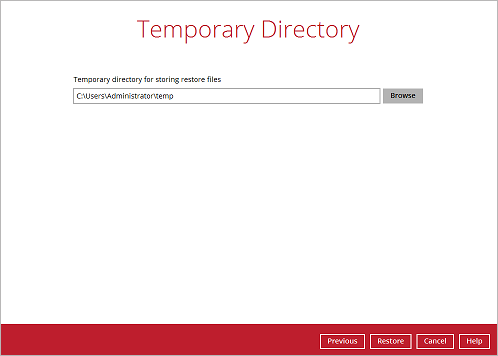
7. Confirm the temporary directory path is correct and then click Restore to proceed.
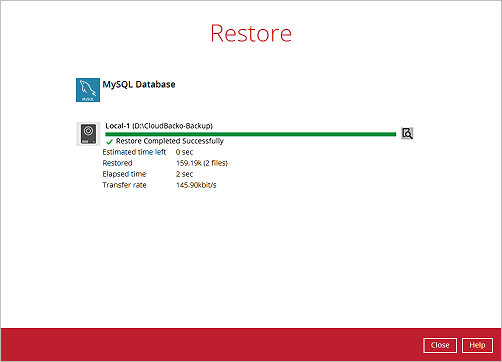
8. After the MySQL database(s) has been restored.
9. Using MySQL Command Line Client you can list the restored databases and tables. Example: Listing the tables in the database using show tables
mysql> show databases;
+--------------------+
| Database           |
+--------------------+
| information_schema |
| classicmodels      |         |
| mysql              |
| performance_schema |
| sakila             |
| world              |
+--------------------+
6 rows in set (0.06 sec)
mysql> show tables in world;
+-----------------+
| Tables_in_world |
+-----------------+
| city            |
| country         |
| countrylanguage |
| departments     |
| dept_emp        |
| dept_manager    |
| employees       |
| salaries        |
| titles          |
+-----------------+
9 rows in set (0.00 sec)
mysql> show tables in classicmodels;
+----------------------------+
| Tables_in_classicmodels    |
+----------------------------+
| actor                      |
| actor_info                 |
| address                    |
| category                   |
| city                       |
| country                    |
| countrylanguage            |
| customer                   |
| customer_list              |
| customers                  |
| departments                |
| dept_emp                   |
| dept_manager               |
| employees                  |
| film                       |
| film_actor                 |
| film_category              |
| film_list                  |
| film_text                  |
| inventory                  |
| language                   |
| nicer_but_slower_film_list |
| offices                    |
| orderdetails               |
| orders                     |
| payment                    |
| payments                   |
| productlines               |
| products                   |
| rental                     |
| salaries                   |
| sales_by_film_category     |
| sales_by_store             |
| staff                      |
| staff_list                 |
| store                      |
| titles                     |
+----------------------------+
37 rows in set (0.00 sec)
To Alternate Location
1. Login to MySQL Server using MySQL Command Line Client and verify the database instance is running.
Enter password: ******
Welcome to the MySQL monitor.  Commands end with ; or \g.
Your MySQL connection id is 10
Server version: 5.6.31-log MySQL Community Server (GPL)

Copyright (c) 2000, 2016, Oracle and/or its affiliates. All rights reserved.

Oracle is a registered trademark of Oracle Corporation and/or its
affiliates. Other names may be trademarks of their respective
owners.

Type 'help;' or '\h' for help. Type '\c' to clear the current input statement.

mysql> show databases;
+--------------------+
| Database           |
+--------------------+
| information_schema |
| mysql              |
| performance_schema |
+--------------------+
3 rows in set (0.00 sec)

mysql>
2. In the CloudBacko Pro main interface, click the Restore icon.

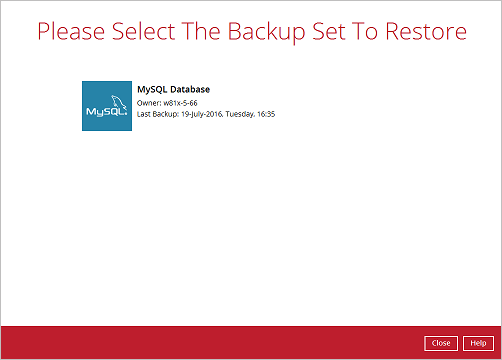
3. Select the backup set that you would like to restore the MySQL Database from.
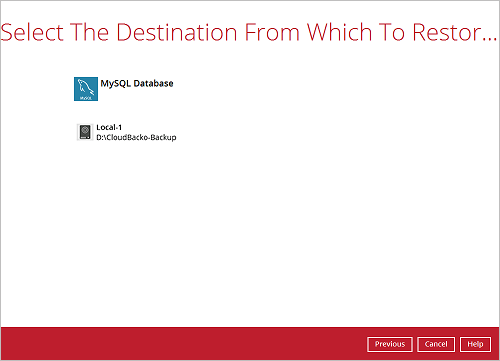
4. Select the storage destination that contains the MySQL databases that you would like to restore from.
5. Select to restore the MySQL node from a specific backup job then select the files or folders that you would like to restore. Click Next to proceed.
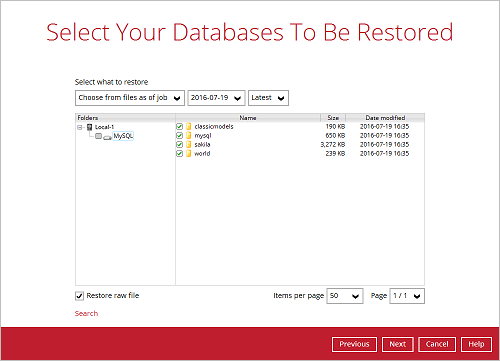
To restore to either original or alternate location please unselect the MySQL data node and only select the databases only.
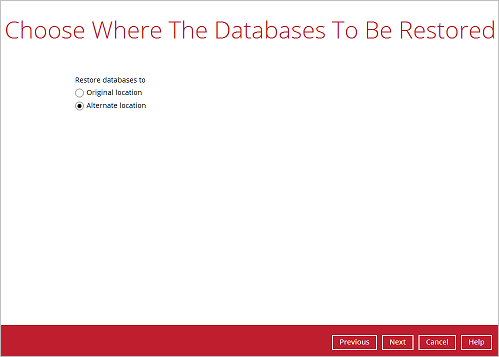
6. Select to restore the MySQL Databases to the alternate location and click Next to proceed.
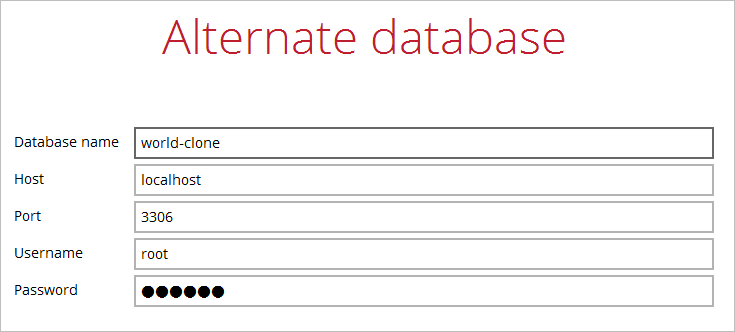
7. Confirm the MySQL database details such as Database name, Host, Port, Username, and Password.
Example: To restore and clone a copy of the world database on the original server with new name world-clone.
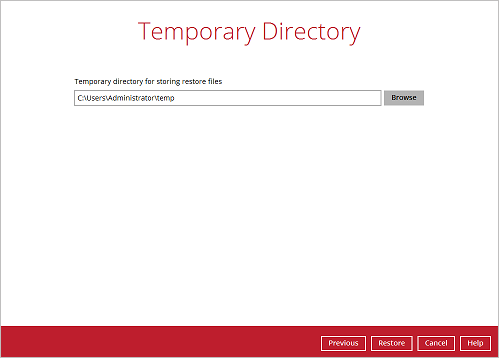
8. Confirm the temporary directory path is correct and then click Restore to proceed.
9. After the MySQL database(s) has been restored.
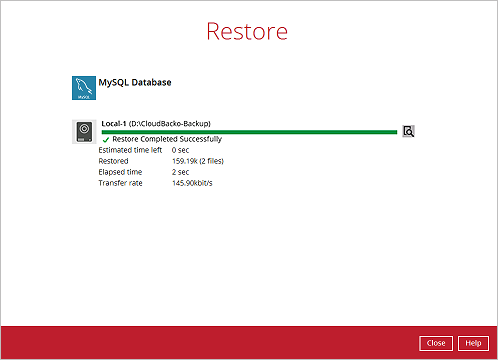
10. Using MySQL Command Line Client you can list the restored databases and tables.
Example: Listing the tables in the restore cloned database using show tables
mysql> show databases;
+--------------------+
| Database           |
+--------------------+
| information_schema |
| classicmodels      |         |
| mysql              |
| performance_schema |
| sakila             |
| world              |
| world-clone        |
+--------------------+
6 rows in set (0.06 sec)

mysql> show tables in `world-clone`;
+-----------------------+
| Tables_in_world-clone |
+-----------------------+
| city                  |
| country               |
| countrylanguage       |
+-----------------------+
3 rows in set (0.00 sec)

mysql>
Restore Raw Files (Manual Restore)
Manual restore involves 2 steps: 1). Restore the MySQL databases from your storage destination to a location on disk, and 2). manually recover the databases.
Restore the MySQL databases from your storage destination to a location on disk
1. In the CloudBacko Pro main interface, click the Restore icon.

2. Select the backup set that you would like to restore the MySQL Database from.

3. Select the storage destination that contains the MySQL databases that you would like to restore from.

4. Select to restore the MySQL database(s) from a specific backup job then select the files or folders that you would like to restore and select the Restore raw file option. Click Next to proceed.

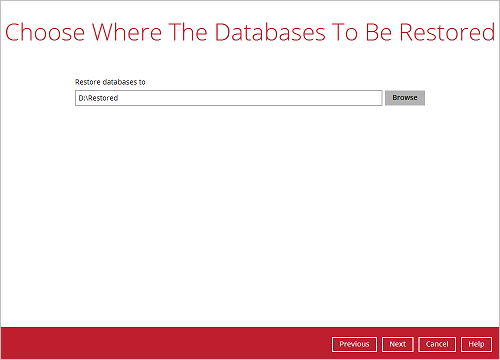
5. Select the location on the local machine you wish to restore the MySQL database files to. Click Next to proceed.
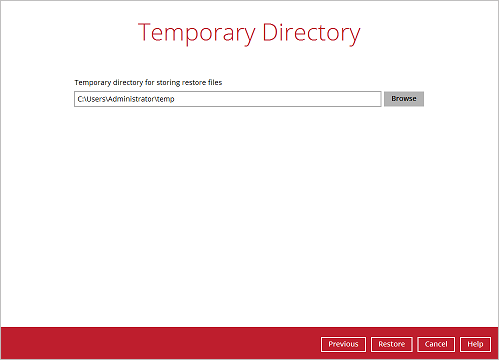
6. Confirm the temporary directory path is correct and then click Restore to proceed.
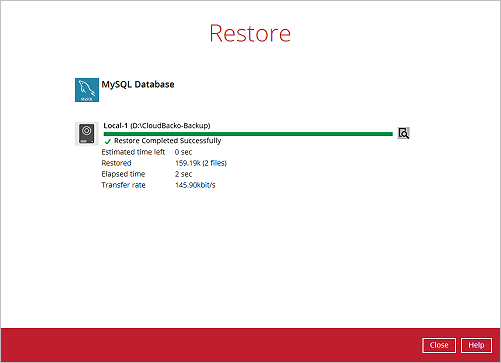
7. After the MySQL database(s) has been restored.
8. Check the location on the local machine to verify the MySQL database files have been restored.
Example: Using Windows File Explorer
Manually recover the databases
1. Login to MySQL Server using MySQL Command Line Client and verify the database instance is running.
Enter password: ******
Welcome to the MySQL monitor.  Commands end with ; or \g.
Your MySQL connection id is 10
Server version: 5.6.31-log MySQL Community Server (GPL)

Copyright (c) 2000, 2016, Oracle and/or its affiliates. All rights reserved.

Oracle is a registered trademark of Oracle Corporation and/or its
affiliates. Other names may be trademarks of their respective
owners.

Type 'help;' or '\h' for help. Type '\c' to clear the current input statement.

mysql> show databases;
+--------------------+
| Database           |
+--------------------+
| information_schema |
| mysql              |
| performance_schema |
+--------------------+
3 rows in set (0.00 sec)

mysql>
2. Create the database names that need to be recovered. Example: classicmodels, sakila, and world.
mysql> create database classicmodels;
Query OK, 1 row affected (0.02 sec)

mysql> create database sakila;
Query OK, 1 row affected (0.00 sec)

mysql> create database world;
Query OK, 1 row affected (0.00 sec)
3. Recover Databases - Repeat the following steps for all databases you wish to restore.
mysql> use classicmodels;
mysql> source d:\restored\MySQL\classicmodels.sql
Query OK, 0 rows affected (0.01 sec)

Query OK, 7 rows affected (0.00 sec)
Records: 7  Duplicates: 0  Warnings: 0

Query OK, 110 rows affected (0.00 sec)
Records: 110  Duplicates: 0  Warnings: 0

Query OK, 122 rows affected (0.00 sec)
Records: 122  Duplicates: 0  Warnings: 0

mysql> use sakila;
mysql> source /restored/MySQL/sakila.sql
Query OK, 0 rows affected (0.01 sec)

Query OK, 148 rows affected (1.9 sec)
Records: 148  Duplicates: 0  Warnings: 0

mysql> use world;
mysql> source /restored/MySQL/world.sql

Query OK, 0 rows affected (0.00 sec)

Query OK, 4079 rows affected (0.03 sec)
Records: 4079  Duplicates: 0  Warnings: 0

Query OK, 0 rows affected (0.01 sec)
4. Check the database status Example: Listing the tables in the database using show tables
mysql> show databases;
+--------------------+
| Database           |
+--------------------+
| information_schema |
| classicmodels      |
| mysql              |
| performance_schema |
| sakila             |
| world              |
+--------------------+
7 rows in set (0.06 sec)

mysql> show tables in world;
+-----------------+
| Tables_in_world |
+-----------------+
| city            |
| country         |
| countrylanguage |
| departments     |
| dept_emp        |
| dept_manager    |
| employees       |
| salaries        |
| titles          |
+-----------------+
9 rows in set (0.00 sec)

mysql> show tables in classicmodels;
+----------------------------+
| Tables_in_classicmodels    |
+----------------------------+
| actor                      |
| actor_info                 |
| address                    |
| category                   |
| city                       |
| country                    |
| countrylanguage            |
| customer                   |
| customer_list              |
| customers                  |
| departments                |
| dept_emp                   |
| dept_manager               |
| employees                  |
| film                       |
| film_actor                 |
| film_category              |
| film_list                  |
| film_text                  |
| inventory                  |
| language                   |
| nicer_but_slower_film_list |
| offices                    |
| orderdetails               |
| orders                     |
| payment                    |
| payments                   |
| productlines               |
| products                   |
| rental                     |
| salaries                   |
| sales_by_film_category     |
| sales_by_store             |
| staff                      |
| staff_list                 |
| store                      |
| titles                     |
+----------------------------+
37 rows in set (0.00 sec)
