3.2. Creating an Office 365 Backup Set with Hybrid Authentication
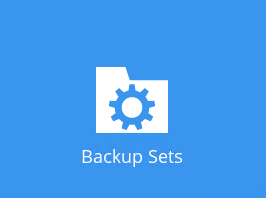
1. In the AhsayOBM main interface, click Backup Sets.
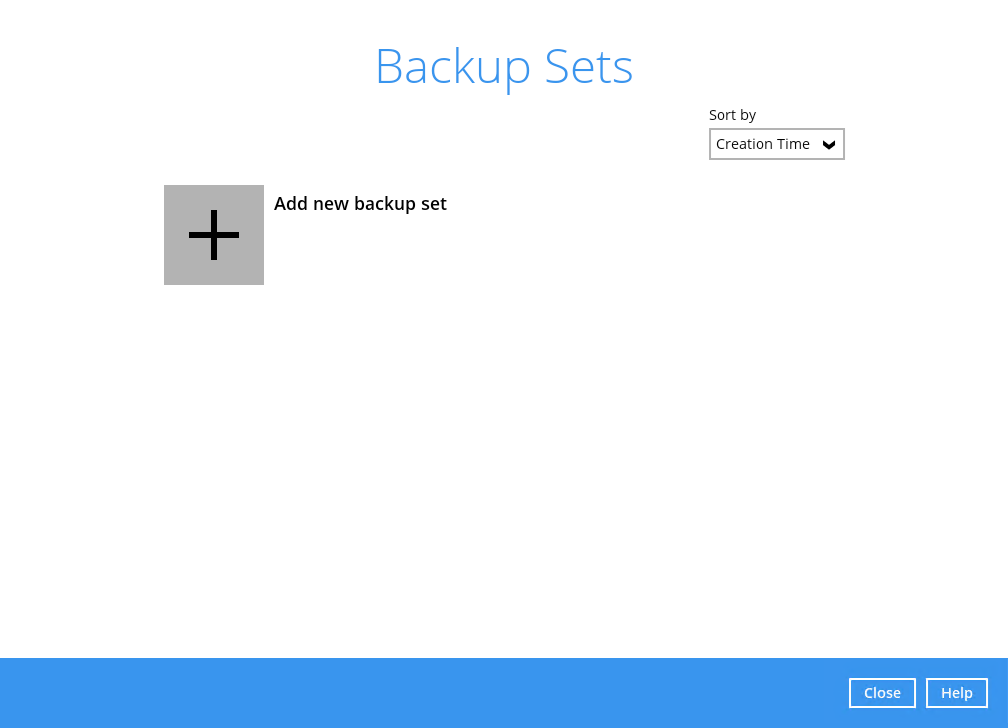
2. Click the “+” icon next to Add new backup set.
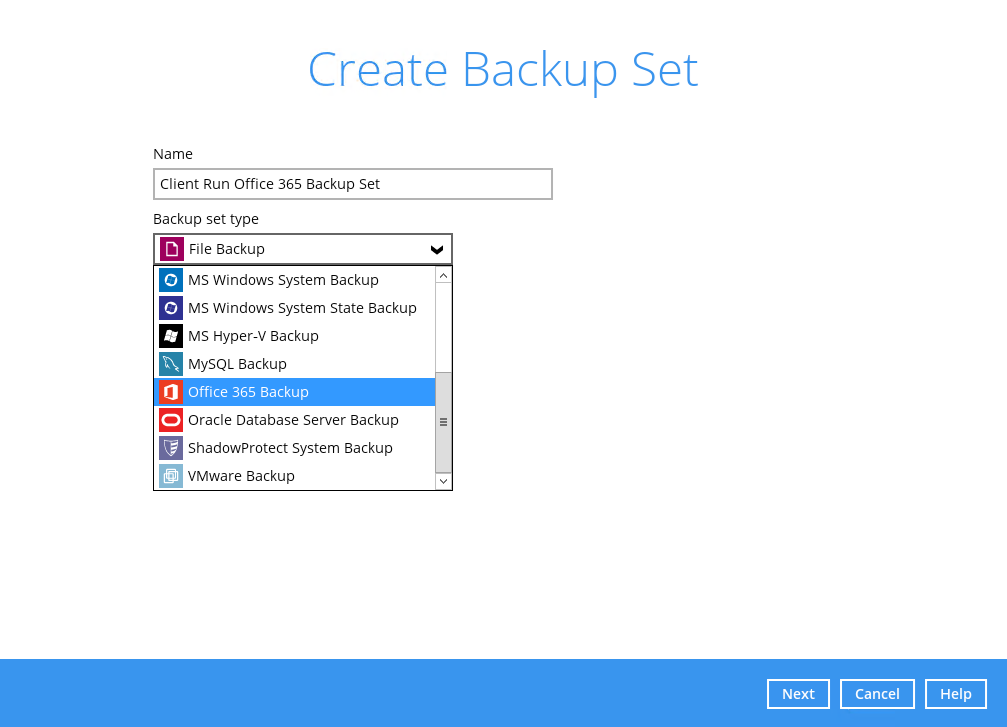
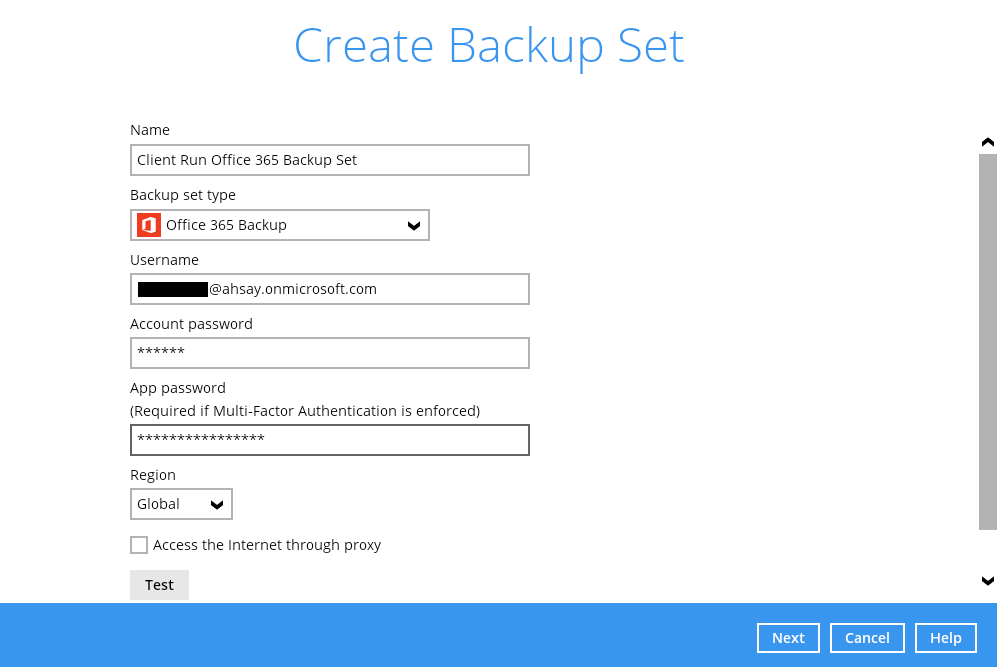
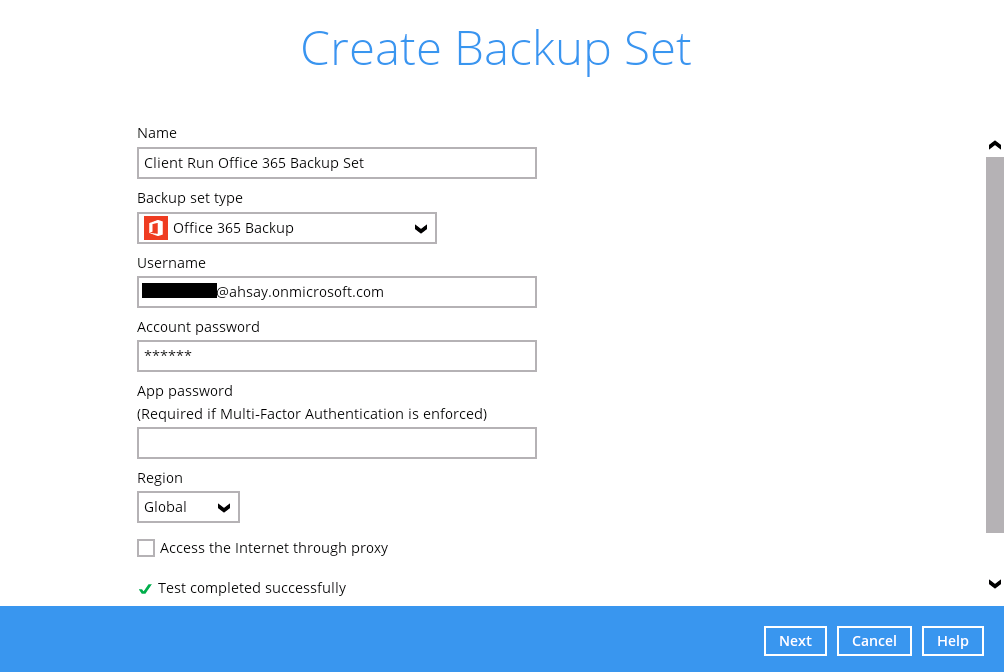
3. Enter a Name for your backup set and select Office 365 Backup as the Backup set type.
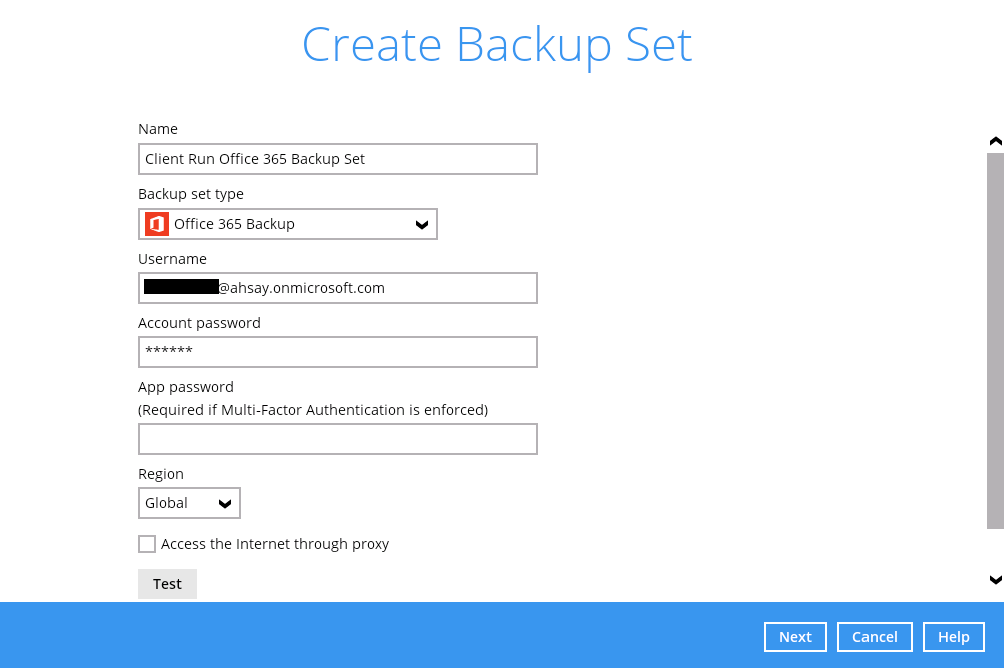
- If MFA is not enforced, enter the Username and Account password. Select the Region and click Test.
- If MFA is enforced, enter the Username, Account password and App password then click Test.
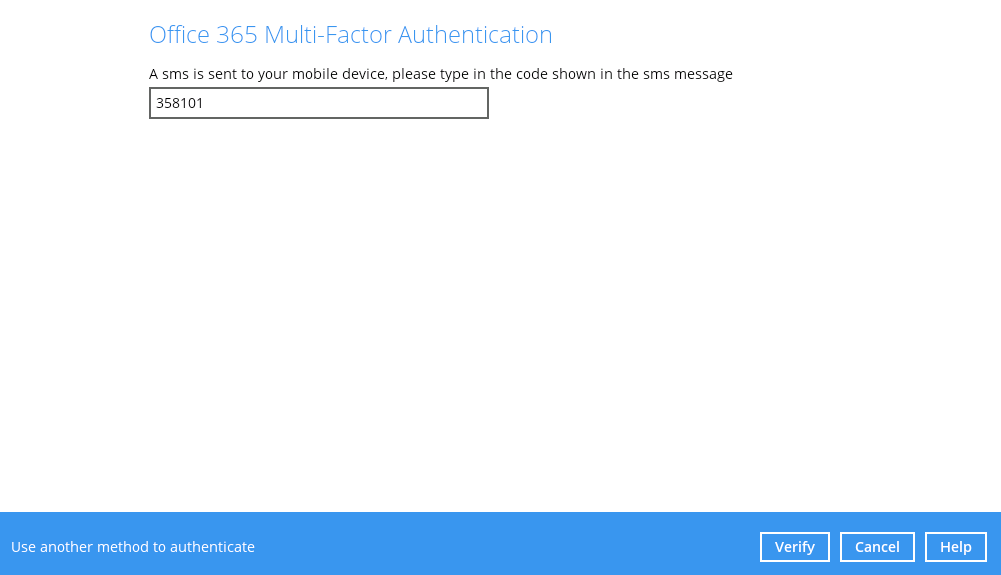
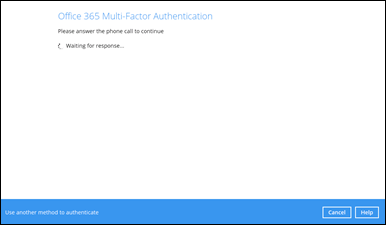
Enter the code sent to your mobile device and click Verify.
or
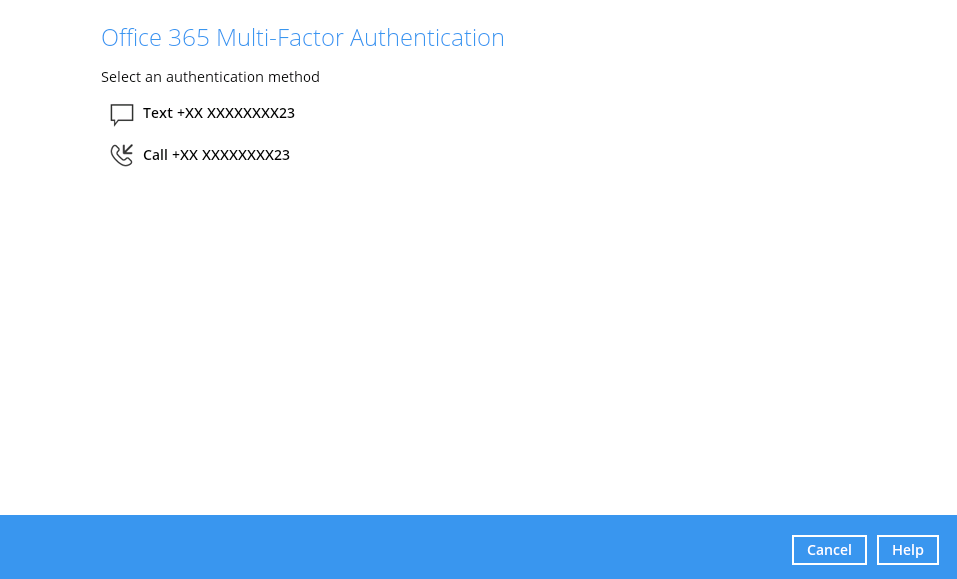
If you click Use another method to authenticate link, select between Text or Call.
- The App password is only required if the MFA status of an Office 365 account is enforced.
- If the MFA of the Office 365 user account will be enabled later on, it is highly advisable to login to AhsayOBM and re-authenticate the Office 365 user account’s credential using the MFA App password. Otherwise the scheduled backups of the Office 365 backup set will stop working.
Click Authorize to start the authentication process.
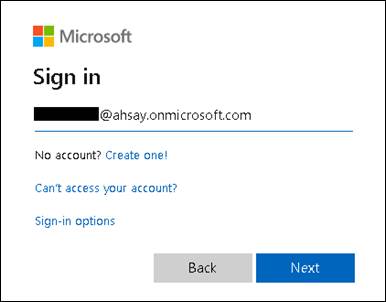
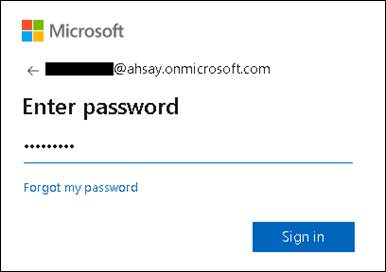
Sign in to your Microsoft account.
If MFA is enforced for the Office 365 user account used to authenticate the backup set, enter the verification code sent to your mobile device and click Verify.
The verification code is only required if the MFA status of an Office 365 account is enforced.
Copy the authorization code.
Go back to AhsayOBM and paste the authorization code. Click OK to proceed.
Test completed successfully shows when the validation is successful. Press Next to proceed to the next step.
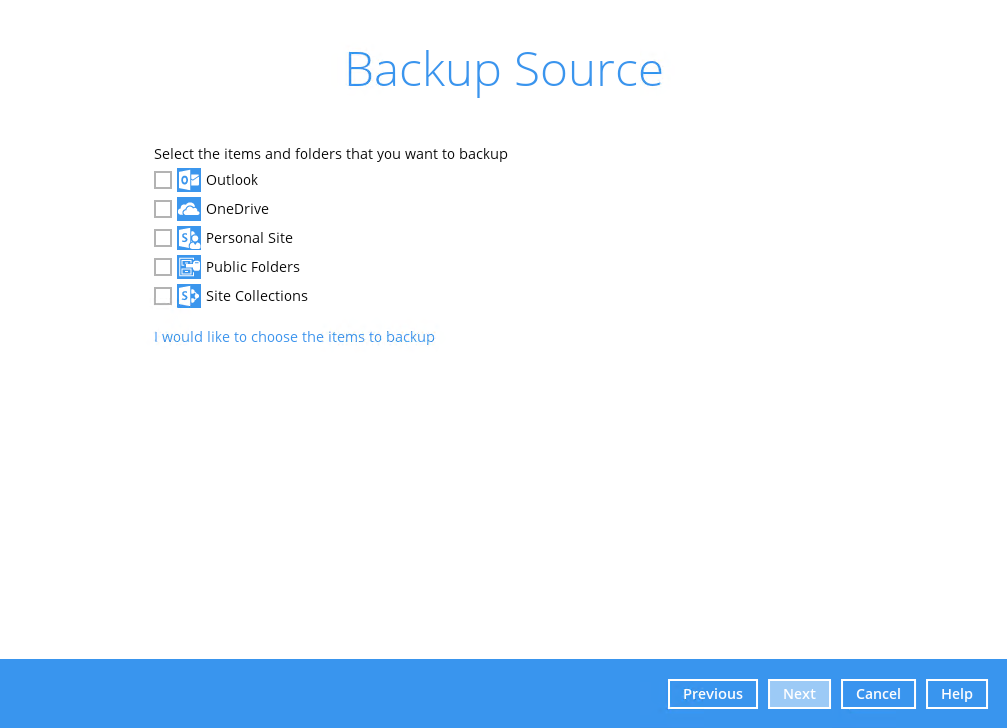
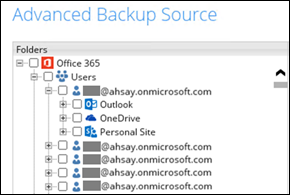
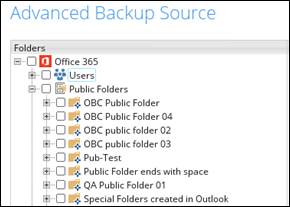
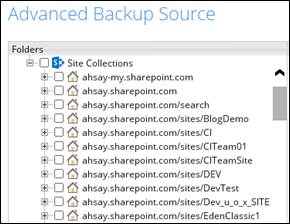
4. In the Backup Source menu, select the desired Outlook, OneDrive, Personal Site, Public Folders or Site Collections for backup.
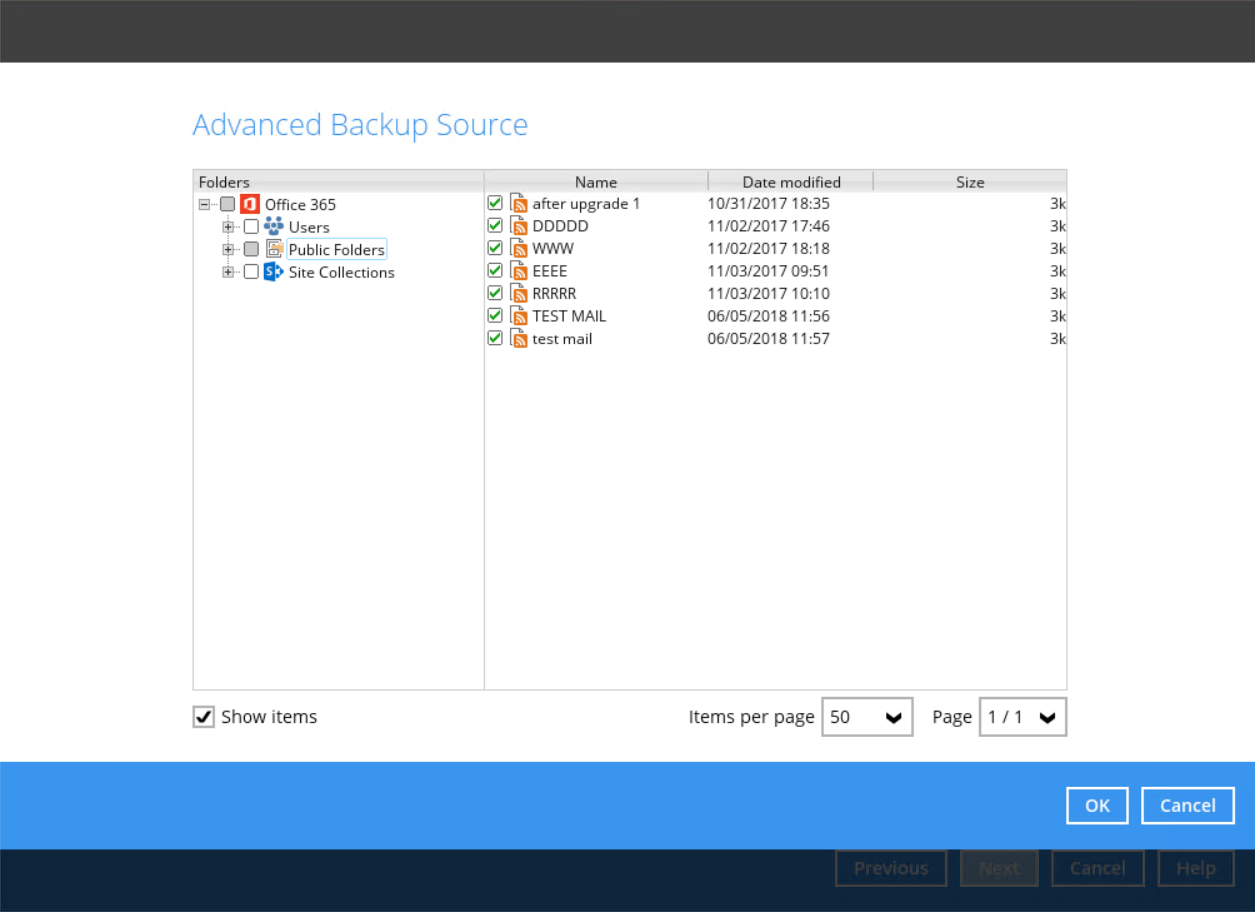
Or click I would like to choose the items to backup to choose the detailed items to backup. Enable the Show items checkbox at the bottom left corner if you would like to choose individual items for backup.
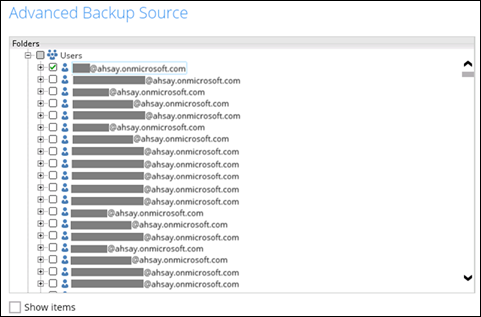
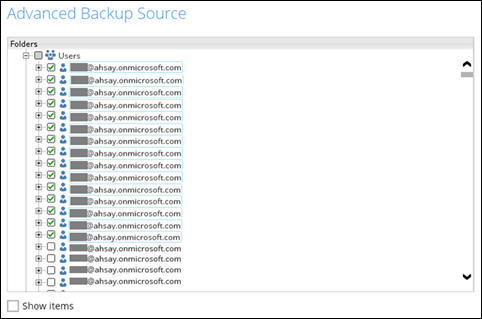
If you will select a large number of items to backup, like 1000 items, you need to click on these 1000 items to select/deselect them individually. Now there is a shortcut that you can use to lessen the burden of selecting/deselecting every 1000 item. You can select/deselect all 100 items at once by using the Shift key. As an example, we will only show how to do this by selecting only 15 users which would fit in our screen. Follow the steps below on how to do this:
i. Select the first user.
ii. Scroll down to the 15th user.
iii. Hold the Shift key then click the 15th user. All the 15 users are now selected.
Below are example screenshots for the Users, Public Folders, and Site Collections.
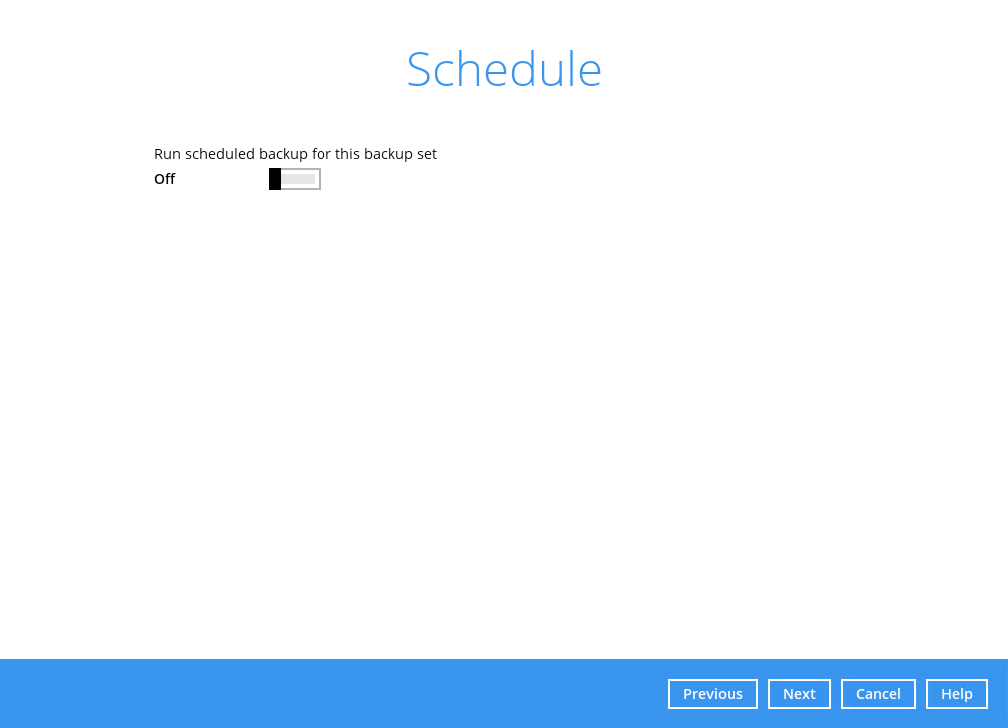
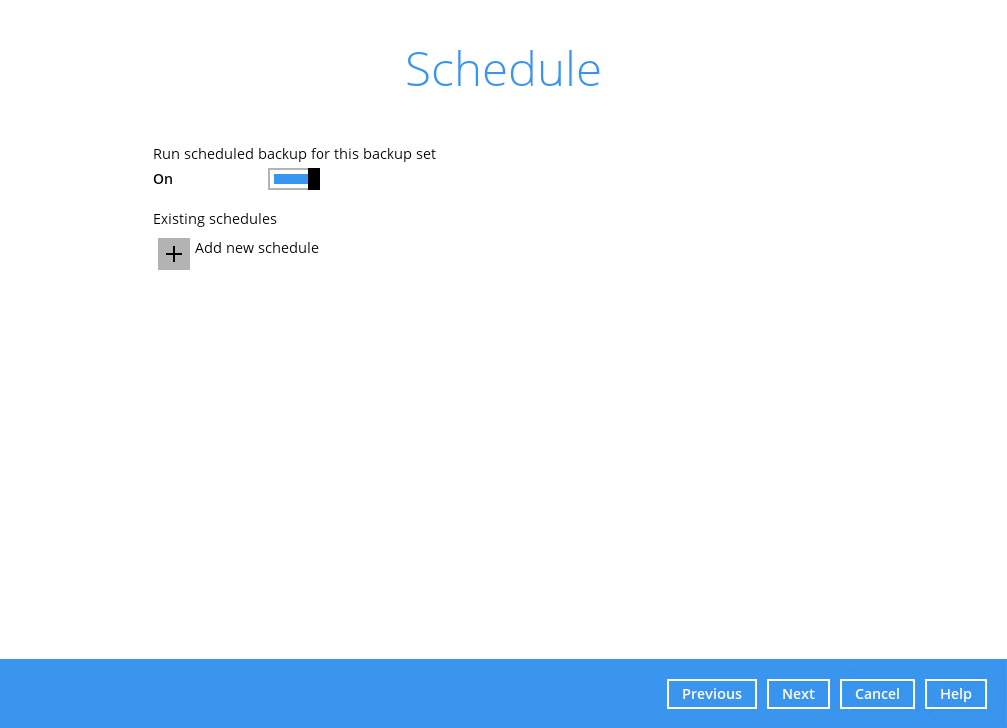
5. In the Schedule menu, configure a backup schedule for backup job to run automatically at your specified time interval. Slide the on/off button to turn on this feature, then click Add new schedule to add a new schedule, then click Next to proceed afterward.
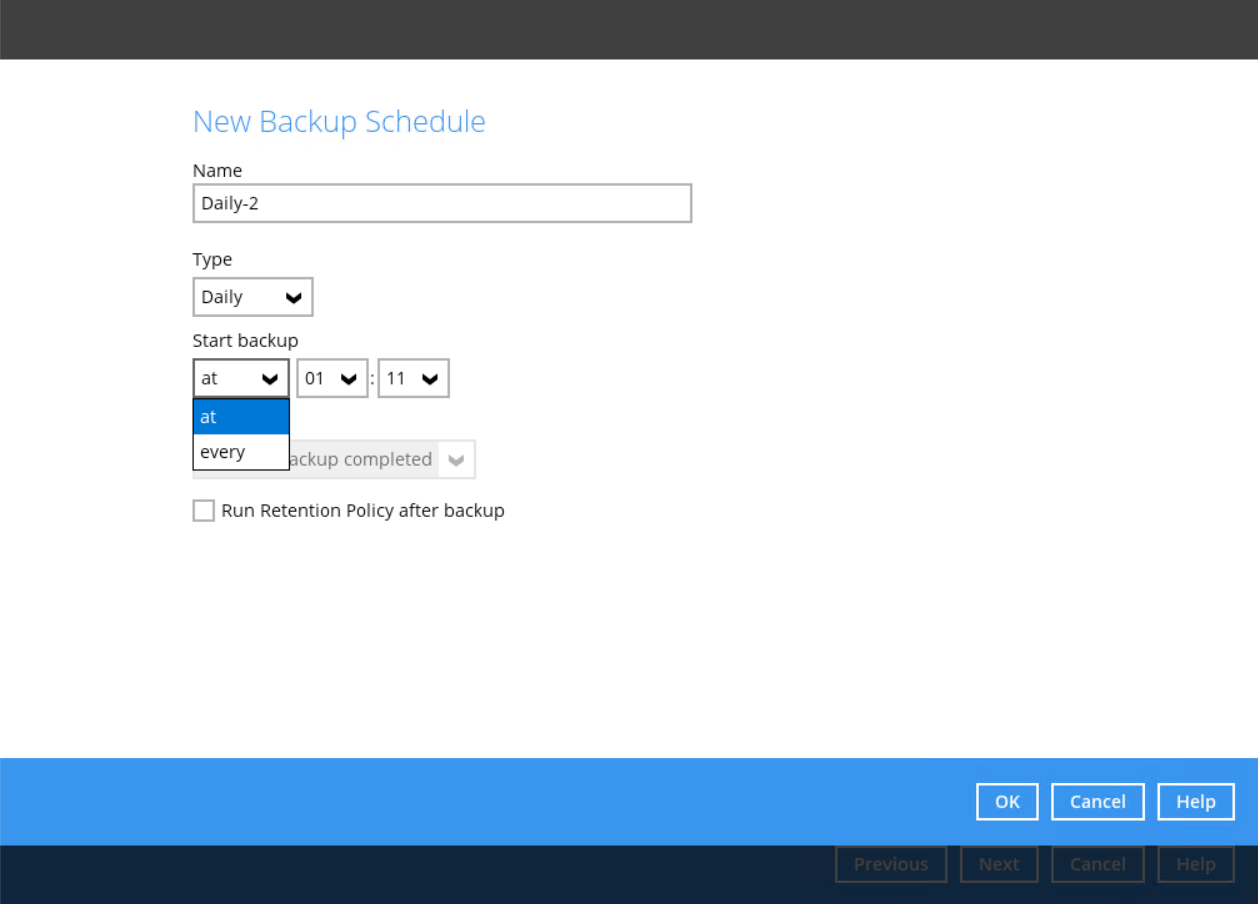
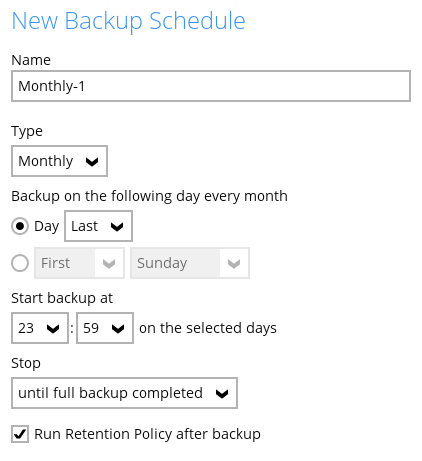
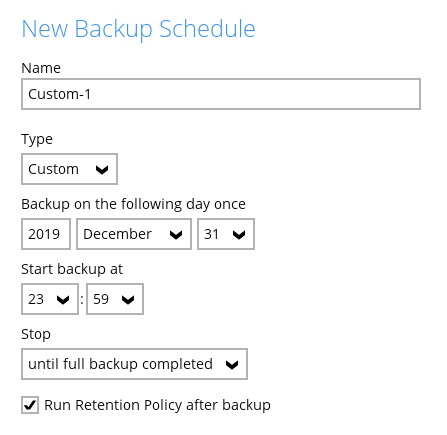
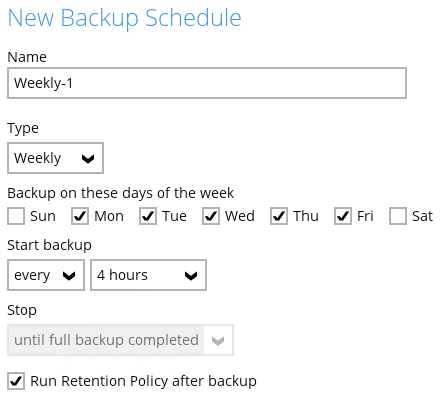
In the New Backup Schedule window, configure the following backup schedule settings.
- Name – the name of the backup schedule.
- Type – the type of the backup schedule. There are four (4) different types of backup schedule: Daily, Weekly, Monthly and Custom.
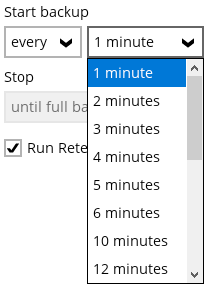
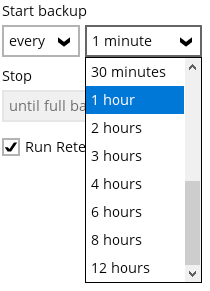
- Start backup – the start time of the backup job.
at – this option will start a backup job at a specific time.
every – this option will start a backup job in intervals of minutes or hours.
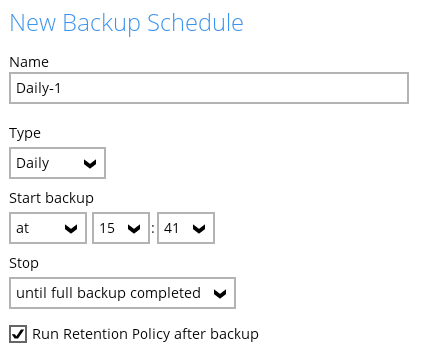
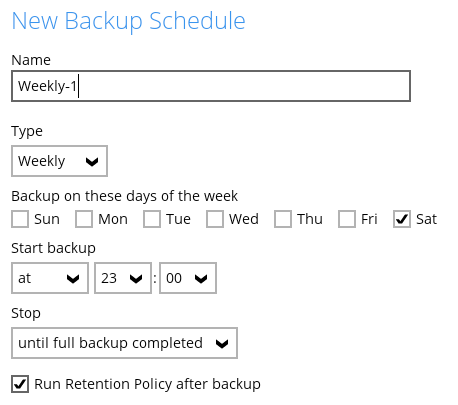
Here is an example of backup set that has a periodic and normal backup schedule.
Figure 1.1 - Periodic schedule every 4 hours Monday - Friday during business hours
- Stop – the stop time of the backup job. This only applies to schedules with start backup “at” and is not supported for periodic backup schedule (start backup “every”)
until full backup completed – this option will stop a backup job once it is complete. This is the configured stop time of the backup job by default.
after (defined no. of hrs.) – this option will stop a backup job after a certain number of hours regardless of whether the backup job has completed or not. This can range from 1 to 24 hrs.
The number of hours must be enough to complete a backup of all files in the backup set. For small files in a backup, if the number of hours is not enough to back up all files, then the outstanding files will be backed up in the next backup job. However, if the backup set contains large files, this may result in partially backed up files.
For example, if a backup set has 100GB file size which will take approximately 15 hours to complete on your environment, but you set the “stop” after 10 hours, the file will be partially backed up and cannot be restored. The next backup will upload the files from scratch again.
The partially backed up data will have to be removed by running the data integrity check.
As a general rule, it is recommended to review this setting regularly as the data size on the backup machine may grow over time.
- Run Retention Policy after backup – if enabled, the AhsayOBM will run a retention policy job to remove files from the backup destination(s) which have exceeded the retention policy after performing a backup job.
Click the [OK] button to save the configured backup schedule settings.
Click the [Next] button to proceed. Multiple backup schedules can be created.
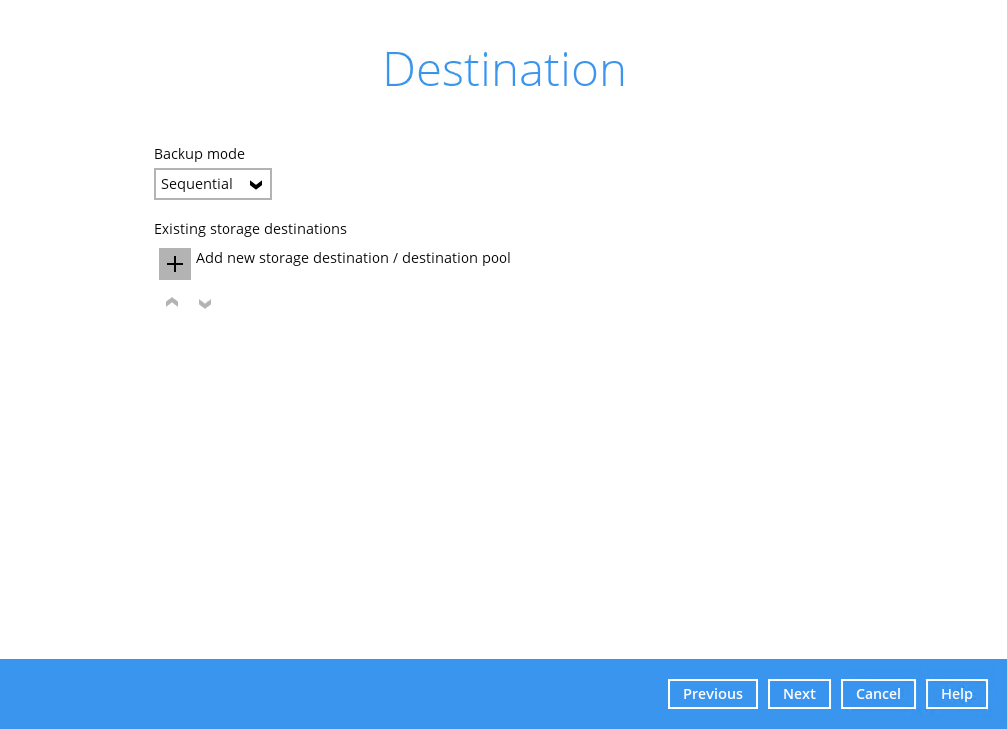
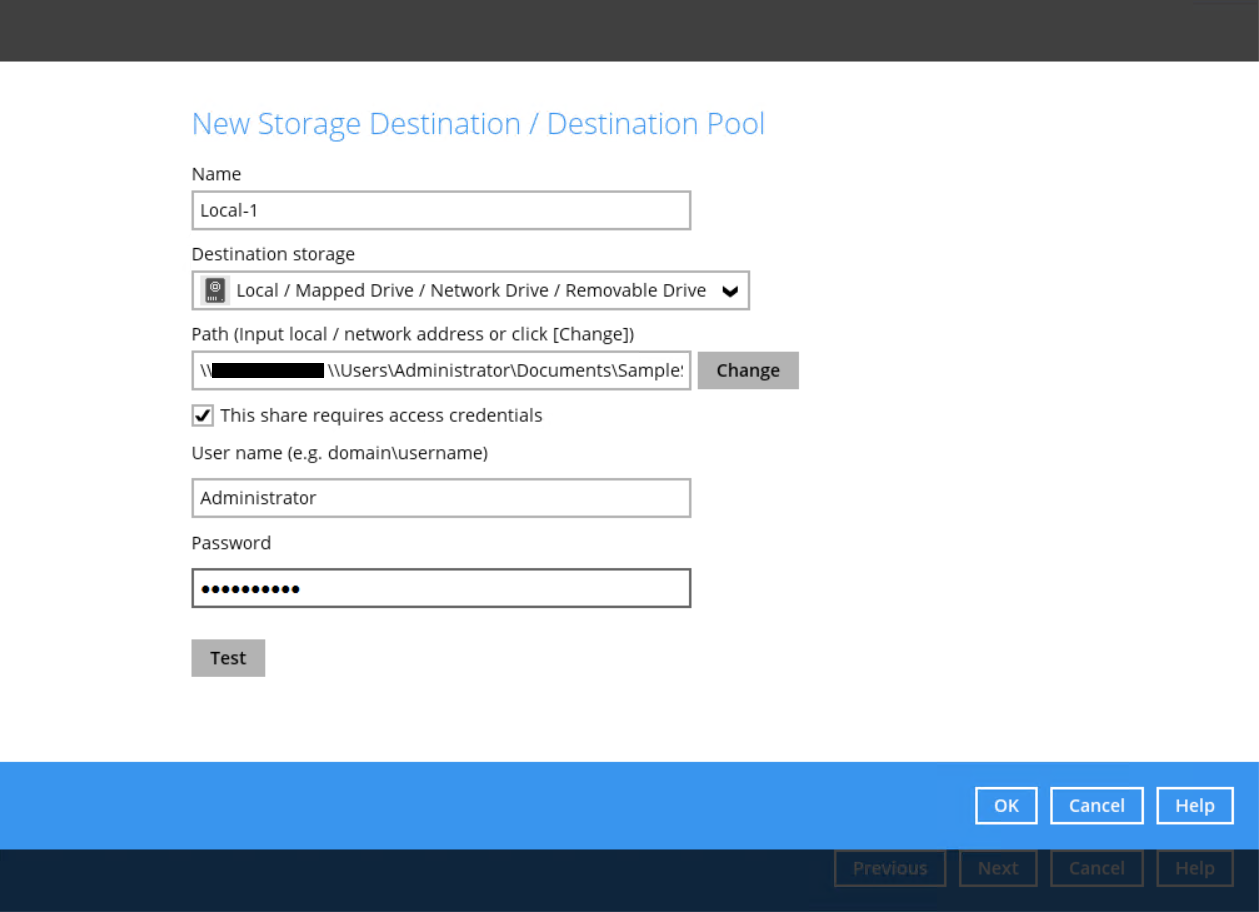
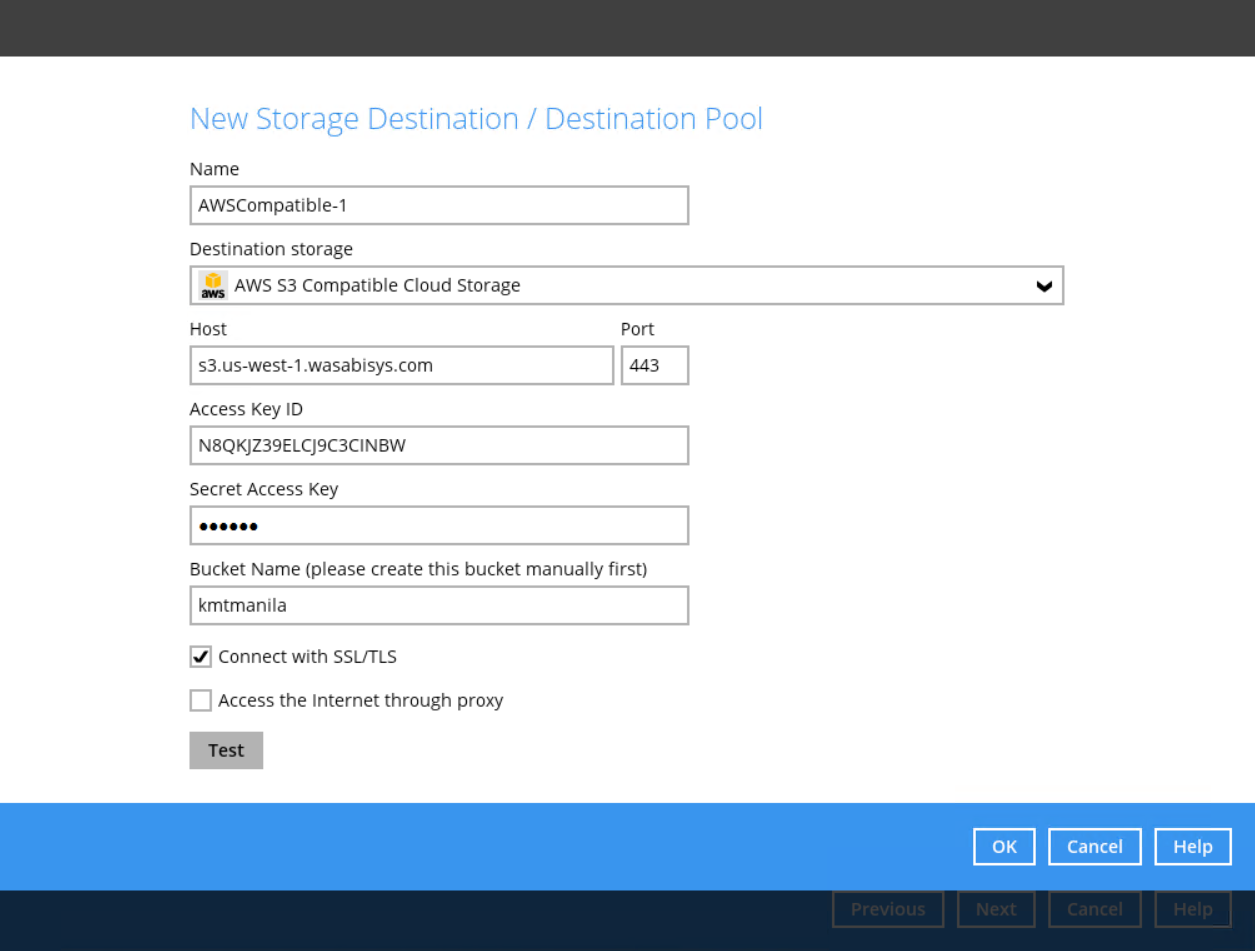
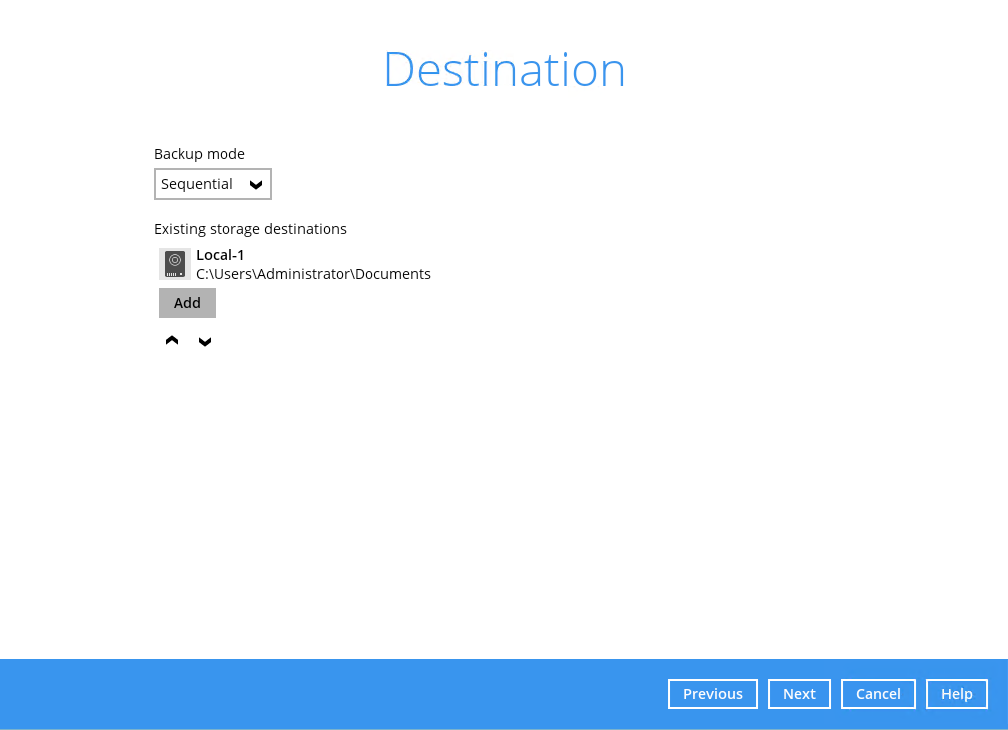
6. In the Destination menu, select a backup destination where the backup data will be stored. Click the “+” icon next to Add new storage destination / destination pool.
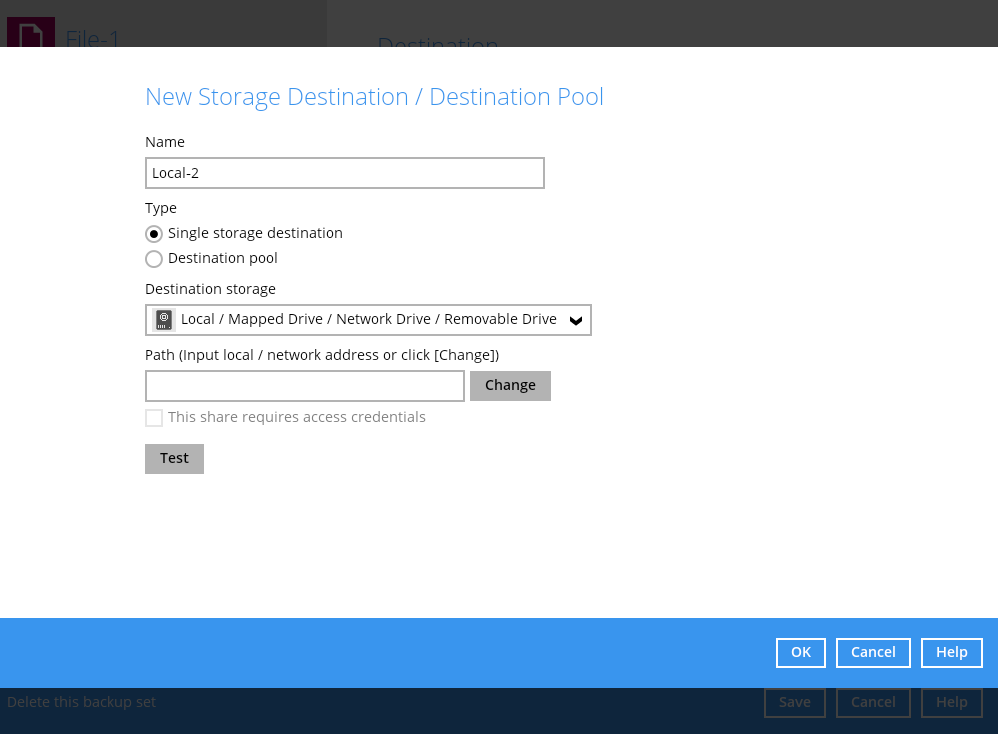
Select storage destinations.
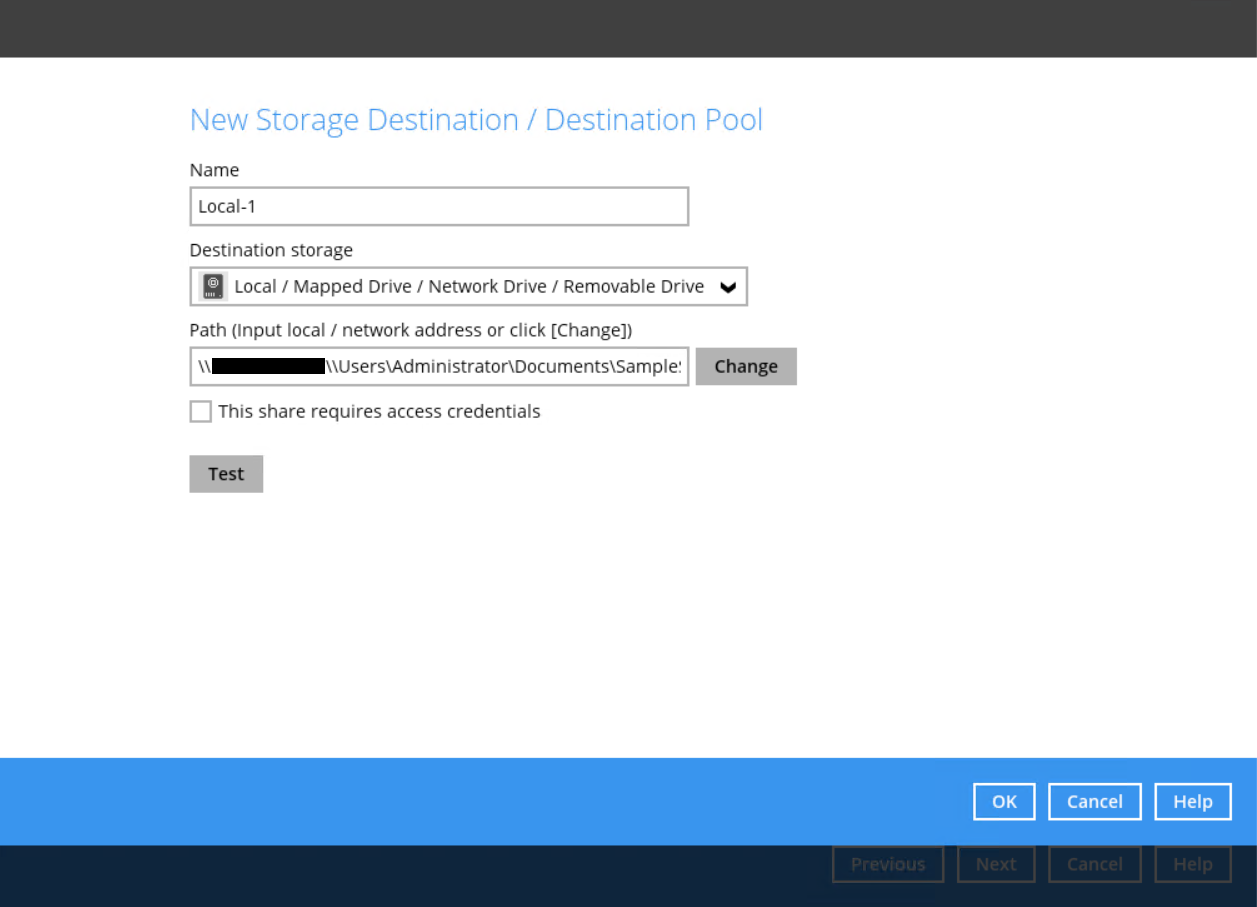
You can choose a storage combination of the Local/Mapped Drive/Network Drive/Removable Drive or Cloud storage. Click OK to proceed when you are done with the settings.
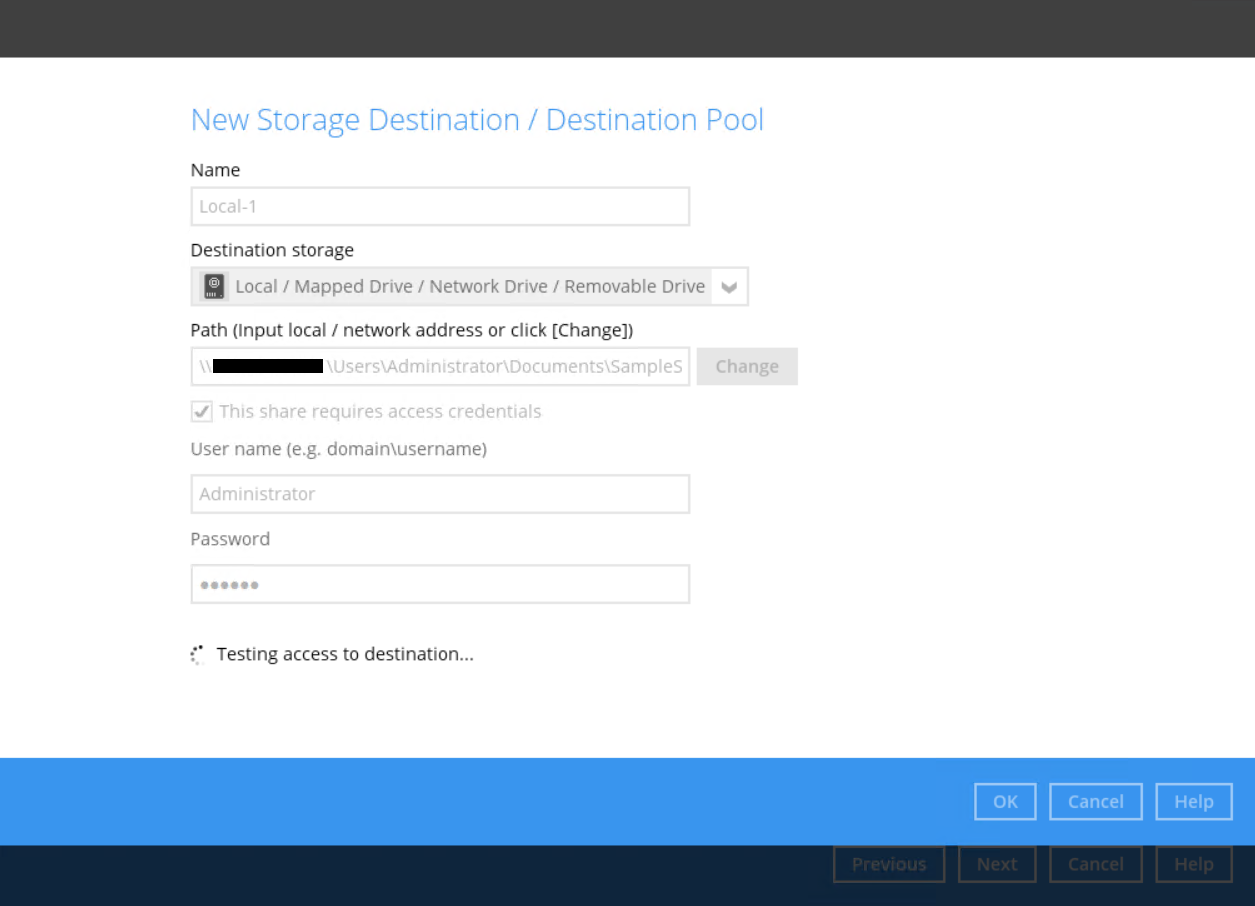
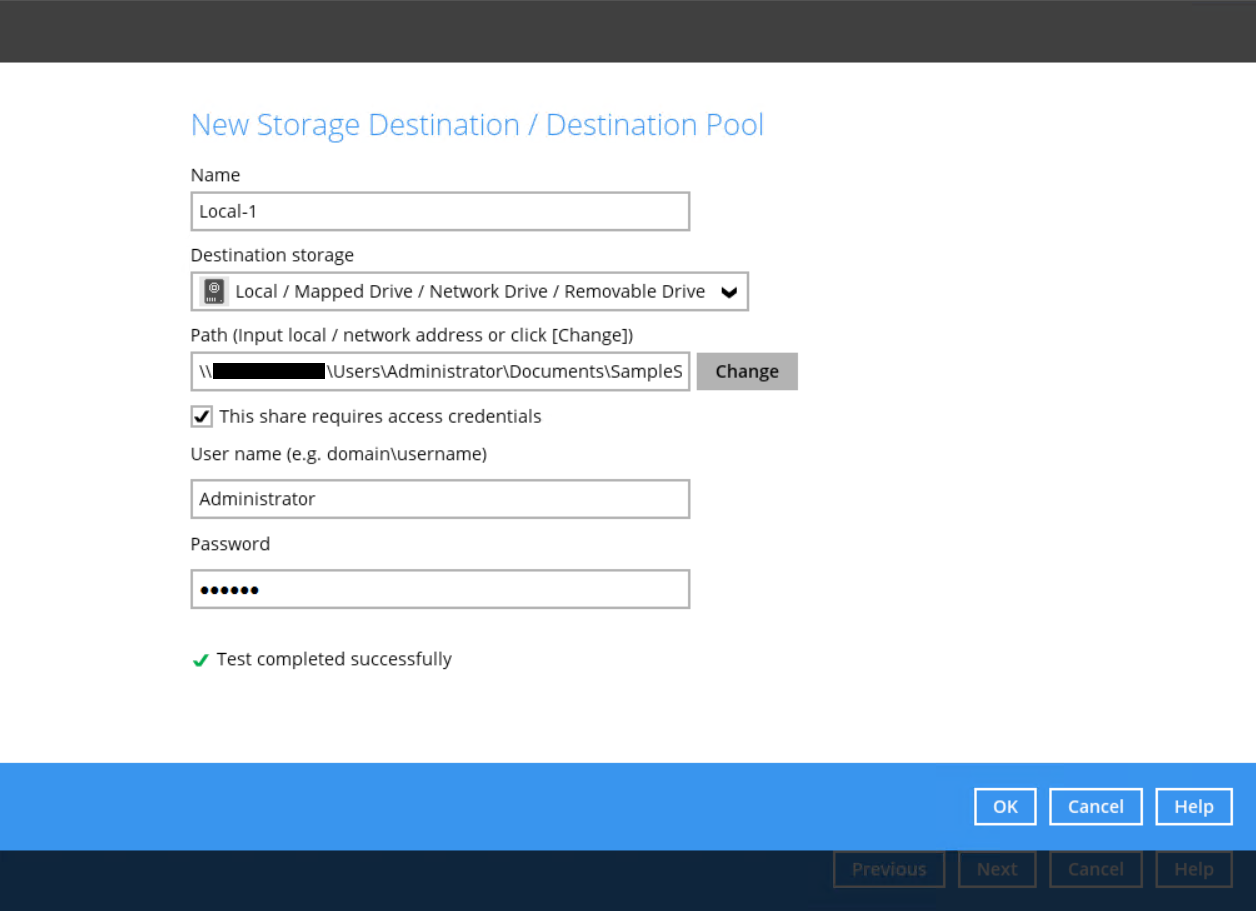
- If you have chosen the Local / Mapped Drive / Network Drive / Removable Drive option, click Change to browse to a directory path where backup data will be stored, then click Test to validate the path. Test completed successfully shows when the validation is done.
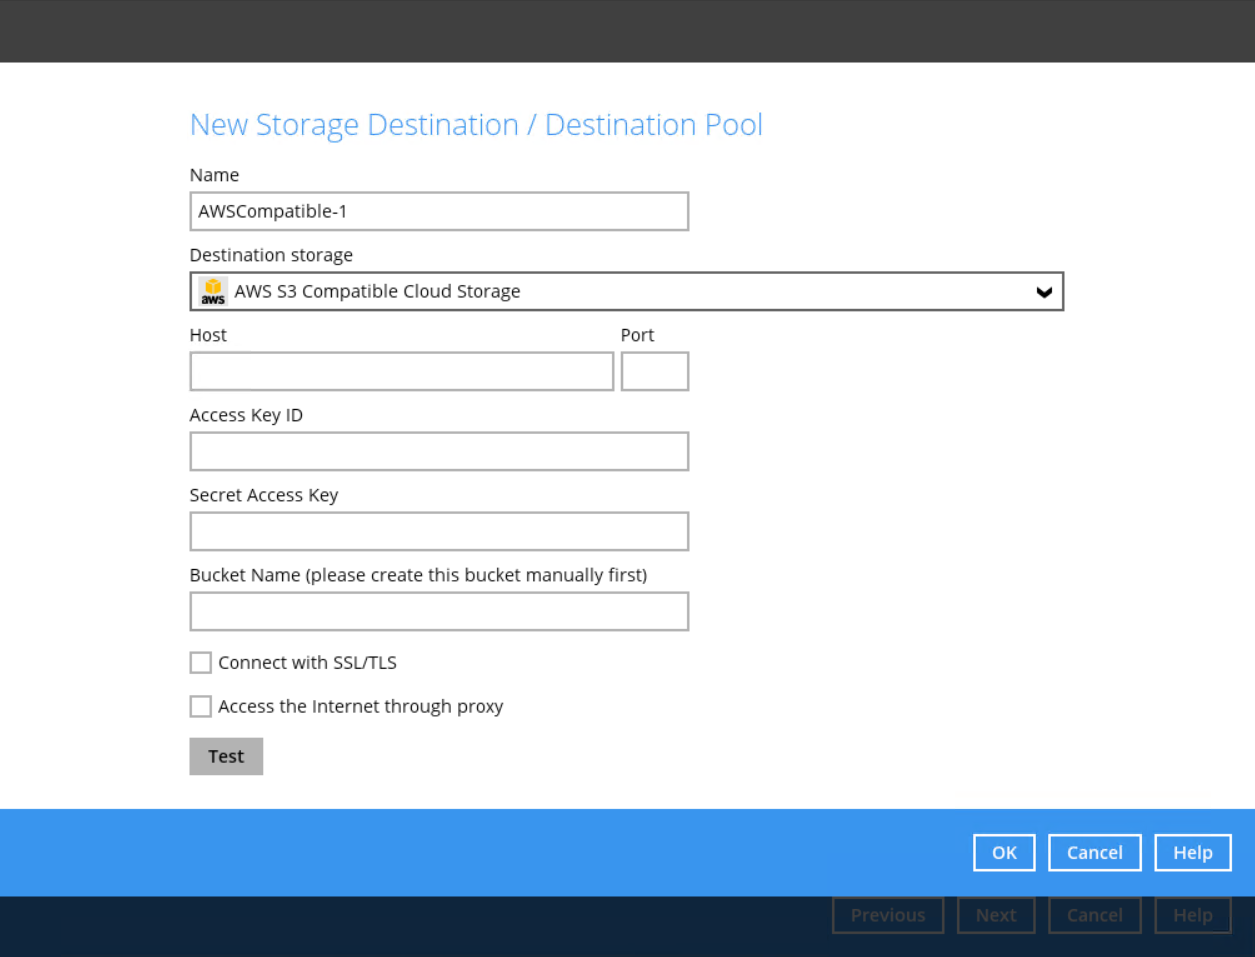
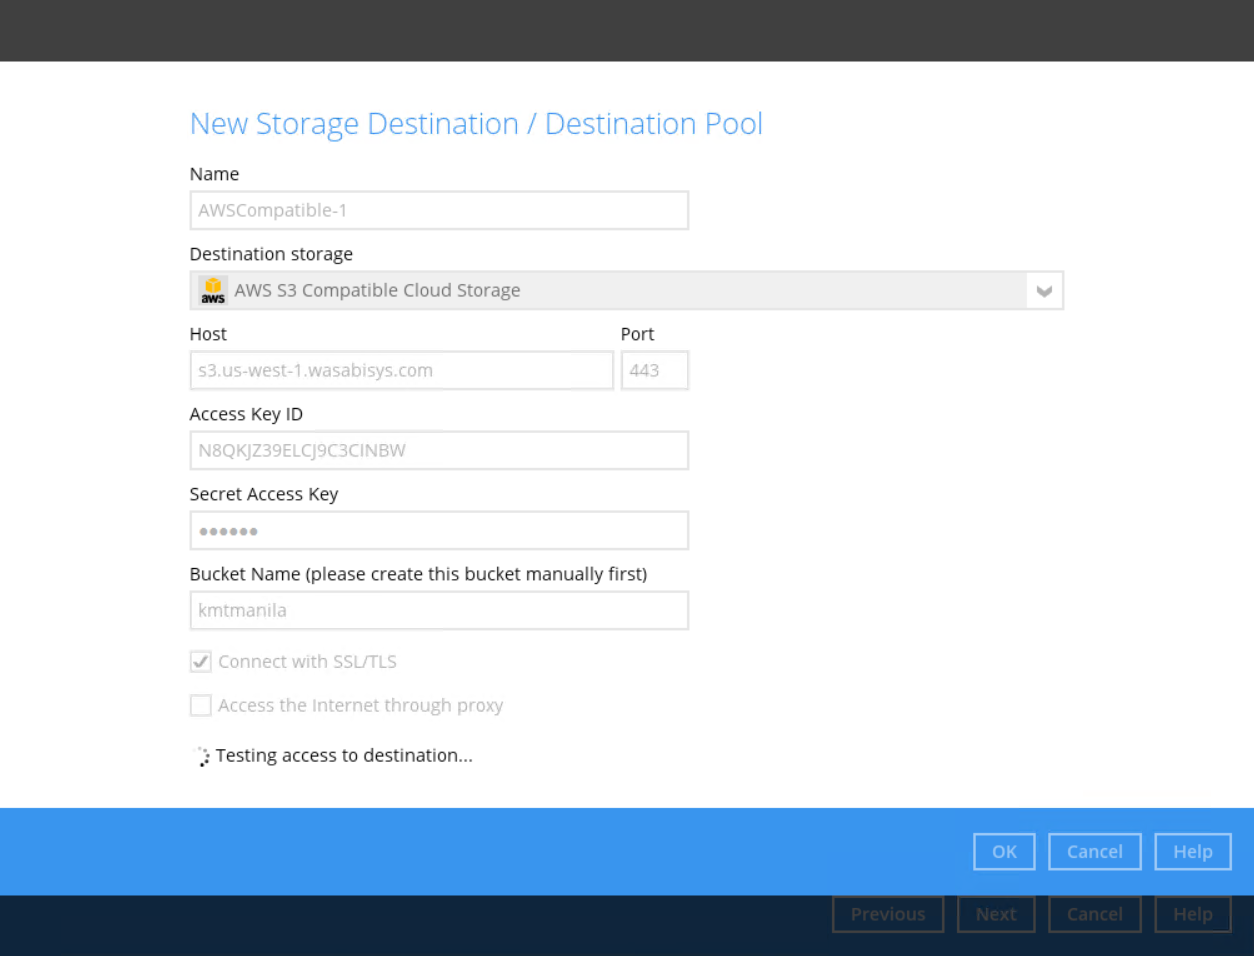
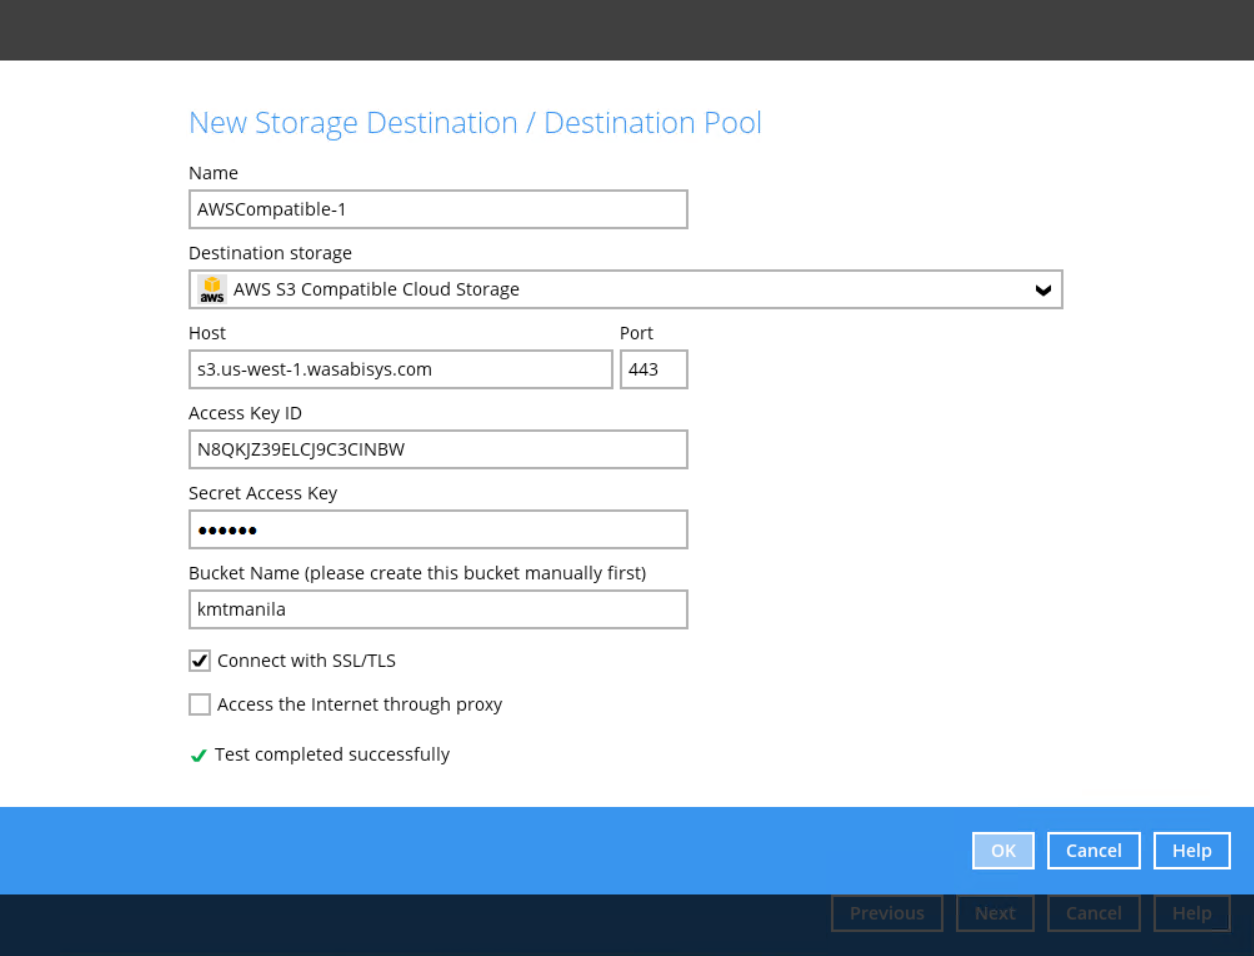
- If you have chosen the AWS S3 Compatible Cloud Storage, select from the destination storage then click OK. Enter the required details and click Test to validate. Test completed successfully shows when the validation is done.
You can add multiple storage destinations. The backup data will be uploaded to all the destinations you have selected in the order you added them. Press the icon to alter the order. Click Next to proceed when you are done with the selection.
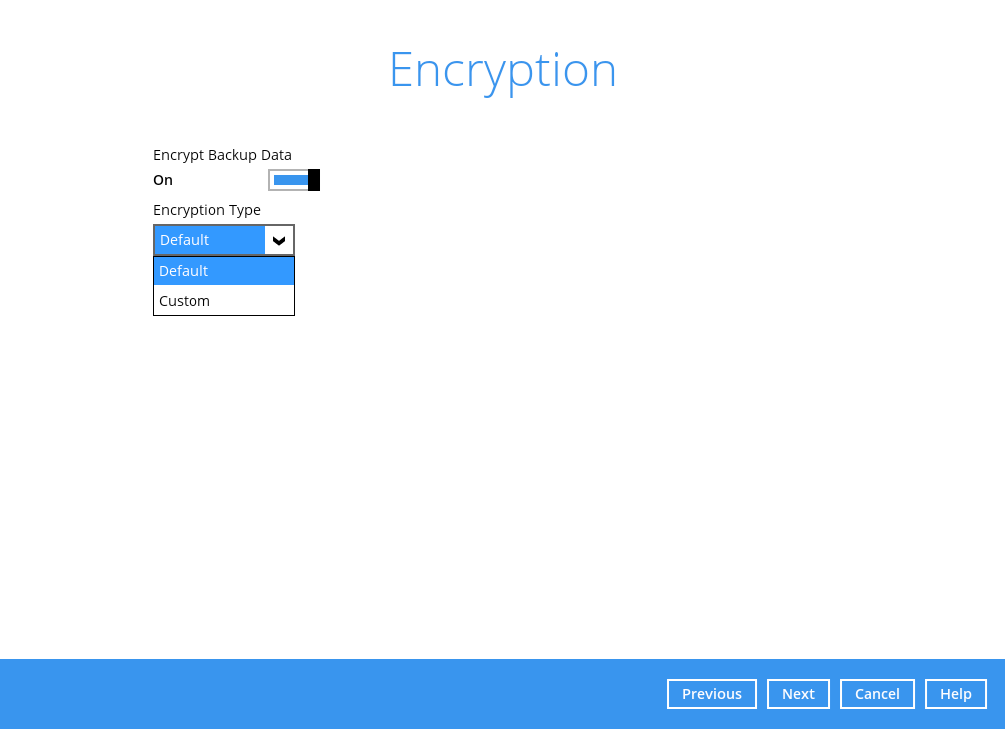
7. In the Encryption window, the default Encrypt Backup Data option is enabled with an encryption key preset by the system which provides the most secure protection.
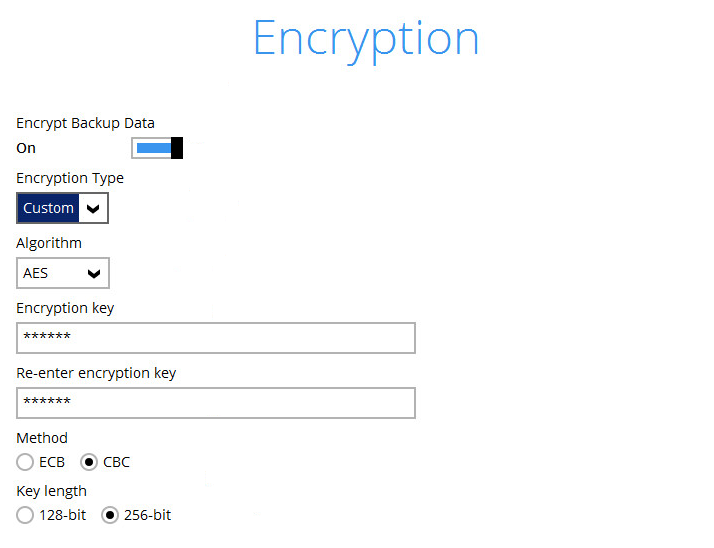
You can choose from one of the following 2 Encryption Type options:
- Default – an encryption key with 44 alpha numeric characters will be randomly generated by the system
- Custom – you can customize your encryption key, where you can set your own algorithm, encryption key, method and key length.
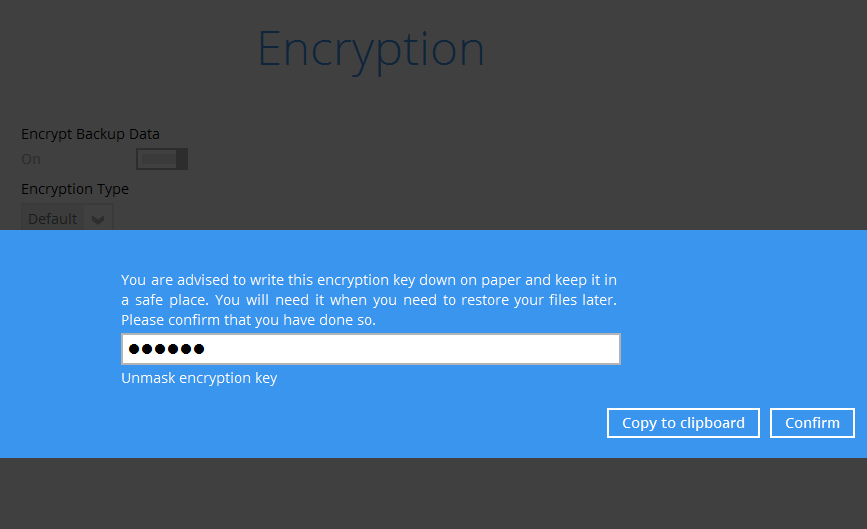
8. If you have enabled the Encryption Key feature in the previous step, the following pop-up window shows, no matter which encryption type you have selected.
The pop-up window has the following three options to choose from:
Unmask encryption key – The encryption key is masked by default. Click this option to show the encryption key.
Copy to clipboard – Click to copy the encryption key, then you can paste it in another location of your choice.
Confirm – Click to exit this pop-up window and proceed to the next step.
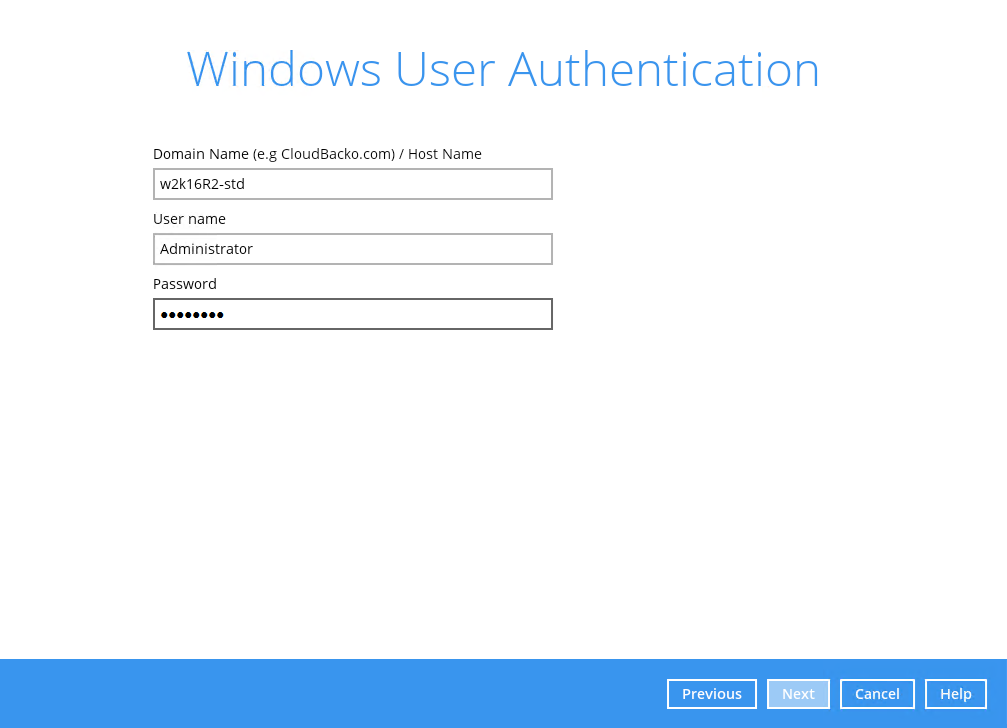
9. If you have enabled the scheduled backup option, you will be prompted to enter the User Name and Password of the Windows account that will be running the backup.
Click Next to create the backup set.
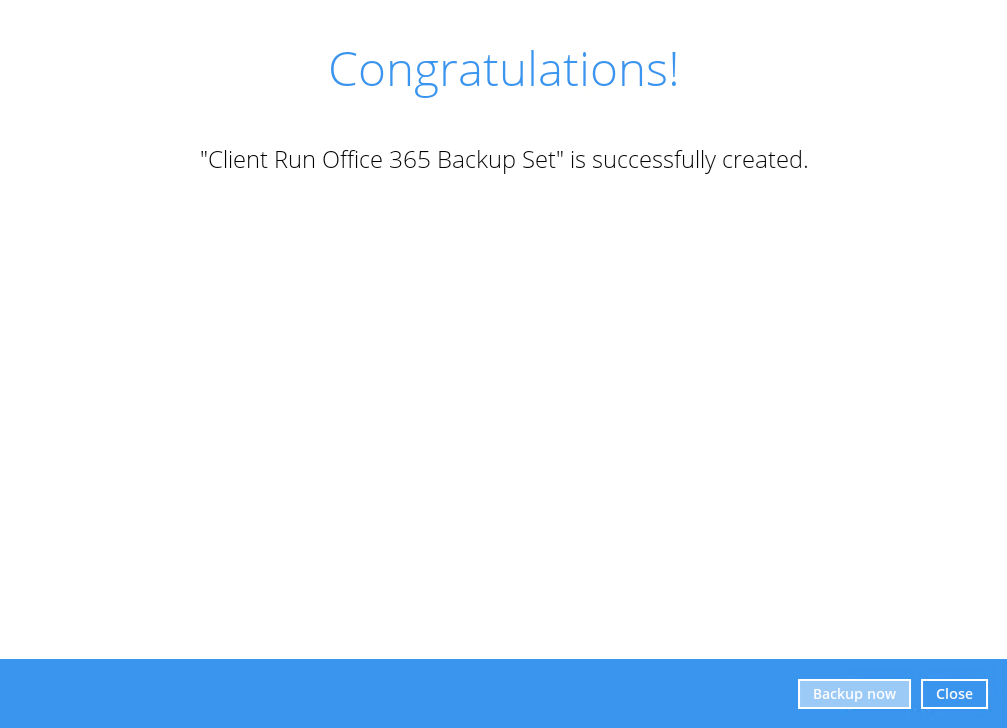
10. The following screen is displayed when the new Office 365 backup set is created successfully. Click Close to go back to main screen.
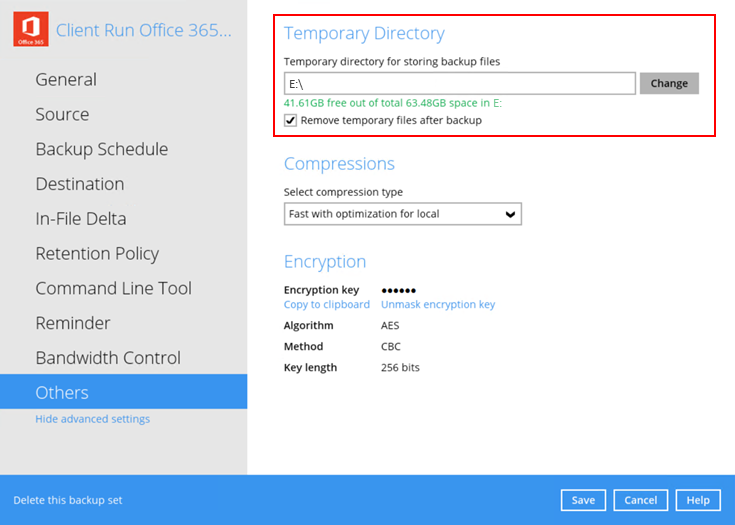
11. Based on Best Practices and Recommendations, it is highly recommended to change the Temporary Directory. Select another location with sufficient free disk space other than Dive C.
Go to Others > Temporary Directory. Click Change to browse for another location.
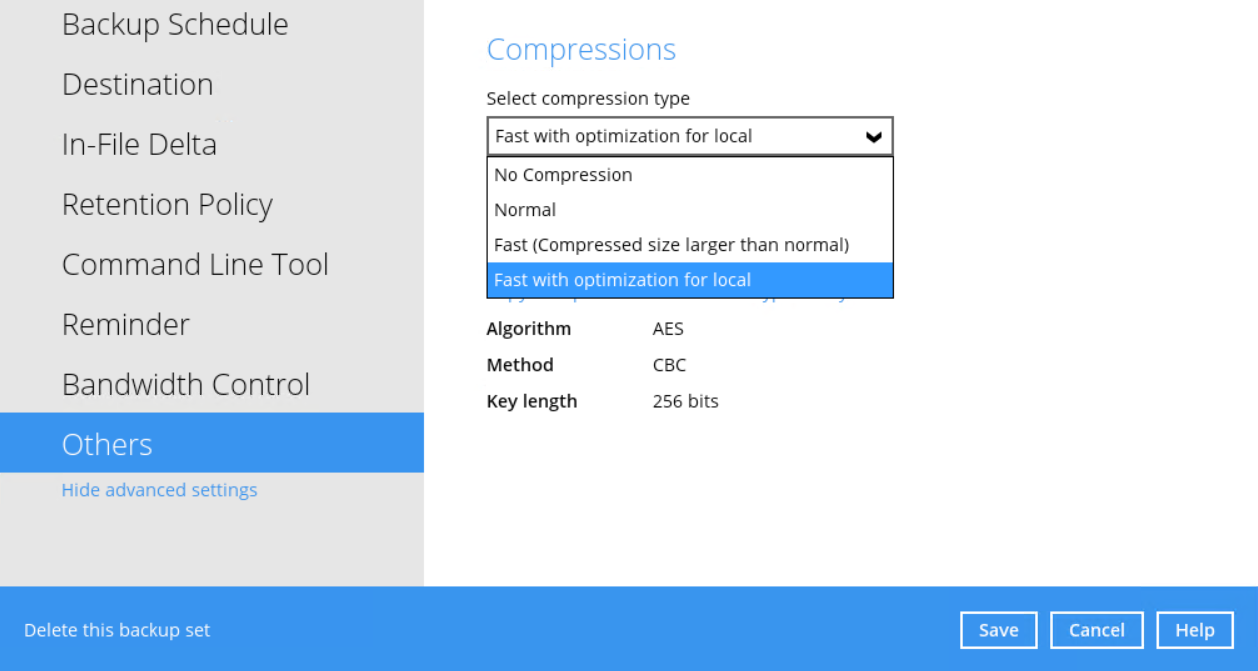
12. Optional: Select your preferred Compression type. By default, the compression is Fast with optimization for local.
Go to Others > Compressions. Select from the following list:
- No Compression
- Normal
- Fast (Compressed size larger than normal)
- Fast with optimization for local
